Introduction
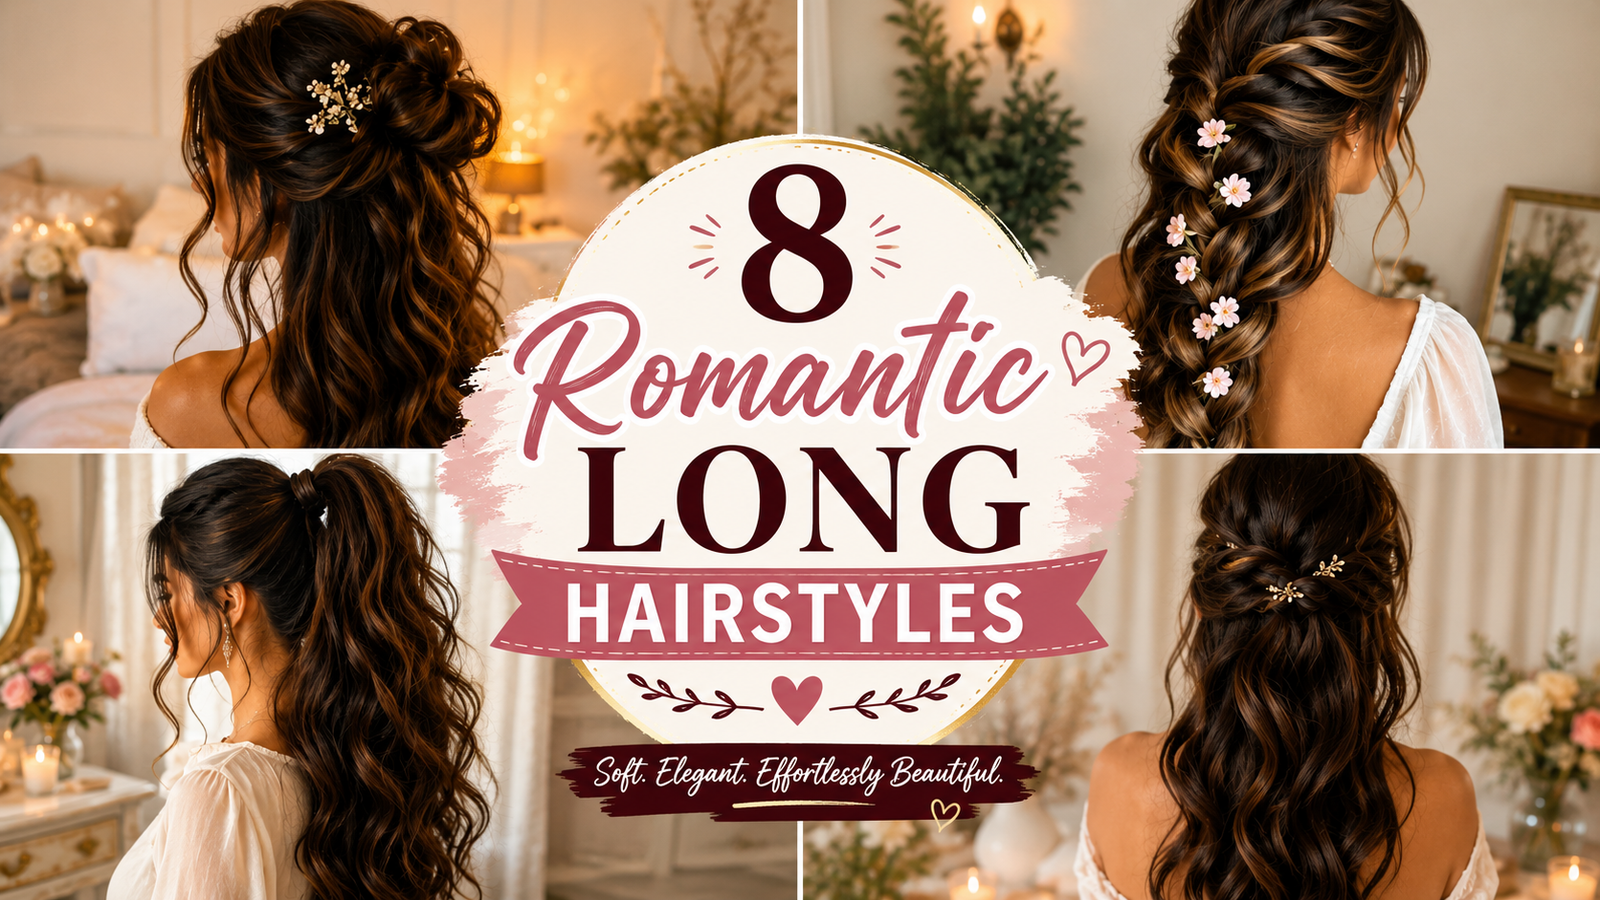
There is something timeless, enchanting, and undeniably feminine about romantic long hairstyles. Whether you are preparing for a candlelit date night, a dreamy outdoor wedding, a vintage photo shoot, or simply want to elevate your everyday look, long hair offers an endless canvas for soft waves, intricate braids, and effortless updos.
The beauty of a romantic hairstyle lies in its soft texture and dimensional movement. Unlike rigid, hyper-structured hair trends of the past, today’s romantic aesthetic prioritizes gentle volume, flowing tendrils, and touchable softness. From cascading bohemian braids wrapped in delicate ribbons to loose, voluminous Hollywood waves, these hairstyles look high-end without requiring hours in a professional salon chair.
In this ultimate guide, we are sharing 8 stunning, step-by-step romantic long hairstyles that you can easily recreate at home. Each tutorial includes complete tool lists, beginner-friendly instructions, styling tricks, color recommendations, and Pinterest-worthy photo inspiration. Whether your hair is straight, wavy, or curly, these gorgeous styles will help you feel like the heroine of your own story. Grab your curling iron, gather your favorite hair accessories, and let’s dive into these dreamy hair ideas!
Why This Trend Is Popular
Romantic long hairstyles continue to dominate Pinterest boards, TikTok feeds, and red carpets for several key reasons:
- Versatility Across Events: These styles seamlessly transition from casual brunch dates to black-tie weddings and holiday parties.
- Effortless Elegance: Soft curls, face-framing tendrils, and tousled braids give off an inviting, “effortlessly beautiful” vibe rather than a stiff, over-styled look.
- Accessory Friendly: Romantic styles provide the perfect foundation for pearl pins, velvet ribbons, fresh flowers, and vintage hair combs.
- Photogenic Appeal: Soft textures catch natural light beautifully, making these looks a favorite for engagement photos, portraits, and social media content.
Materials and Tools Needed
To achieve long-lasting, salon-quality romantic hairstyles at home, keep these key styling tools and products on hand:
- Curling Iron or Wand: A 1-inch to 1.25-inch barrel is ideal for creating soft, bouncy romantic waves.
- Heat Protectant Spray: Essential for shielding long tresses from thermal damage.
- Texturizing Spray & Volumizing Powder: Adds grip, lift, and airy dimension to braids and updos.
- Clear Micro Elastic Bands: Perfect for securing delicate braids and half-up styles without bulk.
- Bobby Pins & Hairpins: Matches your hair color to securely anchor twists and buns.
- Fine-Tooth Tail Comb & Boar Bristle Brush: For clean sectioning and smoothing flyaways.
- Light-to-Medium Hold Hairspray: Keeps curls in place while allowing natural movement.
- Hair Accessories: Silk ribbons, pearl clips, floral pins, or velvet bows.
Safety Tips for Heat Styling
- Always Use Heat Protection: Apply a heat protectant spray evenly on dry or damp hair before using any hot tools.
- Adjust Temperature Settings: Set hot tools below 350°F (175°C) for fine or color-treated hair, and up to 380°F (193°C) for thicker textures.
- Never Clamp Wet Hair: Ensure hair is 100% dry before applying curling irons or straighteners to prevent steam damage.
- Protect Your Skin: Use a heat-resistant glove when using clipless curling wands to prevent accidental finger burns.
8 Detailed Romantic Long Hairstyles
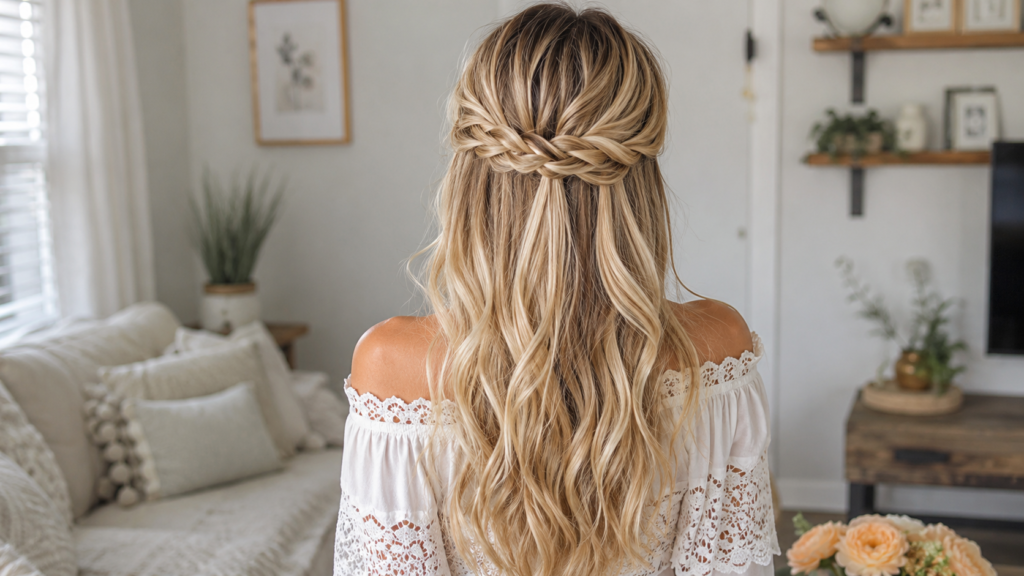
1. Soft Bohemian Half-Up Crown Braid
An iconic choice for dreamy outdoor events, the soft bohemian half-up crown braid combines loose, effortless waves with a woven halo effect that highlights your facial features.
Why You’ll Love This Idea
It keeps hair off your face while showcasing your length. The face-framing tendrils create a glowing, romantic frame, while the braided crown adds texture from every angle.
Materials Needed
- 1.25-inch curling iron
- Texturizing sea salt spray
- 2 clear elastic bands
- 4–6 bobby pins matching your hair color
- Light hairspray
Step-by-Step Instructions
- Prep the Hair: Apply heat protectant spray and curl your entire head using a 1.25-inch curling iron, curling away from the face.
- Add Texture: Mist texturizing spray through the lengths and gently rake through curls with your fingers to create soft waves.
- Section the Front: Leave out two thin, soft tendrils around your face to frame your features.
- Begin the First Braid: Take a 2-inch section of hair from above your left ear and create a standard three-strand braid or French braid heading toward the back of your head.
- Pancake the Braid: Gently pull at the outer edges of the braid loops to widen it and create a fuller, romantic texture. Secure the end with a clear elastic.
- Repeat on the Right Side: Create an identical pancaked braid using a 2-inch section from above your right ear.
- Cross and Anchor: Bring both braids together at the back of your head, overlapping them to form a continuous crown. Tuck the ends underneath each other.
- Pin in Place: Secure the braids with bobby pins inserted horizontally into the braid structure.
- Final Polish: Lightly mist with medium-hold hairspray to lock in shape while maintaining natural movement.
Beginner Tips
- If your hair is clean and slippery, spray the braid sections with dry shampoo or texture powder before braiding to give your fingers better grip.
Common Mistakes to Avoid
- Pulling the braids too tight across the head. Keep them loose and airy for an authentic bohemian feel.
Styling Ideas
- Pair this style with a floral maxi dress, delicate drop earrings, or a vintage lace top.
Best Colors and Hair Types
- Best Hair Colors: Balayage, dimensional blonde, warm chestnut, or highlighted hair where braid details pop.
- Best Hair Types: Medium to long hair with straight, wavy, or relaxed curl patterns.
Estimated Details
- Estimated Cost: $0 – $15 (using basic tools at home)
- Estimated Time: 20–25 minutes
- Difficulty Level: Beginner to Intermediate
- Where It Looks Best: Garden weddings, bridal showers, outdoor photo shoots, and spring date nights.
Pinterest-Worthy Tip: Tuck small sprigs of fresh baby’s breath or miniature dried flowers directly into the weave of the braid before snapping your photos!
Conclusion
This half-up crown braid strikes the ultimate balance between whimsical charm and polished elegance, making it an absolute staple for long-haired beauty lovers.
2. Classic Hollywood Glamour Waves
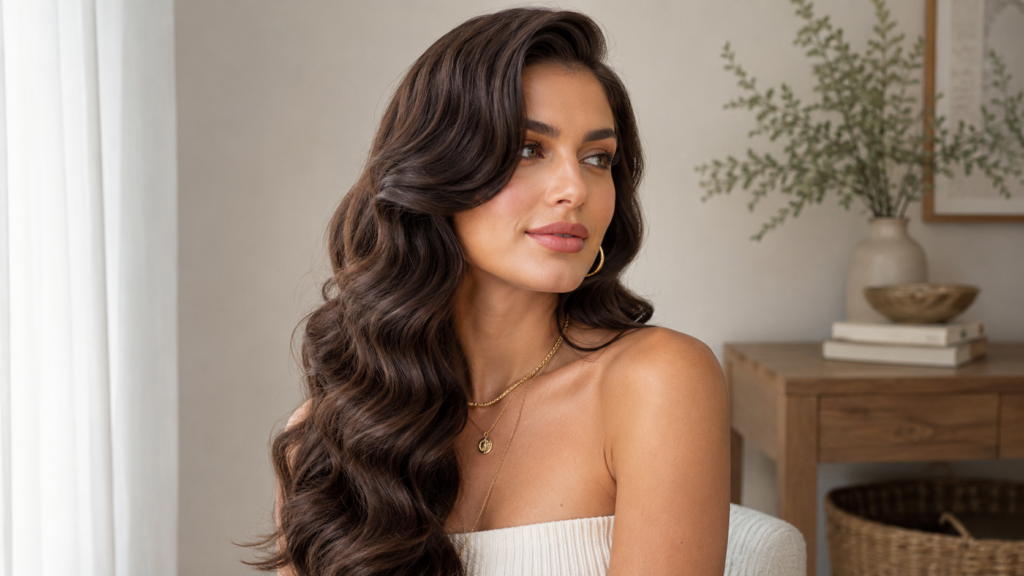
Hollywood waves offer old-school romance with smooth, liquid shine and uniform curves that cascade over one shoulder.
Why You’ll Love This Idea
This look exudes red-carpet luxury, vintage elegance, and high-shine drama that instantly elevates any formal attire.
Materials Needed
- 1-inch curling iron
- Boar bristle paddle brush
- Crease-free setting clips (4–6)
- Shine spray or light hair oil
- Strong-hold flexible hairspray
Step-by-Step Instructions
- Create a Deep Side Part: Use a tail comb to align your side part with the arch of your eyebrow.
- Apply Heat Shield: Spray heat protectant thoroughly from roots to ends.
- Curl in One Direction: Starting on one side, take 1-inch horizontal sections and curl all hair in the exact same direction toward your face.
- Pin Curls to Cool: As you release each curl from the iron, roll it back up and secure it to your scalp with a crease-free clip.
- Complete the Head: Repeat this identical curling and pinning process across the entire head.
- Cool Down: Allow all pinned curls to cool completely for 10–15 minutes.
- The Magic Brush-Out: Remove all clips. Gently brush through the curls using a boar bristle paddle brush. Watch as individual curls merge into a seamless wave pattern.
- Define the Wave S-Curve: Place setting clips into the indents of the waves along the front section to accentuate the “S” shape.
- Set with Spray: Mist generously with hairspray, let sit for 3 minutes, then remove clips and finish with a dusting of shine spray.
Beginner Tips
- Uniformity is key! Curling every single section in the exact same direction is what causes the waves to merge into one fluid pattern when brushed.
Common Mistakes to Avoid
- Brushing out the hair while it is still warm, which will cause the waves to lose their structure and drop flat.
Styling Ideas
- Pair with a silk slip dress, red lipstick, and pearl jewelry for timeless vintage glamour.
Best Colors and Hair Types
- Best Hair Colors: Deep brunette, rich auburn, jet black, or glossy warm caramel tones.
- Best Hair Types: Naturally thick or medium-density long hair that holds a curl well.
Estimated Details
- Estimated Cost: $10 – $25 (for specialty shine spray and setting clips)
- Estimated Time: 35–45 minutes
- Difficulty Level: Intermediate
- Where It Looks Best: Evening galas, formal weddings, anniversary dinners, and winter holiday parties.
Pinterest-Worthy Tip: Sweep all the waves over the shoulder opposite your deep part and secure the back underneath with a hidden rhinestone comb!
Conclusion
Hollywood waves deliver unmatched drama and sophisticated romance, making them the gold standard for black-tie elegance.
3. Low Romantic Messy Chignon with Velvet Ribbon
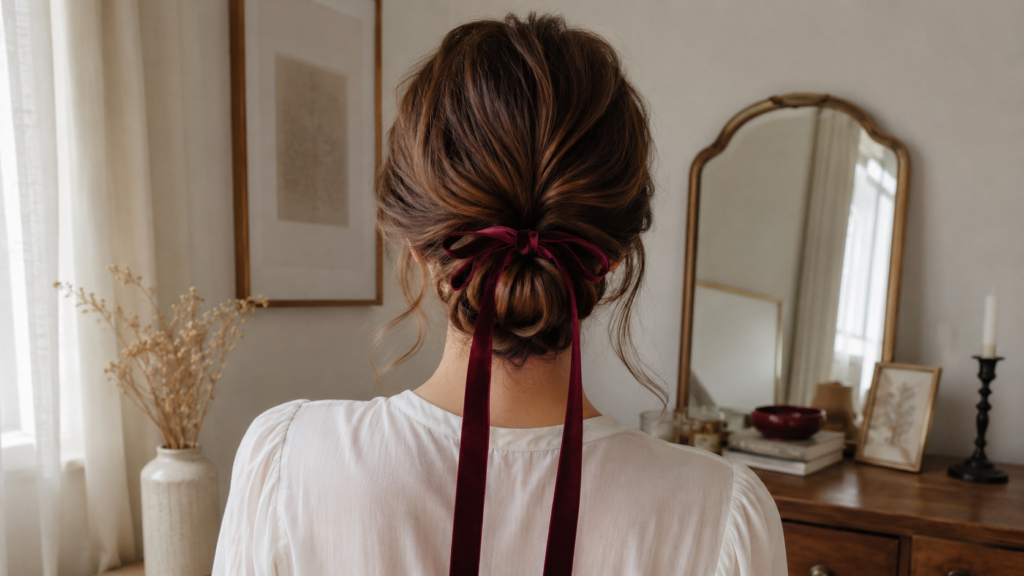
A low, tousled chignon wrapped in a rich velvet bow delivers French-girl chic with romantic, effortless appeal.
Why You’ll Love This Idea
It looks polished and sophisticated yet takes under 15 minutes. It works beautifully on second-day hair and accommodates hair of varying thicknesses.
Materials Needed
- Texturizing dry shampoo
- Hair elastic
- Bobby pins and spin pins
- 1-inch velvet ribbon (1 yard)
- Curling iron (for tendrils)
Step-by-Step Instructions
- Prep Texture: Spray dry shampoo through the roots and mid-lengths to build volume and grip.
- Leave Tendrils Free: Pull out soft curtain bangs or side strands around the temples and ears.
- Gather Low Ponytail: Gather hair loosely at the nape of the neck into a low ponytail and secure with an elastic.
- Create a Pocket: On the last loop of your elastic, leave the hair in a half-loop bun with the ends sticking out bottom-wise.
- Wrap and Twist: Wrap the remaining tail ends around the base of the elastic to hide it.
- Anchor with Pins: Tuck the bun into a soft shape and insert bobby pins diagonally to lock the chignon in place.
- Pancake for Volume: Gently tug at the top crown hair and side sections to add airy volume and loose texture.
- Add Velvet Ribbon: Tie a silk or velvet ribbon around the base of the chignon, letting long tails cascade down your back.
- Style Tendrils: Curl the face-framing strands outward away from your face for a soft finish.
Beginner Tips
- Spin pins (spiral bobby pins) hold heavy chignons twice as securely as standard flat bobby pins with half the effort!
Common Mistakes to Avoid
- Over-smoothing the hair. Small flyaways and piecey texture are what give this chignon its romantic, effortless vibe.
Styling Ideas
- Ideal when paired with high-neck sweaters, backless dresses, or cozy autumn coats.
Best Colors and Hair Types
- Best Hair Colors: Dimensional brunette, dark chocolate, soft black, or ash blonde.
- Best Hair Types: All hair types (straight, wavy, curly, or coily).
Estimated Details
- Estimated Cost: $5 – $10 (for ribbon and pins)
- Estimated Time: 10–15 minutes
- Difficulty Level: Easy / Beginner
- Where It Looks Best: Cozy coffee dates, autumn walks, holiday dinners, and art gallery openings.
Pinterest-Worthy Tip: Choose a velvet ribbon in forest green, burgundy, or dusty rose to contrast strikingly against your hair tone.
Conclusion
This low chignon proves that simple, quick styling can look effortlessly luxurious when accented with the right accessory.
4. Cascading Bubble Braid with Pearl Accents
A modern twist on traditional braids, the cascading bubble braid features soft, rounded volume sections embellished with delicate pearl pins.
Why You’ll Love This Idea
It offers the visual intrigue of a intricate braid while being surprisingly easy to pull off—no complex weaving skills required!
Materials Needed
- 5–8 clear micro elastic bands
- Pearl hair pins or clips
- Volumizing texturizing powder
- Light-hold hairspray
- Curling iron (optional)
Step-by-Step Instructions
- Prep Curls or Waves: Lightly wave hair if starting with stick-straight texture.
- First Half-Up Section: Gather the top crown section of hair into a neat pony at the upper back of the head and secure with a clear band.
- Puff the First Bubble: Gently tug outward on all sides of the pony section above the elastic to create a rounded “bubble.”
- Add Second Elastic: Gather hair from the side temples along with the first pony tail, secure 2–3 inches lower with a second clear elastic.
- Pancake Second Section: Pull outward on the hair between the first and second elastics to form your second volumetric bubble.
- Continue Down: Repeat this process down the length of your hair until reaching the ends.
- Fluff Everything: Work from top to bottom, fluffing each bubble section to make them uniform and dramatic in size.
- Insert Pearl Accessories: Push small pearl hairpins directly into the center of each elastic band to hide the clear ties.
- Set: Spray lightly with hairspray for all-day hold.
Beginner Tips
- Apply a small dusting of volumizing powder directly onto each bubble section before pulling it apart—this prevents hair from slipping flat.
Common Mistakes to Avoid
- Space elastics unevenly. Try to maintain a consistent 2-to-3-inch distance between each bubble band.
Styling Ideas
- Complements off-the-shoulder tops, sweetheart neckline gowns, or romantic summer dresses.
Best Colors and Hair Types
- Best Hair Colors: Bright blonde, silver/platinum, pastel tones, or highlighted hair.
- Best Hair Types: Medium-to-thick long hair or hair with clip-in extensions.
Estimated Details
- Estimated Cost: $8 – $15 (for elastics and pearl pins)
- Estimated Time: 15–20 minutes
- Difficulty Level: Easy / Beginner
- Where It Looks Best: Music festivals, birthday parties, bridal showers, and summer photo shoots.
Pinterest-Worthy Tip: Angle your photos from a 45-degree side view to capture both the dimensional depth of the bubbles and the pearl accents!
Conclusion
Fun, playful, and undeniably chic, the bubble braid is a high-impact style that requires minimal technique for maximum visual reward.
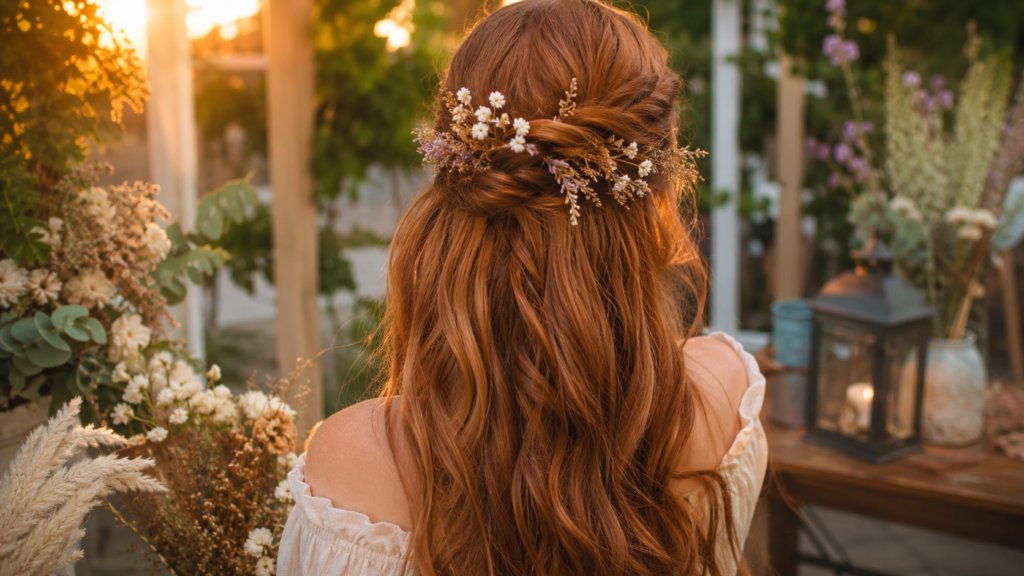
5. Romantic Half-Up Twist with Dried Floral Pins
Inspired by fairytale aesthetics, this hairstyle features two soft rope twists pinned back with delicate dried botanicals.
Why You’ll Love This Idea
It combines organic, earthy elements with soft romantic styling, making it ideal for nature-loving boho souls.
Materials Needed
- 1-inch curling iron or wand
- 2 clear elastic bands
- 4 bobby pins
- Dried flower hair pins (babys breath, small roses, lavender)
- Flexible hold spray
Step-by-Step Instructions
- Wave the Hair: Create soft, piecey beach waves throughout your hair using a curling wand.
- Top Volume: Lightly backcomb the hair at the crown for a subtle vertical lift.
- Left Rope Twist: Take a 2-inch section from the front left side, split it into two strands, and twist them around each other to form a rope twist.
- Pancake the Twist: Pull gently at the edges of the twist to soften its appearance.
- Right Rope Twist: Repeat the identical process with a 2-inch section on the front right side.
- Join at Back: Pull both twists to the middle back of your head and overlap them tightly.
- Pin In Place: Slide bobby pins horizontally into the overlap to anchor the twists without showing visible hardware.
- Add Botanicals: Slide dried floral pins into the top seam of the joined twists.
- Final Mist: Lock in the look with a gentle veil of hairspray.
Beginner Tips
- Twist both sections away from your face (clockwise on the right, counter-clockwise on the left) for the cleanest silhouette.
Common Mistakes to Avoid
- Using heavy, freshly picked flowers that wilt quickly under ambient warmth. Stick to sturdy dried floral pins or silk floral replicas.
Styling Ideas
- Style with linen dresses, cottagecore aprons, or casual countryside outfits.
Best Colors and Hair Types
- Best Hair Colors: Warm honey blonde, copper red, strawberry blonde, or soft golden brown.
- Best Hair Types: Naturally wavy, fine-to-medium long hair.
Estimated Details
- Estimated Cost: $10 – $20 (for dried floral pins)
- Estimated Time: 15 minutes
- Difficulty Level: Easy
- Where It Looks Best: Countryside picnics, rustic barn weddings, spring festivals, and botanical garden visits.
Pinterest-Worthy Tip: Shoot this look outdoors during Golden Hour (1 hour before sunset) to let the warm sunlight illuminate the dried flowers and soft hair waves!
Conclusion
This floral half-up twist brings fairytale romance to life with minimal effort and charming botanical touches.
6. Volumized Romantic Ponytail with Face-Framing Waves
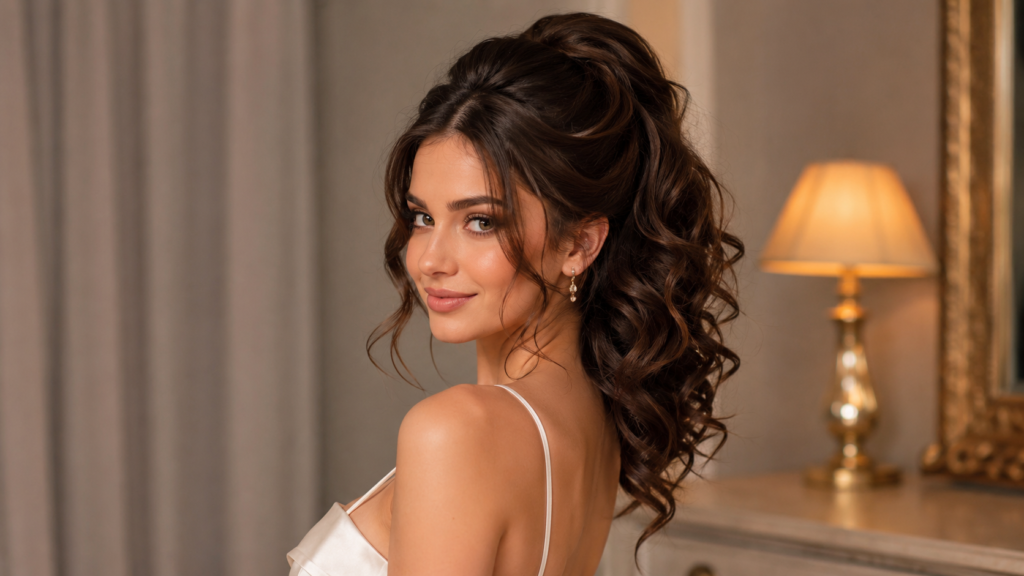
Elevate the basic ponytail into a voluminous, glamorous style full of bouncy movement and face-framing curls.
Why You’ll Love This Idea
It offers the lift and sleekness of an updo combined with the playful bounce of long cascading waves.
Materials Needed
- Large barrel curling iron (1.5 inch)
- Strong hair elastic & hair bungee
- Volumizing powder or texturizing spray
- Teasing comb
- Bobby pins
Step-by-Step Instructions
- Curling: Curl all hair using a 1.5-inch iron for wide, bouncy waves.
- Section Front Tendrils: Separate 1-inch sections on both sides of your face to leave out.
- Crown Teasing: Tease the underside of the crown section to create a soft cushion of volume.
- Secure High-Mid Ponytail: Gather hair at mid-crown height and secure firmly with a hair bungee or strong elastic.
- Hide the Elastic: Take a thin strand of hair from underneath the ponytail, wrap it tightly around the elastic, and pin it securely underneath with a bobby pin.
- Prop Up the Pony: Insert two bobby pins vertically downward into the elastic base inside the ponytail to keep the tail lifted all day.
- Fluff for Volume: Apply volumizing powder to the ponytail base and gently tease sections from behind to create maximum fullness.
- Style Face Framing Strands: Re-curl the front tendrils so they curve softly toward your jawline.
- Set: Finish with a generous mist of firm-hold hairspray.
Beginner Tips
- The hidden vertical bobby pin trick under the ponytail elastic prevents the pony from sagging under its own weight over time!
Common Mistakes to Avoid
- Placing the ponytail too low on the head, which can flatten the crown profile.
Styling Ideas
- Looks stunning with statement earrings, power blazers, or strapless evening gowns.
Best Colors and Hair Types
- Best Hair Colors: Highlights, ombre, dimensional warm brown, or platinum.
- Best Hair Types: Thick, dense long hair or hair paired with ponytail extensions.
Estimated Details
- Estimated Cost: $5 – $12
- Estimated Time: 20 minutes
- Difficulty Level: Easy to Intermediate
- Where It Looks Best: Cocktail parties, date nights, red-carpet events, and birthdays.
Pinterest-Worthy Tip: Tilt your head slightly to the side when posing to showcase both the crown height and the cascading tail length in a single shot!
Conclusion
Sleek yet playful, the volumized romantic ponytail is the ultimate confidence-boosting hairstyle for night-out glam.
7. Bohemian Side-Swept Dutch Braid
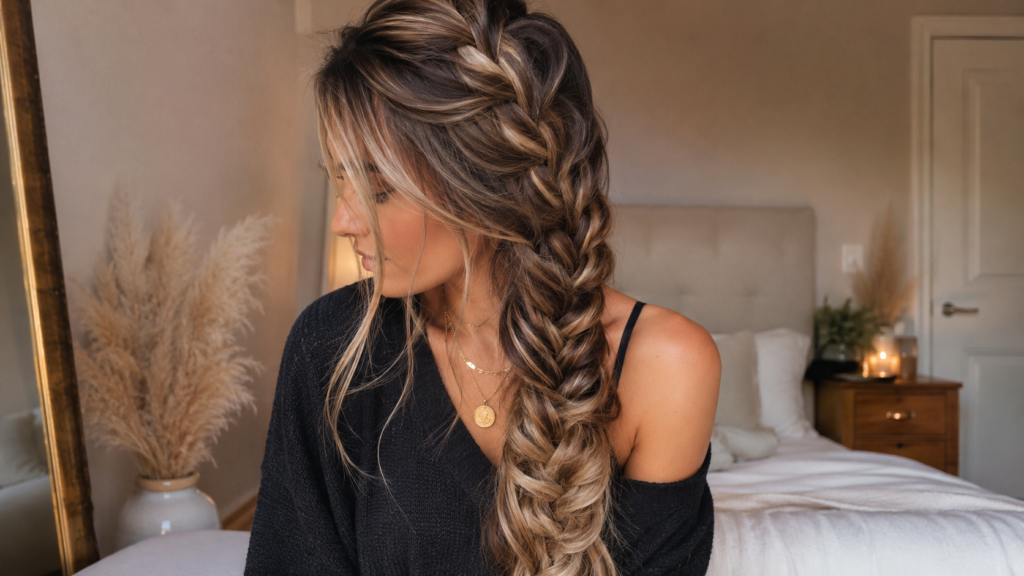
A dramatic, thick side-swept Dutch braid that drapes gracefully over one shoulder for an effortless bohemian goddess aesthetic.
Why You’ll Love This Idea
It is intricate, eye-catching, keeps long hair neat on windy days, and looks exceptionally thick when pancaked correctly.
Materials Needed
- Texturizing spray or dry shampoo
- Clear elastic band
- Decorative hair pins or clip (optional)
- Flexible hairspray
Step-by-Step Instructions
- Side Parting: Create a deep side part to direct hair toward your preferred shoulder.
- Prep Texture: Spray texturizing mist thoroughly to prevent slippery strands.
- Start Dutch Braid: Take a 3-inch section near your part line. Split into 3 strands. Unlike French braiding, cross side strands underneath the middle strand.
- Incorporate Hair: As you work down along your hairline, add hair from the scalp into each strand before crossing underneath.
- Curve Along Neck: Direct the braid diagonally around the nape of the neck toward your opposite shoulder.
- Braid Down Length: Continue three-strand under-braid down the remaining length and secure ends with a clear elastic.
- Pancake for Drama: Starting from the top, pull outward on the outer loops of each braid link to double the braid’s apparent size.
- Release Wisps: Gently pull out soft wispy strands around the ears and neck.
- Lock In: Set with a thorough dusting of flexible hairspray.
Beginner Tips
- A Dutch braid is simply an “inside-out” French braid. Remind yourself to cross under, not over!
Common Mistakes to Avoid
- Pulling too tight while braiding. Maintain relaxed tension so pancaking is easy and doesn’t break strands.
Styling Ideas
- Complements boho blouses, cozy knitted shawls, or shoulder-baring summer outfits.
Best Colors and Hair Types
- Best Hair Colors: Multi-tonal hair, balayage, highlighted blonde, or chocolate brown with caramel babylights.
- Best Hair Types: Long, heavy hair or hair with layered length.
Estimated Details
- Estimated Cost: $0 – $10
- Estimated Time: 15–20 minutes
- Difficulty Level: Intermediate
- Where It Looks Best: Beach trips, autumn trail walks, rustic weddings, and casual weekend brunch.
Pinterest-Worthy Tip: Weave a thin metallic cord or velvet string through the braid links for an extra pop of texture!
Conclusion
The side-swept Dutch braid turns long hair into a dramatic wearable work of art that feels as comfortable as it is striking.
8. Romantic Soft Low Space Buns with Loose Tendrils
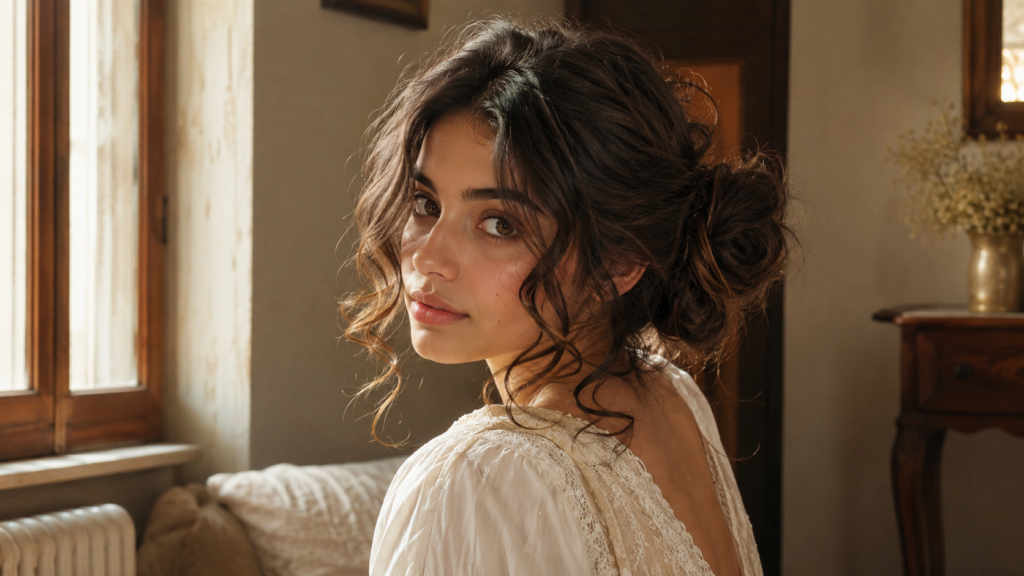
A playful yet undeniably romantic option, twin low space buns wrapped softly at the nape of the neck offer whimsical charm.
Why You’ll Love This Idea
It combines youthful fun with soft, romantic touchability, making it an ideal choice for playful date days and creative photo shoots.
Materials Needed
- 2 clear hair elastics
- 8–10 bobby pins
- 1-inch curling iron
- Light texturizing spray
Step-by-Step Instructions
- Center Part: Part your hair cleanly down the center back into two equal sections using a fine-tooth comb.
- Leave Front Strands: Pull out generous face-framing tendrils near your temples and jawline.
- Low Pigtails: Secure each side into a low, loose pigtail right behind each ear lobe.
- Twist and Wrap: Gently twist one pigtail length and wrap it loosely around its base to form a soft bun shape.
- Pin and Fluff: Anchor with bobby pins, then gently tug at loops of the bun to make it soft and voluminous.
- Repeat Opposite Side: Twist, wrap, pin, and fluff the second pigtail identically.
- Curl Tendrils: Use a curling iron to add soft S-waves to the front tendrils framing your face.
- Final Adjustments: Pull lightly on the crown hair to eliminate rigid scalp tension.
- Spray: Set with a light misting of flexible hairspray.
Beginner Tips
- Don’t worry about symmetry! Slightly uneven, tousled space buns actually enhance the soft, effortless aesthetic.
Common Mistakes to Avoid
- Wrapping the buns too tight, which can make them look small and stiff rather than soft and romantic.
Styling Ideas
- Pair with floral dresses, denim jackets, or sweet summer loungewear.
Best Colors and Hair Types
- Best Hair Colors: Pastel tones, bright blonde, dark espresso, or red hair.
- Best Hair Types: Medium to long hair of any texture.
Estimated Details
- Estimated Cost: $0 – $5
- Estimated Time: 10–15 minutes
- Difficulty Level: Easy
- Where It Looks Best: Picnic dates, summer concerts, casual vlogging, and fun weekend outings.
Pinterest-Worthy Tip: Add two small decorative butterfly clips or flower pins right above each bun base for a nostalgic aesthetic!
Conclusion
Romantic low space buns deliver a playful, youthful take on traditional updos while maintaining an effortless, soft look.
Quick Comparison Summary
| Hairstyle Idea | Difficulty Level | Estimated Time | Best Occasion | Key Accessory |
| 1. Soft Boho Crown Braid | Intermediate | 20–25 mins | Garden Wedding / Photoshoot | Baby’s Breath / Floral Pins |
| 2. Hollywood Glamour Waves | Intermediate | 35–45 mins | Formal Evening / Gala | Crease-Free Clips / Hair Comb |
| 3. Low Messy Chignon | Easy / Beginner | 10–15 mins | Coffee Date / Cozy Autumn | Velvet or Silk Ribbon |
| 4. Cascading Bubble Braid | Easy / Beginner | 15–20 mins | Festival / Bridal Shower | Pearl Hair Pins |
| 5. Half-Up Floral Twist | Easy | 15 mins | Rustic Wedding / Picnic | Dried Flower Pins |
| 6. Volumized Ponytail | Easy / Intermediate | 20 mins | Cocktail Party / Birthday | Statement Earrings / Bungee |
| 7. Side-Swept Dutch Braid | Intermediate | 15–20 mins | Outdoor Walk / Brunch | Clear Elastics / Metallic Cord |
| 8. Soft Low Space Buns | Easy | 10–15 mins | Picnic / Weekend Outing | Mini Butterfly / Flower Clips |
Expert Styling & Care Tips for Long Hair
- Prep Hair the Night Before: Many romantic updos and braids hold significantly better on “second-day hair.” If your hair is freshly washed, build texture using dry shampoo or texturizing sea salt spray.
- Curl Away From the Face: When curling face-framing strands, rotate the wand away from your features. This opens up your face and lifts your profile visually.
- Pancake Every Braid: Always take 15 seconds to gently pull apart braid loops (“pancaking”). This instantly doubles the visual volume of your hairstyle on camera.
- Invisibly Anchor Pins: Cross two bobby pins in an “X” shape when securing sections. The locking mechanism keeps thick hair anchored firmly all day.
- Hydrate Your Ends: Long hair requires moisture to keep ends looking healthy and plush in photos. Work 2 drops of lightweight hair oil into your ends before styling.
Budget-Saving Tips for Salon-Quality Looks
- DIY Hair Accessories: Instead of buying expensive boutique hair bows, purchase high-quality velvet or silk ribbons by the yard at your local craft store for a fraction of the price.
- Use Extension Clips for Volume: If your natural hair is thin, invest in a simple 3-piece set of clip-in human hair extensions to instantly boost braid density without paying for professional installations.
- Multi-Purpose Products: A good texturizing spray can double as a dry shampoo and medium-hold finishing spray, saving shelf space and money.
- Repurpose Jewelry: Have an old pearl necklace or crystal brooch? Wire it onto a bobby pin to create custom, luxury-looking hair jewelry for free!
Frequently Asked Questions (FAQs)
1. How do I make romantic waves stay in straight, long hair all day?
Start by applying a lightweight mousse to damp hair before blow-drying. Always use a heat protectant spray with holding polymers. After curling each section, pin the curl to your head while it cools completely. Set with a medium-hold hairspray before brushing out.
2. Can I achieve these romantic hairstyles with fine or thin hair?
Absolutely! Use volumizing root powders, texturizing sprays, and clip-in extensions to build foundation thickness. Techniques like “pancaking” braids will also create the illusion of thick, full hair.
3. What curling barrel size is best for romantic waves?
A 1.25-inch (32mm) barrel is the most versatile size for long hair. It produces big, soft waves that look natural rather than tight ringlets.
4. How can I hide clear elastic bands in my braids and updos?
Wrap a small 1/4-inch section of hair directly over the elastic band, tuck the end through the band underneath, or anchor it with a hidden bobby pin. Alternatively, cover elastics with decorative pearl pins or ribbons.
5. Are these long hairstyles suitable for weddings and bridesmaids?
Yes! In fact, the Soft Boho Crown Braid, Hollywood Waves, and Low Messy Chignon are among the top requested bridal and bridesmaid hairstyles worldwide.
6. How do I avoid frizzy flyaways without making my hair look stiff?
Avoid heavy gels or wet hairsprays. Instead, smooth flyaways using a clean spoolie brush lightly misted with flexible hairspray, or apply a drop of finishing serum.
7. How long does hair need to be to create a cascading bubble braid?
Hair should ideally fall past your collarbones (at least 14–16 inches in length). If your hair is shorter, clip-in ponytail extensions work amazingly well!
8. What is the difference between French and Dutch braids?
In a French braid, strands are crossed over the center strand, embedding the braid inward. In a Dutch braid, strands are crossed under the center strand, popping the braid outward for 3D volume.
Final Thoughts
Achieving a dreamy, romantic long hairstyle does not require daily salon visits or hours in front of a vanity mirror. With the right techniques—like curling away from the face, pancake-expanding your braids, preppping with texturizing powder, and adding thoughtful accessories like ribbons or pearls—you can transform your long hair into an effortlessly stunning crown.
Try out a few of these styles at home, experiment with different accessories, and discover which look makes you feel the most radiant!
Save This Inspiration to Pinterest!
Loved these romantic long hairstyle ideas? Pin this guide to your favorite Pinterest Hair Inspiration Board so you have these step-by-step tutorials ready for your next date night, wedding, or special occasion!
(Click the Pinterest Save button on any image above to keep these ideas at your fingertips!)