Introduction
If you love bold, fun, and confident hair, you have probably searched for Karol G hairstyles more than once. The Colombian superstar is known for her music, her energy, and her ever-changing hair looks. One month she is rocking long, wavy curls that bounce with every dance move. The next month she surprises everyone with a chic short bob. She is not afraid to try new things, and that is exactly why so many people love her style.
This article is made for anyone who wants Karol G inspired hairstyles they can actually try at home. You do not need a professional stylist or a fancy salon budget. You just need a little time, the right tools, and some confidence. Whether your hair is short, long, curly, straight, or somewhere in between, there is an idea here for you.
We are going to cover eight detailed hairstyle ideas. Some are perfect for a night out or a concert. Others work great for everyday wear or a special event like a wedding or prom. Each idea includes step-by-step instructions, tips for beginners, common mistakes to avoid, and even a Pinterest-worthy styling tip so your photos look amazing.
Pinterest is full of hair inspiration, but it can be hard to find a guide that actually explains how to get the look, not just what it looks like. That is where this guide comes in. We are keeping things simple, friendly, and easy to follow, so even if you have never styled your own hair before, you can still get results you will love.
So grab your hairbrush, your favorite styling tools, and get ready to feel like a Bichota. Let’s dive into the best Karol G hairstyles for short hair, long hair, and gorgeous updos.
Why This Trend Is Popular
Karol G hairstyles have become a huge trend on Pinterest, TikTok, and Instagram, and it is easy to see why. Here are the main reasons people keep searching for this look:
- She changes her hair often. This gives fans tons of different looks to choose from, not just one style.
- Her hair looks bold but wearable. Many of her styles can be dressed up or down for everyday life.
- She embraces color and texture. From pink hair to natural curls, she shows that hair can be fun and expressive.
- Her looks fit many hair types. There are ideas here for straight, wavy, and curly hair.
- Concert and festival culture is booming. People want hairstyles that feel confident and camera-ready.
- It fits many occasions. These looks work for concerts, parties, dates, proms, and even weddings.
This trend is popular because it is not about copying one exact hairstyle. It is about borrowing her confidence and energy and making the style your own.
Materials and Tools Needed
Before you start any of the hairstyles below, it helps to have a basic hair styling kit ready. Here is what you may need across these looks:
| Tool | Purpose |
|---|---|
| Curling iron or wand | Creates waves and curls |
| Flat iron | Smooths hair or creates sleek styles |
| Round brush + blow dryer | Adds volume and shine |
| Bobby pins | Holds updos and braids in place |
| Hair ties (clear and colored) | Secures ponytails and buns |
| Rat-tail comb | Creates clean parts and sections |
| Texturizing spray | Adds grip for braids and buns |
| Heat protectant spray | Protects hair from heat damage |
| Hairspray (light and strong hold) | Locks in your final style |
| Shine serum or hair oil | Adds gloss and tames frizz |
| Hair clips or claw clips | Section hair while styling |
| Rhinestones or hair jewelry (optional) | Adds a festival or glam touch |
You do not need every item for every style. Each idea below will tell you exactly what you need.
Safety Tips
Since many of these looks use heat tools, please keep these safety tips in mind:
- Always use a heat protectant spray before curling or straightening your hair.
- Never use heat tools on wet hair. This can cause serious damage.
- Keep heat tools between 300°F and 380°F for most hair types. Fine or damaged hair should use lower heat.
- Do not hold a curling iron on one section for too long. A few seconds is usually enough.
- Let hairspray dry before touching your style, so it does not become sticky or flat.
- Take breaks between heat styling days to keep your hair healthy.
- If your scalp feels sore from tight buns or braids, loosen the style right away.
Now let’s get into the fun part: the eight hairstyle ideas!
1. Long Beachy Waves with a Middle Part
Short Introduction
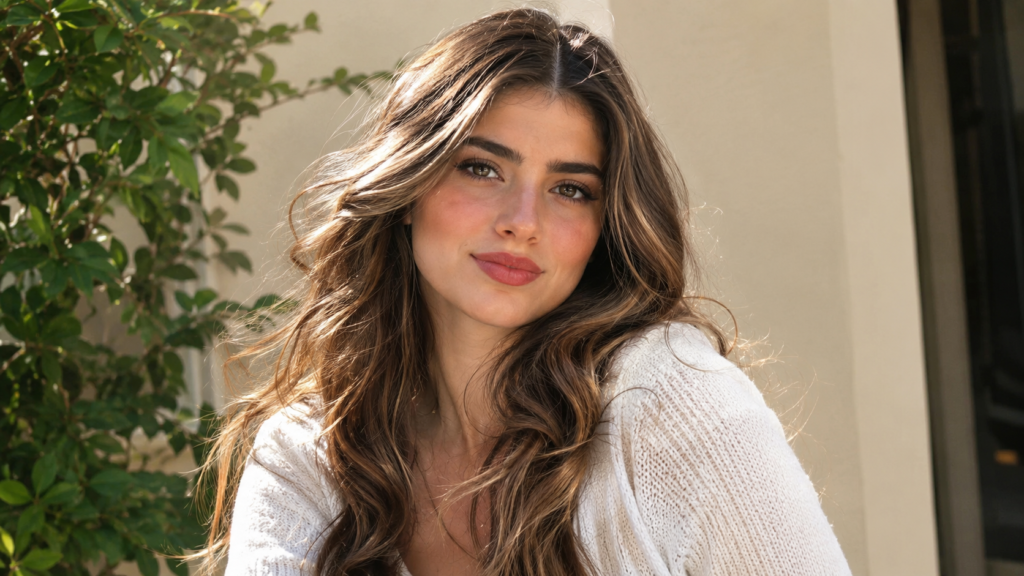
This is one of the most iconic Karol G hairstyles. Long, loose waves with a deep middle part give off effortless glam energy. It looks amazing whether you are heading to a concert or just want to feel confident on a regular day.
Why You’ll Love This Idea
This style is romantic, bouncy, and full of movement. It frames your face beautifully and works for almost every face shape. It also photographs incredibly well, which makes it a favorite for Pinterest boards.
Materials Needed
- Curling wand (1 to 1.5 inch barrel)
- Heat protectant spray
- Texturizing sea salt spray
- Light hold hairspray
- Rat-tail comb
Step-by-Step Instructions
- Start with clean, dry hair. Slightly damp hair styled with a diffuser also works well.
- Apply heat protectant spray from mid-length to ends.
- Part your hair down the middle using a rat-tail comb for a clean line.
- Section your hair into four to six parts using clips.
- Wrap small sections of hair around the curling wand, holding each for 8 to 10 seconds.
- Alternate the direction of your curls (away from your face, then toward it) for a natural look.
- Let all curls cool completely before touching them.
- Gently run your fingers through the curls to loosen them into soft waves.
- Spray texturizing spray at the roots for lift and volume.
- Finish with a light mist of hairspray to hold the waves without stiffness.
Beginner Tips
- Curl away from your face for the first two sections, this creates a natural frame.
- Smaller sections give tighter curls, larger sections give looser waves.
- Do not brush the curls right after curling, this makes them fall flat.
Common Mistakes to Avoid
- Using too much heat and burning the ends.
- Curling every section in the exact same direction, which looks unnatural.
- Skipping the heat protectant spray.
Styling Ideas
- Add a thin gold hair clip near the part for a subtle sparkle.
- Tuck one side behind your ear for an asymmetrical look.
- Pair with hoop earrings for a bold, confident finish.
Best Colors and Materials
This style looks stunning in warm brown, caramel balayage, or a rich chocolate shade, similar to some of Karol G’s natural looks.
Estimated Cost
$0 to $40 (if you already own a curling wand)
Estimated Time
25 to 35 minutes
Difficulty Level
Beginner Friendly
Where It Looks Best
Concerts, date nights, everyday wear, and outdoor photos
Pinterest-Worthy Tip
Take your photo with the wind gently blowing your hair or while walking, this captures the movement of the waves beautifully.
Conclusion
This look proves that you do not need a complicated style to feel glamorous. Long beachy waves are timeless, easy to recreate, and always on trend.
2. Chic Curtain Bangs Bob
Short Introduction
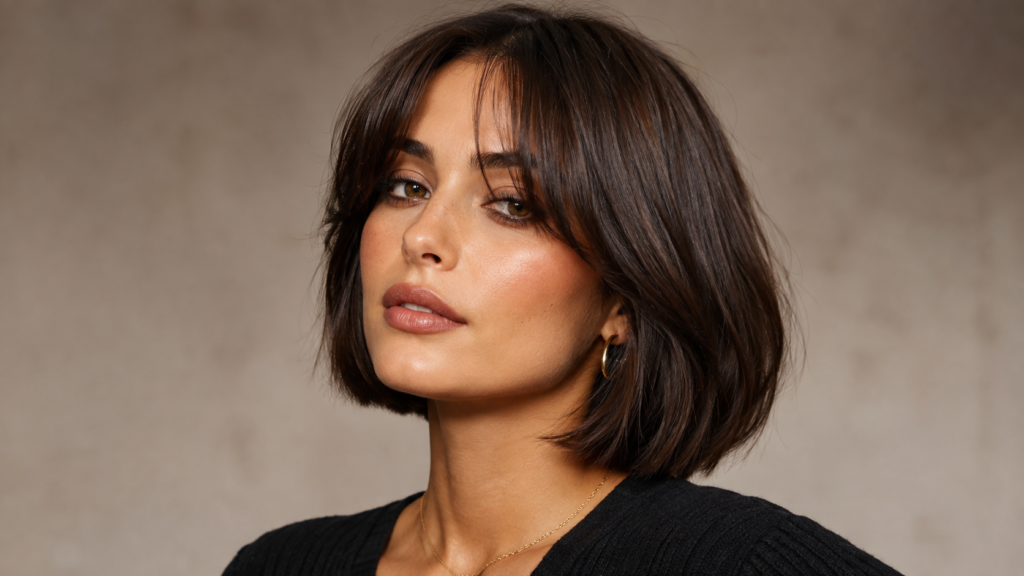
Inspired by a bold red-carpet transformation, this jaw-length bob with soft curtain bangs is perfect for anyone ready for a fresh, dramatic change.
Why You’ll Love This Idea
This cut feels modern, sophisticated, and youthful all at once. It is a great option if you want short hair that still looks elegant and easy to style.
Materials Needed
- Round brush and blow dryer
- Small barrel curling iron (for bangs)
- Flat iron (optional, for sleek finish)
- Lightweight hairspray
- Shine serum
Step-by-Step Instructions
- Start with damp, towel-dried hair.
- Apply a small amount of heat protectant spray throughout.
- Blow-dry your hair using a round brush, pulling the ends slightly inward.
- Focus extra attention on the front pieces (your curtain bangs) so they curve away from your face.
- Once fully dry, use a small curling iron to add a soft bend to the front pieces.
- Curl the ends of the bob slightly inward or outward for texture.
- Use a flat iron lightly over the top layer if you want a smoother, glossier finish.
- Separate the curtain bangs down the middle so they frame both sides of your face.
- Apply a small amount of shine serum to the ends to reduce frizz.
- Finish with a light mist of hairspray to hold the shape.
Beginner Tips
- If you are new to bangs, ask your stylist for “curtain bangs” specifically, they are easier to grow out than blunt bangs.
- Round brushing takes practice, go slow and use small sections.
- Keep the curl at the ends soft, not tight, for a modern look.
Common Mistakes to Avoid
- Cutting bangs too short without professional guidance.
- Over-curling the bob, which can make it look dated instead of chic.
- Forgetting to blend the bangs into the rest of the haircut.
Styling Ideas
- Add a thin headband for a polished, put-together look.
- Wear gold hoop or drop earrings to balance the jaw-length cut.
- Try a glossy lip to match the sleek, modern vibe of the bob.
Best Colors and Materials
Rich chocolate brown or soft caramel highlights complement this cut beautifully and add depth to the shorter length.
Estimated Cost
$0 to $60 (styling tools) plus salon haircut cost if needed
Estimated Time
20 to 30 minutes for styling
Difficulty Level
Intermediate
Where It Looks Best
Red carpet style events, dinners, work settings, and photoshoots
Pinterest-Worthy Tip
Photograph this style from a slight side angle to show off the jawline-skimming length and bang movement.
Conclusion
A curtain bangs bob is proof that short hair can be just as glamorous and expressive as long hair. It is bold, fresh, and full of personality.
3. Messy Curly Bun Updo
Short Introduction
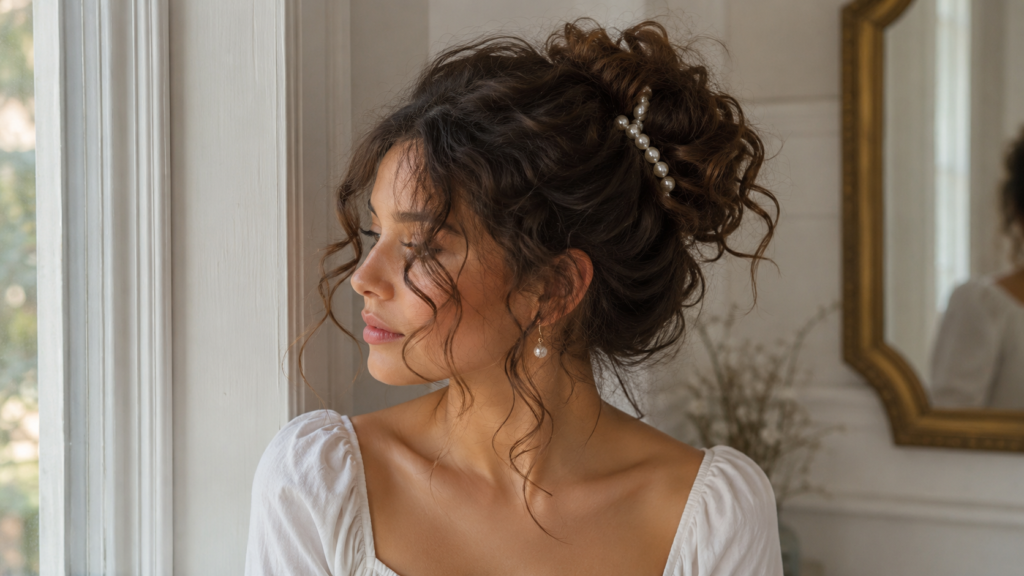
This relaxed, romantic updo takes curled hair and gathers it into a soft, messy bun. It is a fun twist on a classic style and looks effortlessly glamorous.
Why You’ll Love This Idea
It is one of the easiest updos to create, and the “messy” part means it does not need to be perfect. It is forgiving for beginners and still looks elegant.
Materials Needed
- Curling iron
- Bobby pins
- Hair tie
- Texturizing spray
- Strong hold hairspray
Step-by-Step Instructions
- Curl your entire head of hair in medium sections for texture.
- Let the curls cool, then lightly shake them out with your fingers.
- Flip your head forward and gather your hair at the crown or nape of your neck, depending on the height you want.
- Secure the hair with a hair tie, but do not pull it all the way through on the last twist, leaving a loop.
- Gently pull small pieces of hair out around the bun for a soft, undone look.
- Twist the loose ends around the base of the bun.
- Pin the twisted ends into place using several bobby pins.
- Pull a few face-framing pieces loose at the front.
- Spray texturizing spray over the bun for grip and volume.
- Finish with a strong hold hairspray to keep flyaways controlled.
Beginner Tips
- A “messy” bun is meant to look imperfect, do not stress over precision.
- Practice on second-day hair, it holds texture better than freshly washed hair.
- Use a hair donut or bun-maker tool if you want more volume with less effort.
Common Mistakes to Avoid
- Pulling the bun too tight, which can cause headaches and pulls out baby hairs.
- Using too few bobby pins, causing the bun to fall apart.
- Skipping the curling step, which makes the bun look flat instead of textured.
Styling Ideas
- Add a decorative hair clip or pearl pins around the bun.
- Wrap a thin ribbon or scarf around the base for extra flair.
- Leave soft curls at the front for a romantic frame around your face.
Best Colors and Materials
This updo works with any hair color, but adding subtle highlights helps the texture of the bun catch the light beautifully.
Estimated Cost
$0 to $20 for accessories
Estimated Time
15 to 20 minutes
Difficulty Level
Beginner Friendly
Where It Looks Best
Weddings, brunch dates, festivals, and casual glam occasions
Pinterest-Worthy Tip
Photograph the bun from behind to show off the texture and any hair accessories you added.
Conclusion
This messy curly bun proves that updos do not have to be complicated to look stunning. It is quick, romantic, and endlessly versatile.
4. Half-Up Half-Down Concert Curls
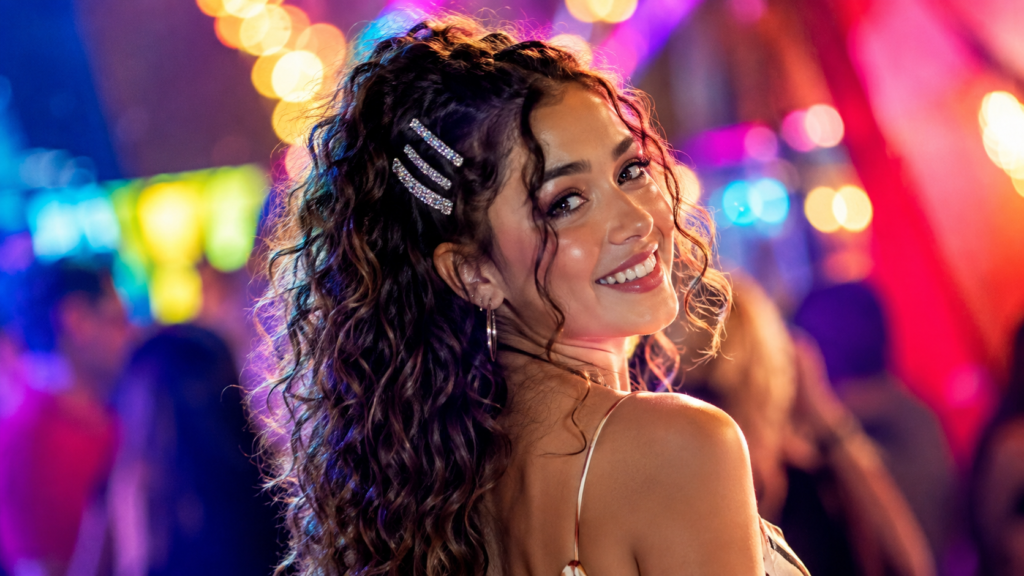
Short Introduction
This is one of the most requested Karol G concert hairstyles. It combines the freedom of down hair with the polish of an updo, and it holds up through hours of dancing and singing along.
Why You’ll Love This Idea
It keeps hair off your face while still showing off length and curls. It is practical for events and still looks incredibly cute in photos.
Materials Needed
- Curling wand
- Small hair tie
- Bobby pins
- Rhinestone hair clips (optional)
- Strong hold hairspray
Step-by-Step Instructions
- Curl your entire head of hair for volume and texture.
- Once cooled, gently shake out the curls with your fingers.
- Take a section of hair from each side of your head, near your temples.
- Bring both sections to the back of your head.
- Secure them together with a small, clear hair tie.
- Gently pull the ponytail section to add a small amount of volume at the crown.
- Take a thin strand of hair from underneath the ponytail and wrap it around the hair tie to hide it.
- Pin the wrapped strand underneath with a bobby pin.
- Add rhinestone clips near the gathered section for a festival touch, if desired.
- Finish with a strong hold hairspray to help it survive dancing and movement.
Beginner Tips
- Use small sections when gathering hair for a neater base.
- If your hair is slippery, add texturizing spray before sectioning.
- Practice this style before the event so you feel confident on the day.
Common Mistakes to Avoid
- Gathering too much hair, which can make the down section look thin.
- Not securing the base tightly enough for a full day or night of wear.
- Forgetting heat protectant before curling.
Styling Ideas
- Add small rhinestones along the part for a sparkly, festival-ready look.
- Try a colorful hair tie that matches your concert outfit.
- Braid the gathered top section instead of a simple ponytail for extra detail.
Best Colors and Materials
Bold colors like pink, red, or copper tones bring extra energy to this style, especially under stage or festival lighting.
Estimated Cost
$5 to $25 for accessories
Estimated Time
20 to 25 minutes
Difficulty Level
Beginner Friendly
Where It Looks Best
Concerts, festivals, parties, and outdoor events
Pinterest-Worthy Tip
Take photos under colorful lighting, like string lights or a sunset, to make the curls and any sparkly accessories pop.
Conclusion
This half-up style gives you the best of both worlds: movement and polish. It is a go-to choice for anyone who wants concert-ready hair that lasts all night.
5. Sleek Slicked-Back Bun
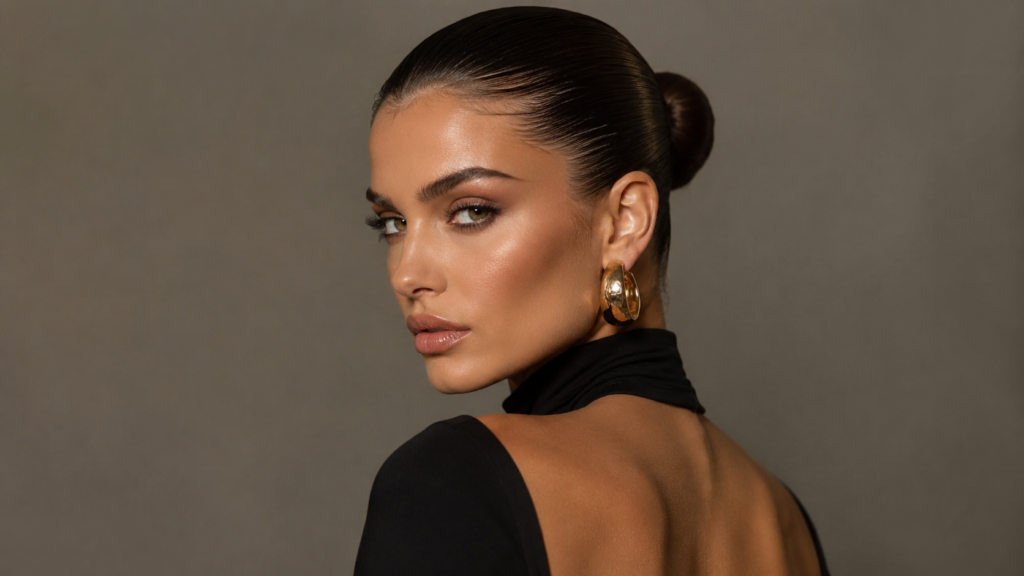
Short Introduction
This glamorous, 90s-inspired updo is smooth, polished, and dramatic. It is a favorite for red carpet and special occasion looks.
Why You’ll Love This Idea
It is sophisticated, sleek, and makes a bold statement without needing curls or waves. It also highlights your facial features beautifully.
Materials Needed
- Flat iron (optional, for smoothing)
- Fine-tooth comb
- Strong hold gel
- Hair tie
- Bobby pins
- Strong hold hairspray
Step-by-Step Instructions
- Start with damp or dry hair, depending on your hair type.
- Apply a strong hold gel evenly through your hair using your hands.
- Use a fine-tooth comb to smooth your hair back from your forehead.
- Gather all of your hair at the crown or lower back of your head, wherever you want the bun.
- Secure it tightly with a hair tie.
- Twist the ponytail around itself into a tight coil.
- Wrap the coil around the base to form a bun shape.
- Pin the bun securely in place with several bobby pins.
- Smooth down any flyaways using a small amount of gel on a toothbrush or comb.
- Finish with a strong hold hairspray for all-day hold.
Beginner Tips
- Second-day hair with a little natural oil holds gel better than freshly washed hair.
- Use a comb, not just your hands, for the smoothest possible finish.
- Start with less gel, you can always add more.
Common Mistakes to Avoid
- Using too much gel, which can leave hair looking wet or crunchy.
- Pulling the bun too tight at the hairline, which can cause discomfort.
- Skipping the flyaway step, small hairs can ruin the sleek effect.
Styling Ideas
- Add bold gold hoop earrings to match the dramatic, polished vibe.
- Try a middle part or a deep side part for two different looks.
- Add a thin gold chain along the part line for extra glam.
Best Colors and Materials
Deep brunette or jet black shades make this sleek style look extra dramatic and glossy.
Estimated Cost
$5 to $15 for gel and pins
Estimated Time
15 to 20 minutes
Difficulty Level
Intermediate
Where It Looks Best
Formal events, proms, weddings, and evening photoshoots
Pinterest-Worthy Tip
Photograph this style straight-on to highlight the clean, sleek lines and symmetry of the bun.
Conclusion
This slicked-back bun is bold, elegant, and endlessly chic. It proves that sometimes the simplest styles make the biggest statement.
6. Bold Color Long Wavy Hair
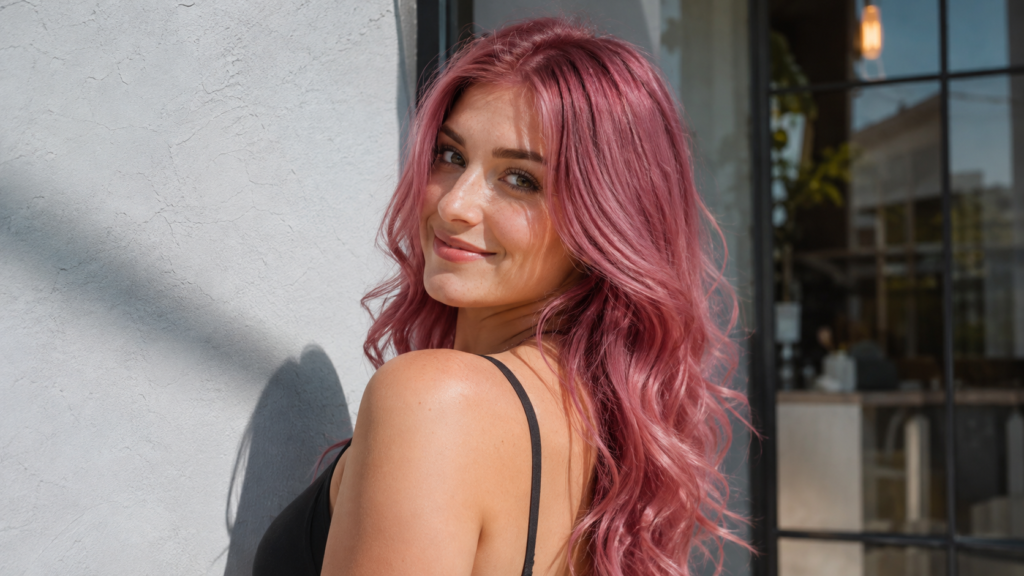
Short Introduction
Karol G is known for being fearless with hair color, from soft pinks to bright reds. This idea focuses on adding a bold color to long wavy hair for maximum impact.
Why You’ll Love This Idea
It is a fun way to express your personality and stand out. Bold color paired with soft waves feels both edgy and feminine at the same time.
Materials Needed
- Semi-permanent hair color or dye of choice
- Gloves and application brush
- Curling wand
- Heat protectant spray
- Color-safe shampoo and conditioner
Step-by-Step Instructions
- Choose a bold color that complements your skin tone, such as rose pink, copper, or burgundy.
- If dyeing at home, do a strand test first to check the color result.
- Apply the color following the product instructions, focusing on mid-lengths and ends for a softer look, or all over for full color.
- Rinse and condition according to the product directions.
- Let your hair dry fully before heat styling.
- Apply heat protectant spray throughout.
- Curl your hair in medium sections for loose, bouncy waves.
- Shake out the curls gently with your fingers once cooled.
- Use a color-safe shine serum to boost vibrancy and shine.
- Touch up with a light hairspray to hold the waves.
Beginner Tips
- Start with a semi-permanent color if you are unsure about commitment.
- Bold colors show up best on lighter hair, you may need to lighten first.
- Always do a patch test 48 hours before dyeing to check for allergic reactions.
Common Mistakes to Avoid
- Skipping the strand test and being surprised by the final color.
- Using regular shampoo, which fades bold color faster.
- Over-washing your hair in the first week after coloring.
Styling Ideas
- Pair bold hair color with neutral makeup to let the hair be the star.
- Try color-matched hair accessories for a coordinated look.
- Add subtle highlights in a second shade for dimension.
Best Colors and Materials
Rose pink, copper red, and deep burgundy are all popular choices that photograph beautifully and match Karol G’s playful, bold style.
Estimated Cost
$15 to $80 depending on product and whether you go to a salon
Estimated Time
1 to 3 hours (including color processing time)
Difficulty Level
Advanced
Where It Looks Best
Concerts, festivals, photoshoots, and bold everyday statements
Pinterest-Worthy Tip
Photograph bold-colored hair in natural sunlight to capture the true richness and depth of the shade.
Conclusion
Bold color is one of the most fun ways to channel Karol G’s fearless style. It is a big change, but a rewarding one for anyone ready to stand out.
7. Bubble Braid Concert Ponytail
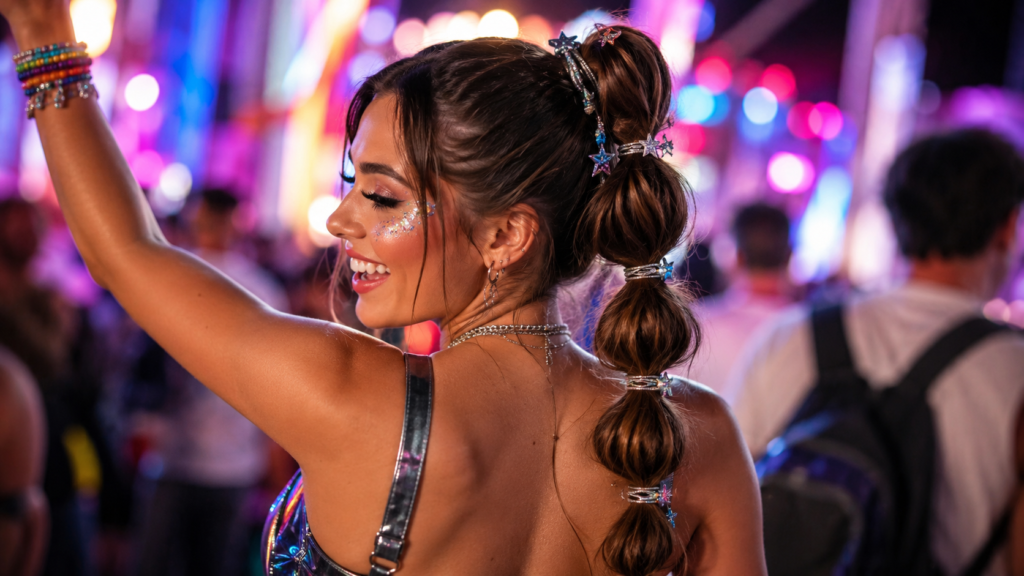
Short Introduction
Bubble braids are a fun, trendy twist on the classic ponytail. They are practical for dancing and moving around, and they look incredibly cute in photos.
Why You’ll Love This Idea
This style keeps hair secure and out of your face, making it perfect for concerts and festivals, while still looking playful and stylish.
Materials Needed
- Small clear hair ties (several)
- Rat-tail comb
- Texturizing spray
- Bobby pins
- Optional hair charms or rhinestones
Step-by-Step Instructions
- Brush your hair smooth and gather it into a high or low ponytail.
- Secure the ponytail tightly with a hair tie.
- About two inches down from the first tie, add another small hair tie.
- Continue adding hair ties every two inches down the length of the ponytail.
- Once all the ties are in place, gently pull the hair between each tie outward on both sides to create a “bubble” effect.
- Repeat this gently along the entire ponytail until each section looks rounded and full.
- Smooth down any small flyaways with your fingers or a touch of texturizing spray.
- Add hair charms or small rhinestones between the bubbles for extra sparkle, if desired.
- Pin down the base of the ponytail if you want extra hold.
- Finish with a light mist of hairspray to keep the bubbles in place.
Beginner Tips
- Use clear hair ties so they blend in and let the bubbles stand out.
- Start with a looser ponytail, tight hair does not create bubbles as easily.
- Practice pulling gently, pulling too hard can loosen the ties.
Common Mistakes to Avoid
- Spacing the hair ties unevenly, which makes the bubbles look uneven.
- Using thick elastic hair ties, which can be uncomfortable and visible.
- Not pulling enough hair out to create a full bubble shape.
Styling Ideas
- Add small colorful beads or charms between each bubble.
- Try a side ponytail for a slightly different look.
- Pair with glittery makeup for a full festival glam look.
Best Colors and Materials
This style works with any hair color, but adding temporary glitter hair spray gives extra shine for nighttime events.
Estimated Cost
$5 to $15 for hair ties and accessories
Estimated Time
15 to 20 minutes
Difficulty Level
Beginner Friendly
Where It Looks Best
Concerts, festivals, dance events, and summer outings
Pinterest-Worthy Tip
Photograph the braid from the side or back to clearly show off each bubble section and any added sparkle.
Conclusion
Bubble braids are playful, practical, and full of personality. They are one of the easiest ways to create a fun, photo-ready look for any high-energy event.
8. Voluminous Blowout with Curtain Fringe
Short Introduction
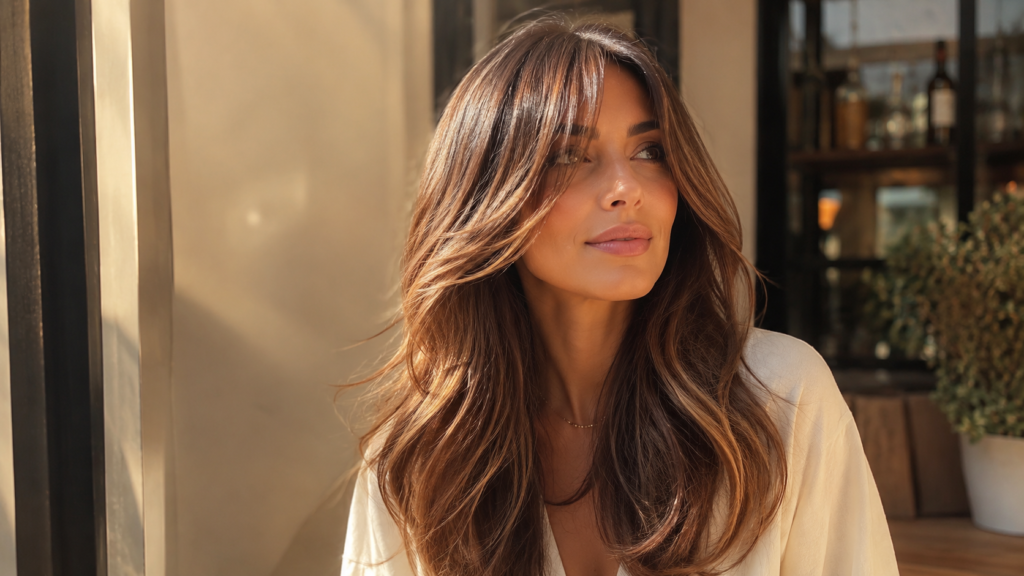
This medium-length style focuses on big, bouncy volume paired with soft curtain fringe. It is glamorous, polished, and works beautifully for both everyday wear and special occasions.
Why You’ll Love This Idea
It gives major volume and movement without needing an updo or bold curls. It is a great in-between style for anyone who wants glam hair that still feels natural.
Materials Needed
- Round brush (large barrel)
- Blow dryer
- Volumizing mousse
- Heat protectant spray
- Small curling iron (for fringe)
- Light hold hairspray
Step-by-Step Instructions
- Apply volumizing mousse to damp hair, focusing on the roots.
- Spray heat protectant throughout your hair.
- Section your hair into top, middle, and bottom layers using clips.
- Starting with the bottom layer, blow-dry using a round brush, pulling hair up and away from your head at the roots.
- Roll the ends around the brush and hold the heat for a few seconds before releasing.
- Repeat this process with the middle and top layers.
- Once fully dry, use a small curling iron on your curtain fringe pieces, curling them away from your face.
- Flip your head upside down for a few seconds and shake your roots gently for extra volume.
- Flip back up and lightly comb through with your fingers, not a brush, to keep the volume.
- Finish with a light hold hairspray, focusing on the roots for lasting lift.
Beginner Tips
- Use a round brush with a vented barrel for easier styling.
- Do not overload your hair with mousse, a little goes a long way.
- Blow-dry your roots in the opposite direction they naturally fall for maximum volume.
Common Mistakes to Avoid
- Brushing out the volume completely after styling.
- Using too much heat on the fringe, which can make it look flat instead of soft.
- Skipping the root volumizing step, which is key for this look.
Styling Ideas
- Add a delicate hair clip on one side to keep fringe away from your eyes when needed.
- Pair with bold eye makeup since the hair keeps the face open and visible.
- Try soft waves at the ends instead of a smooth blowout for extra texture.
Best Colors and Materials
Warm caramel or honey blonde tones catch the light beautifully and enhance the volume and movement of this style.
Estimated Cost
$0 to $50 depending on tools you already own
Estimated Time
25 to 40 minutes
Difficulty Level
Intermediate
Where It Looks Best
Everyday glam, work events, dinners, and photoshoots
Pinterest-Worthy Tip
Photograph this style in soft, warm lighting to highlight the volume and shine of the blowout.
Conclusion
This voluminous blowout with curtain fringe is the perfect balance of glam and everyday wearability. It is proof that big, beautiful hair does not require an updo or bold color to make a statement.
Expert Styling Tips
- Always start with healthy hair. No style looks its best on damaged or dry strands, so regular trims and deep conditioning matter.
- Match your style to your event. Save sleek updos for formal occasions and bouncy curls for concerts and festivals.
- Layer your products. Start with heat protectant, then styling product, then finishing spray for the best hold.
- Practice before the big day. Try your chosen style a few days ahead so you feel confident and can adjust timing.
- Use the right tool size. Smaller barrels create tighter curls, larger barrels create loose, natural waves.
- Do not skip cool-down time. Letting curls cool before touching them helps them hold their shape longer.
Budget-Saving Tips
- Use tools you already own before buying new ones.
- Try semi-permanent color before committing to a permanent dye job.
- Watch free tutorials online to practice techniques before your event.
- Buy travel-size versions of new products to test them first.
- Ask a friend to help with harder-to-reach styles like slicked-back buns.
- Reuse accessories like clips and rhinestones across multiple looks.
Frequently Asked Questions
1. What is Karol G’s most popular hairstyle? Her long, wavy hair with a middle part is one of her most recognized and requested looks, but her bold hair colors are also extremely popular.
2. Can I get these hairstyles with short hair? Yes! Several ideas in this guide, like the curtain bangs bob, are designed specifically for shorter hair lengths.
3. Do I need curly or wavy hair naturally to try these styles? No, most of these looks can be created with a curling iron or wand, even if your natural hair is straight.
4. How long do these hairstyles usually last? With the right products and hairspray, most styles last through a full event, though updos generally hold longer than loose curls.
5. What hair color works best for a Karol G inspired look? Warm browns, caramel tones, and bold colors like pink or copper all work well, depending on the specific style you choose.
6. Are these hairstyles good for beginners? Many of them are beginner friendly, especially the messy bun, bubble braid, and half-up half-down styles.
7. What products do I really need to get started? At minimum, a heat protectant spray, a curling tool, bobby pins, and hairspray will cover most of the styles in this guide.
8. Can these hairstyles work for weddings or proms? Absolutely, the slicked-back bun and messy curly bun are both great options for formal events.
9. How do I keep bold hair color from fading fast? Use color-safe shampoo, wash your hair less often, and avoid hot water when rinsing.
10. What if my hair is too fine for volume-based styles? Volumizing mousse, root-focused blow-drying, and lightweight texturizing sprays can help create lift even with fine hair.
Final Thoughts
Karol G hairstyles are all about confidence, fun, and self-expression. You do not need to copy every detail perfectly. Instead, take the parts you love most, whether that is the color, the texture, or the overall vibe, and make it your own.
From easy everyday waves to glamorous updos, this guide gives you eight different ways to feel bold and beautiful. Try one style this week, or save this guide and work through all eight over time.
Pinterest Call-to-Action
Loved these Karol G hairstyle ideas? Save this pin now so you can come back to it anytime you need hair inspiration! Share it with a friend who loves trying new looks, and follow for more hairstyle guides just like this one. 💕✨