
Introduction
Heading back to campus is one of the most exciting times of the year! You get to reconnect with friends, decorate your space, and share your personal style through cute back to college outfits. However, moving into a college dorm or a shared apartment often comes with one major challenge: tiny closets and limited storage space. Trying to keep your favorite trendy clothes organized while maintaining a tight student budget can feel overwhelming.
The good news is that you do not need a huge budget or a giant walk-in closet to look amazing every single day. By combining smart DIY clothing hacks, custom wardrobe organizers, and creative styling tricks, you can curate a stunning back-to-school wardrobe that fits perfectly into small spaces. DIY crafts and customized clothing organizers make it easy to mix, match, and display your outfits so getting dressed in the morning is stress-free.
In this ultimate guide, we will explore creative DIY wardrobe projects, customized clothing hacks, and stylish dorm storage ideas designed to elevate your everyday outfits. Whether you want to customize your denim, build space-saving hangers, or design aesthetic display racks, these ideas will keep your style fresh and your closet beautifully organized. Let us jump into these fun, budget-friendly projects that will make your wardrobe pop this semester!
Why This Trend Is Popular
Combining DIY crafts with fashion styling is huge on Pinterest right now. Students love personalized style because standard retail clothes can end up looking repetitive on campus. Adding unique details like fabric paint, embroidery, or custom patches makes your clothes stand out.
At the same time, micro-living and small-space organization have become major interior design trends. Dorm rooms are small, so aesthetic storage solutions act as both practical organizers and gorgeous room decor. When your rack displays your cute back to college outfits like a boutique, your room instantly feels cozy, high-end, and photogenic.
Materials and Tools Needed
Here are the basic materials and tools you will need for these creative fashion and organizer projects:
| Category | Recommended Items |
| Craft Supplies | Fabric markers, acrylic paint, fabric glue, embroidery thread, needles, stencil brushes. |
| Hardware & Display | Wooden hangers, copper pipes, macrame cord, S-hooks, adhesive wall hooks. |
| Upcycled Fabrics | Old denim jackets, plain tote bags, scrap ribbon, wooden beads, canvas cloth. |
| Basic Tools | Fabric scissors, measuring tape, hot glue gun, iron, masking tape. |
Safety Tips
- Use Heat Safely: Always turn off irons and hot glue guns when not in use. Use a heat-resistant mat to protect your workspace.
- Work in Ventilated Areas: When using fabric spray paints, sealant sprays, or permanent glues, open windows to ensure good airflow.
- Handle Tools Wisely: Keep sharp scissors, needles, and wire cutters pointed away from yourself while cutting or sewing.
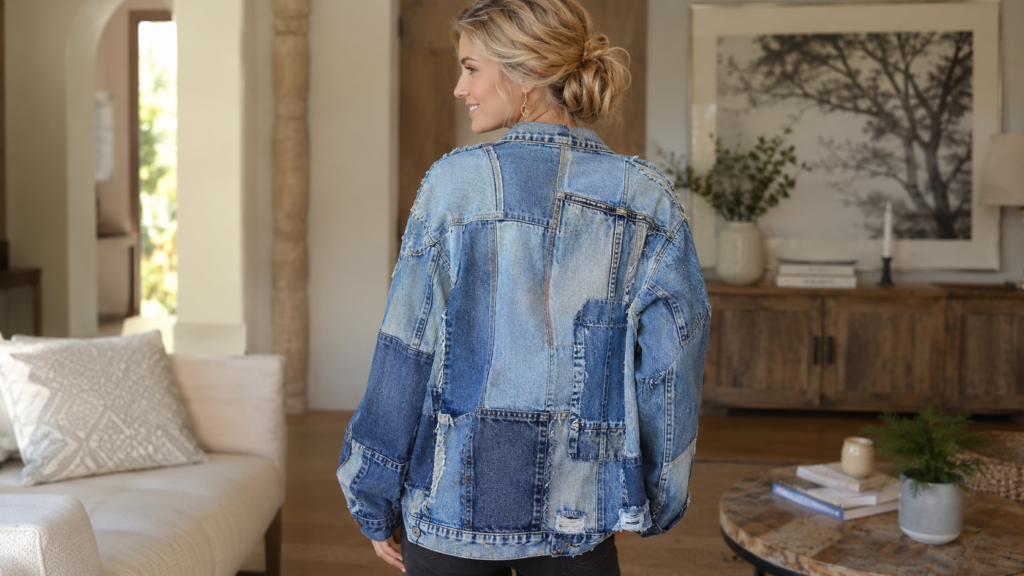
1. Upcycled Patchwork Denim Jacket
Introduction
A staple piece for any college closet is a trusty denim jacket. You can transform an old, plain jean jacket into a high-fashion statement piece by adding custom fabric patches, vintage lace, or floral cutouts. It pairs effortlessly with dresses, leggings, or skirts for chilly morning lectures.
Why You’ll Love This Idea
It breathes fresh life into thrifted or old clothing, saving you money while creating a one-of-a-kind piece that nobody else on campus will have.
Materials Needed
- Old denim jacket
- Fabric scraps (floral prints, plaid, or lace)
- Fabric glue or iron-on adhesive web
- Embroidery hoop and floss (optional)
- Fabric scissors
Step-by-Step Instructions
- Lay your denim jacket flat on a clean surface and smooth out all wrinkles.
- Cut your accent fabrics into geometric shapes, stars, or floral patterns.
- Arrange the patches on the back panel, collar, or elbow areas until you like the arrangement.
- Pin the patches in place so they do not shift around.
- Apply iron-on adhesive or fabric glue behind each patch.
- Press firmly with a warm iron for 30 seconds per section to bond the fabric.
- Let the glue cool completely for 20 minutes.
- (Optional) Hand-stitch around the edges using a blanket stitch for extra durability.
- Snip any loose threads.
- Hang your jacket on a padded hanger to maintain its shape.
Beginner Tips
Use iron-on bonding web if you do not know how to sew. It holds strong through multiple machine washes.
Common Mistakes to Avoid
Avoid using regular school glue or liquid hot glue, as they will wash out or create hard, lumpy spots on the denim.
Styling or Decorating Ideas
Pair this jacket with a casual black t-shirt dress and white sneakers for an effortless campus vibe.
Best Colors and Materials
Medium-wash blue denim combined with pastel floral cotton fabrics or cream lace.
- Estimated Cost: $10 – $20
- Estimated Time: 1 to 2 hours
- Difficulty Level: Easy
- Where It Looks Best: Displayed on an open clothing rack or worn as an everyday outerwear layer.
- Pinterest-Worthy Tip: Take close-up photos of the embroidered texture in bright morning light to pin on your fashion boards.
Conclusion
This custom denim jacket brings texture and personality to simple outfits, making it an essential piece for unpredictable autumn weather.
2. Aesthetic Macrame Hanging Outfit Planner
Introduction
Planning your cute back to college outfits for the week saves precious time during busy exam weeks. A handmade macrame hanging organizer gives you a chic spot to layout your daily tops, skirts, and accessories ahead of time.
Why You’ll Love This Idea
It eliminates morning stress, keeps your clothes wrinkle-free, and doubles as boho wall art above your dorm desk.
Materials Needed
- Wooden dowel (24 inches)
- 4mm cotton macrame cord
- 5 S-hooks
- Wooden tags or labels (Monday to Friday)
- Scissors
Step-by-Step Instructions
- Measure and cut 10 lengths of macrame cord, each 6 feet long.
- Attach each cord to the wooden dowel using simple lark’s head knots.
- Tie square knots across the cords to form a decorative grid pattern down the first 6 inches.
- Gather the remaining bottom cords into neat tassel bunches and knot them off.
- Trim the tassel ends evenly with sharp fabric scissors.
- Attach a long cord to both ends of the dowel to create a hanging loop.
- Attach 5 metal S-hooks along the wooden dowel, spacing them out evenly.
- Hang labeled wooden tags (Mon–Fri) above each S-hook.
- Mount the entire piece on your wall using a heavy-duty adhesive hook.
Beginner Tips
Keep your knot tension even by pulling the cords gently after every knot sequence.
Common Mistakes to Avoid
Making the hanging loop too short will cause the organizer to tilt forward when holding heavier clothes.
Styling or Decorating Ideas
Hang matching neutral-colored outfits on slim wooden hangers from each S-hook for a cohesive, minimalist look.
Best Colors and Materials
Natural cream cotton cord paired with light oak wood dowels and bronze hardware.
- Estimated Cost: $15 – $25
- Estimated Time: 1.5 hours
- Difficulty Level: Intermediate
- Where It Looks Best: Mounted on a blank wall right next to your vanity or full-length mirror.
- Pinterest-Worthy Tip: Style this organizer with soft warm lighting and a small potted plant nearby for a pins-worthy aesthetic.
Conclusion
A macrame weekly outfit planner combines practical daily organization with stunning boho decor, perfect for keeping your college routine smooth.
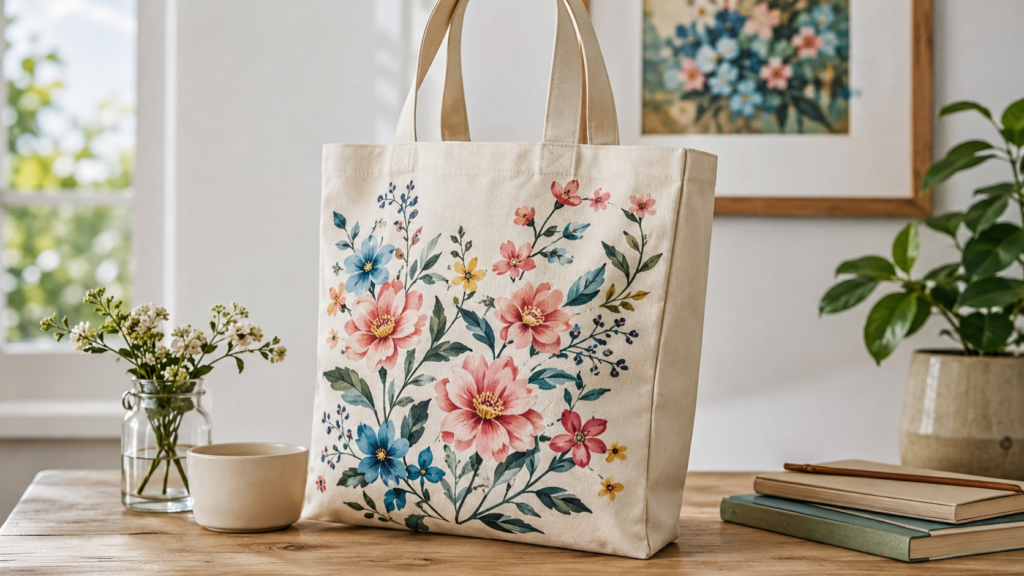
3. Painted Floral Canvas Tote Bag
Introduction
No college look is complete without a sturdy, stylish tote bag to carry your books, laptop, and daily essentials. Decorating a plain canvas tote with botanical patterns creates a gorgeous accessory that compliments all your cute back to college outfits.
Why You’ll Love This Idea
It replaces plain backpacks with a cute, eco-friendly bag that adds a pop of art to your outfit every single day.
Materials Needed
- Blank cotton canvas tote bag
- Acrylic fabric paint set
- Fine-tip detail paintbrushes
- Cardboard insert sheet
- Fabric sealant spray
Step-by-Step Instructions
- Iron the canvas tote bag so the surface is flat and smooth.
- Slide a thick cardboard sheet inside the tote to prevent paint from bleeding through to the back.
- Lightly sketch simple wildflower stems and leaves using a pencil.
- Paint the stems and leaf bases using muted green fabric paints.
- Add colorful flower petals using soft pinks, warm yellows, and lavender hues.
- Let the base paint layer dry completely for about 30 minutes.
- Add small dots and highlight lines with a fine-tip detail brush for texture.
- Allow the entire painting to dry overnight.
- Heat-set the paint with a dry iron over a piece of parchment paper.
- Lightly coat with fabric sealant spray for extra protection.
Beginner Tips
If you lack confidence in freehand painting, use botanical stencils or real dried leaves as stamps.
Common Mistakes to Avoid
Do not apply paint too thickly, or it will crack when the canvas flexes as you carry heavy books.
Styling or Decorating Ideas
Hang this tote on a decorative peg rail alongside a beige knit sweater and a corduroy skirt.
Best Colors and Materials
Off-white heavy canvas with sage green, dusty rose, and mustard yellow fabric paints.
- Estimated Cost: $8 – $15
- Estimated Time: 1 hour (plus overnight drying)
- Difficulty Level: Easy
- Where It Looks Best: Hanging on a entryway coat hook or carried across campus.
- Pinterest-Worthy Tip: Fill the tote with a notebook, a pair of glasses, and fresh flowers for an aesthetic flat-lay photo.
Conclusion
Customizing a canvas tote bag gives you a personalized, functional piece that ties your whole outfit together while walking across campus.
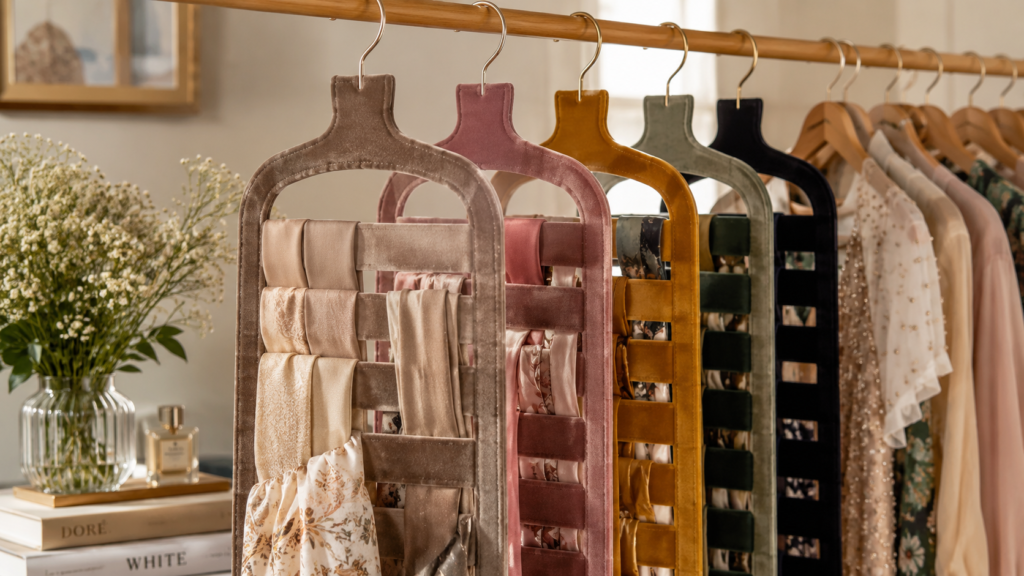
4. Velvet Ribbon Hanger Organizers
Introduction
Upgrading your basic clothing hangers with soft velvet ribbon and golden accents gives your entire closet a luxurious look. These non-slip hangers preserve delicate tops, knit sweaters, and cardigans while making your dorm closet feel like a boutique.
Why You’ll Love This Idea
Velvet prevents smooth tops from slipping off onto the floor, saving you time and keeping your closet neat.
Materials Needed
- Plain wooden or plastic hangers
- Velvet ribbon (3/8 inch wide)
- Hot glue gun and glue sticks
- Metallic gold spray paint (for the metal hooks)
- Scissors
Step-by-Step Instructions
- Cover the wooden/plastic part of the hanger with tape, leaving only the metal hook exposed.
- Spray paint the metal hooks with metallic gold spray paint and let dry for 30 minutes.
- Remove the protective tape once dry.
- Apply a small dot of hot glue at the base of the metal hook.
- Press the end of the velvet ribbon firmly into the glue.
- Begin wrapping the ribbon snugly around the arms of the hanger, overlapping slightly.
- Add small dots of hot glue every 2 inches to lock the ribbon in place.
- Wrap all the way to the outer end of one arm, then wrap back toward the center.
- Repeat the process for the opposite side of the hanger.
- Trim the excess ribbon and secure the end cleanly with a final dot of hot glue.
Beginner Tips
Pull the ribbon taut while wrapping so there are no loose folds or wrinkles along the hanger frame.
Common Mistakes to Avoid
Avoid applying too much hot glue at once, as it can seep through thin velvet and leave hard marks.
Styling or Decorating Ideas
Use matching cream or dusty pink ribbon hangers to display your favorite graphic tees, blouses, and light jackets.
Best Colors and Materials
Emerald green, dusty rose, or cream velvet ribbon paired with brushed gold hardware.
- Estimated Cost: $10 – $18 for a set of 10
- Estimated Time: 45 minutes
- Difficulty Level: Easy
- Where It Looks Best: Inside an open closet rack or hanging on a decorative valet hook.
- Pinterest-Worthy Tip: Arrange your clothes on these hangers in color-coordinated order for an ultra-satisfying closet tour photo.
Conclusion
Custom velvet hangers are an affordable upgrade that keeps your wardrobe looking neat and protects your stylish college clothes from damage.
5. Industrial Copper Pipe Garment Rack
Introduction
When dorm closet space is tight, a freestanding industrial copper pipe rack offers immediate extra storage. It serves as an open wardrobe display for your daily outfits while acting as a sleek industrial piece of room decor.
Why You’ll Love This Idea
It maximizes floor space in tiny rooms, holds heavy winter coats easily, and gives your dorm a modern minimalist loft aesthetic.
Materials Needed
- 1/2-inch copper pipes (cut to your desired height and width)
- 4 copper elbow joints
- 2 copper T-joints
- 4 copper end caps
- Heavy-duty epoxy or copper glue
Step-by-Step Instructions
- Wipe down all copper pipes with rubbing alcohol to clear grease or dirt.
- Lay out your copper pieces on the floor to construct the base rectangle.
- Apply epoxy glue inside the T-joints and connect the base pipes securely.
- Attach four end caps to the bottom corners to act as sturdy feet.
- Insert the vertical side pipes into the base T-joints using epoxy glue.
- Attach elbow joints to the tops of both vertical side pipes.
- Place the top horizontal clothes bar into the top elbow joints.
- Check that the structure stands completely straight using a bubble level.
- Let the epoxy cure undisturbed for 24 hours before hanging any clothes.
- Wipe down the finished rack with copper cleaner for a brilliant mirror shine.
Beginner Tips
Have the hardware store precut the copper pipes to your exact measurements to save effort at home.
Common Mistakes to Avoid
Hanging heavy clothes before the epoxy glue fully cures will cause the frame to bend or disconnect.
Styling or Decorating Ideas
Place a small woven basket underneath the rack to hold folded jeans, shoes, or handbag accessories.
Best Colors and Materials
Polished warm copper metal matched with neutral, beige, and terracotta clothing pieces.
- Estimated Cost: $35 – $50
- Estimated Time: 1 to 2 hours (plus 24-hour cure time)
- Difficulty Level: Intermediate
- Where It Looks Best: Placed along a bedroom feature wall or tucked neatly near an entryway corner.
- Pinterest-Worthy Tip: Decorate the top corner of the rack with a hanging pothos plant to soften the industrial look.
Conclusion
A DIY copper garment rack turns your favorite cute back to college outfits into a visual decor element while doubling your storage capacity.
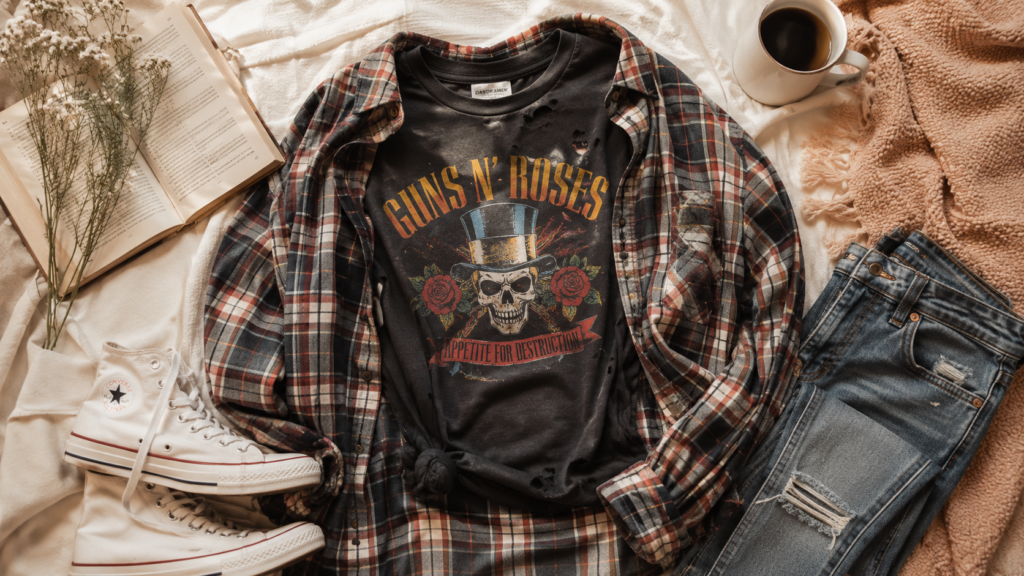
6. Distressed Graphic Tee & Flannel Combination
Introduction
Graphic tees paired with oversized flannel shirts are the definition of classic, casual college style. You can customize a simple oversized t-shirt using easy distressing tricks to give it a vintage, cozy feel that looks effortlessly cool.
Why You’ll Love This Idea
It offers maximum comfort during long study sessions while looking trendy and stylish for casual social hangouts.
Materials Needed
- Plain or graphic thrifted t-shirt
- Sandpaper (medium grit)
- Fabric scissors
- Tea or coffee bath (for aging white fabric)
- Spray bottle with saltwater
Step-by-Step Instructions
- Lay the t-shirt flat on a wooden work table.
- Gently rub sandpaper along the neckline, sleeve cuffs, and bottom hem to create natural wear.
- Use sharp scissors to make tiny, strategic cuts along the collar band.
- Lightly spritz the t-shirt with a saltwater spray to soften stiff cotton fibers.
- Submerge white or gray t-shirts in a warm black tea bath for 30 minutes to create an authentic vintage patina.
- Rinse the shirt in cold water until the water runs clear.
- Tumble dry on medium heat to set the distressed texture.
- Layer your customized tee under an open, cozy flannel shirt.
- Pair with your favorite light-wash jeans or high-waisted leggings.
- Roll up the flannel sleeves slightly for a relaxed, layered silhouette.
Beginner Tips
Start distressing slowly. You can always add more wear, but you cannot fix large accidental holes.
Common Mistakes to Avoid
Cutting too close to structural seams can cause the shirt to unravel completely in the washing machine.
Styling or Decorating Ideas
Tie the flannel around your waist during warmer afternoons to easily adjust your outfit’s temperature.
Best Colors and Materials
Washed charcoal, vintage cream, and oversized plaid flannels in forest green or maroon.
- Estimated Cost: $5 – $15
- Estimated Time: 45 minutes
- Difficulty Level: Easy
- Where It Looks Best: Folded neatly on open shelving or worn on campus for relaxed days.
- Pinterest-Worthy Tip: Snap a cozy mirror selfie holding an iced coffee to showcase this relaxed campus style.
Conclusion
Distressing your own graphic tees lets you create relaxed, comfortable layered outfits without spending big bucks at high-end boutiques.
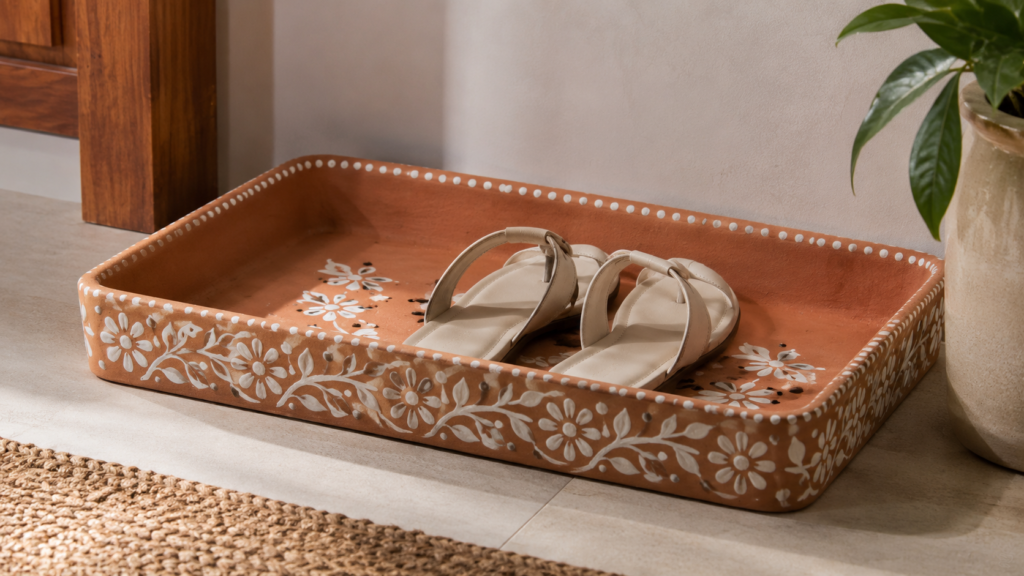
7. Hand-Painted Terracotta Shoe & Accessory Tray
Introduction
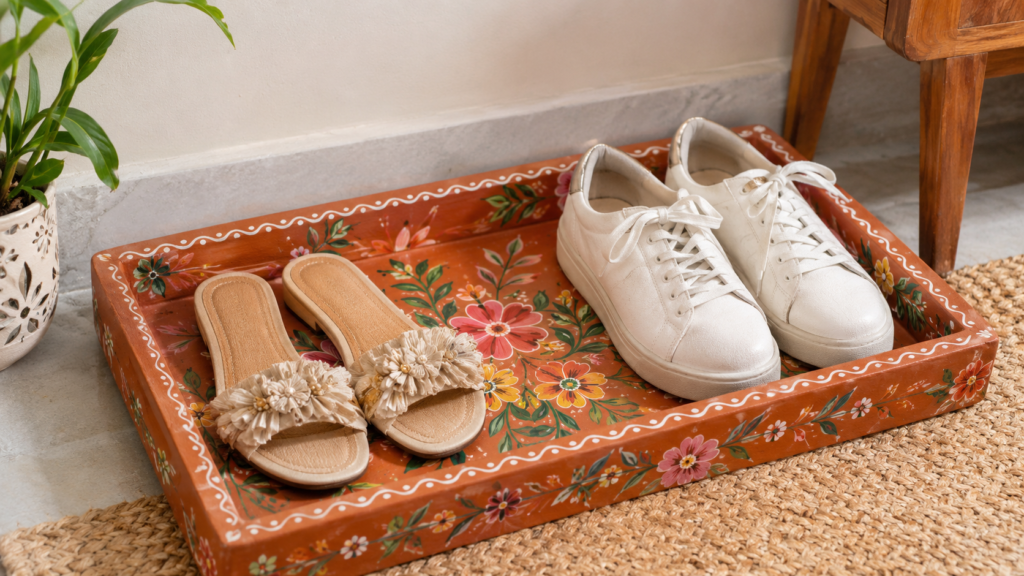
Keeping your footwear and small accessories tidy near your dorm entrance helps preserve your favorite shoes. A hand-painted shallow terracotta or wooden tray creates a dedicated spot for shoes, sunglasses, and jewelry while keeping dirt off your floors.
Why You’ll Love This Idea
It prevents dirty shoe soles from touching clean floors and keeps daily accessories organized in one stylish spot.
Materials Needed
- Shallow wooden or terracotta tray
- Acrylic outdoor craft paints
- Painter’s tape
- Matte varnish sealant
- Foam paintbrushes
Step-by-Step Instructions
- Clean the tray surface thoroughly with a damp cloth and let it dry completely.
- Use painter’s tape to block off crisp geometric shapes or color blocks across the base.
- Apply a smooth coat of acrylic craft paint inside the taped-off sections.
- Let the first coat dry for 20 minutes before applying a second coat for full opacity.
- Carefully peel away the painter’s tape while the paint is slightly damp for clean lines.
- Add subtle hand-painted dots or leaf motifs using fine brushes if desired.
- Allow all paint layers to dry for at least 2 hours.
- Apply two coats of clear matte varnish sealant to protect against shoe scuffs and moisture.
- Let the tray cure overnight.
- Place the tray by your dorm door and arrange your favorite sneakers or ankle boots on top.
Beginner Tips
Use foam brushes instead of bristled brushes to avoid leave brush marks on flat tray surfaces.
Common Mistakes to Avoid
Skipping the protective varnish layer will allow moisture from wet shoes to ruin the acrylic paint design.
Styling or Decorating Ideas
Place a small catch-all dish on one side of the tray to hold house keys, dorm keycards, and rings.
Best Colors and Materials
Warm terracotta, warm beige, white accent lines, and natural wood textures.
- Estimated Cost: $12 – $20
- Estimated Time: 1.5 hours
- Difficulty Level: Easy
- Where It Looks Best: Placed on the floor right beside your entryway or inside the bottom of your closet.
- Pinterest-Worthy Tip: Arrange clean white sneakers alongside trendy sunglasses on the tray for a clean lifestyle photo.
Conclusion
A hand-painted shoe tray keeps your entryway clean and adds a decorative touch to your everyday outfit storage routine.
8. DIY Beaded Strap Accessory Rack
Introduction
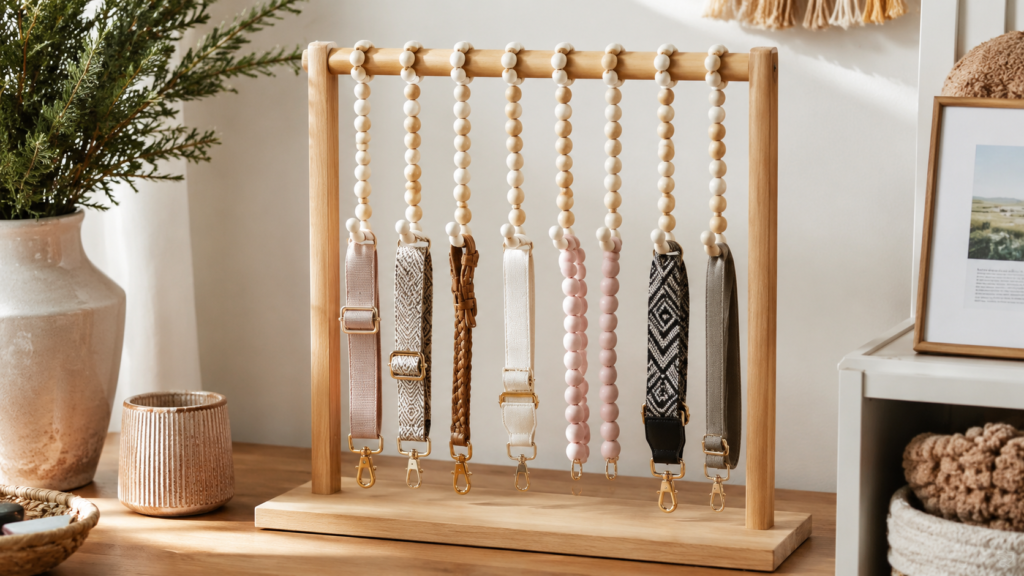
Jewelry, belts, and cross-body bag straps often get tangled up in drawers. A wall-mounted wooden accessory organizer made with large wooden beads keeps your belts, scarves, and jewelry visible, organized, and tangle-free.
Why You’ll Love This Idea
It stops delicate necklaces and bag straps from tangling while turning your favorite accessories into visual room decor.
Materials Needed
- Unfinished wooden beads (assorted sizes)
- Sturdy leather cord or thick twine
- Small wooden brass hooks
- Wall anchor or heavy-duty adhesive hook
- Scissors
Step-by-Step Instructions
- Thread a sturdy knot at the end of a 20-inch leather cord.
- String unfinished wooden beads onto the cord in an alternating pattern of large and small sizes.
- Leave 3 inches of clear cord space at the top for mounting.
- Attach small brass hooks into every third wooden bead by screwing them into precut guide holes.
- Tie a secure loop knot at the top of the leather cord.
- Smooth out the bead placement so the hooks face forward.
- Mount the loop onto an adhesive wall hook near your dressing area.
- Hang your favorite cross-body bags, belts, and statement necklaces on the brass hooks.
- Adjust the weight distribution so the beaded strand hangs straight down.
Beginner Tips
Rub a tiny bit of beeswax on the leather cord to make threading beads easier and prevent fraying.
Common Mistakes to Avoid
Overloading a single hook with heavy leather bags can stretch the cord or pull the hook out.
Styling or Decorating Ideas
Hang this rack beside a full-length mirror so you can easily grab accessories while styling your cute back to college outfits.
Best Colors and Materials
Raw natural maple beads, dark brown leather cord, and brushed brass hardware.
- Estimated Cost: $10 – $16
- Estimated Time: 45 minutes
- Difficulty Level: Easy
- Where It Looks Best: Hanging vertically on narrow wall spaces or closet doors.
- Pinterest-Worthy Tip: Take an up-close detail shot showing colorful neck scarves and gold chains hanging from the wooden beads.
Conclusion
This beaded accessory rack offers an elegant solution for organizing loose accessories, ensuring your favorite items are ready to complete your daily outfit.
Expert Decorating Tips
Organizing your college wardrobe involves creating a functional space that makes getting ready enjoyable. Here are four expert tips to elevate your wardrobe setup:
- Group by Color Palette: Organize your hanging clothes from light tones to dark tones. This creates an organized aesthetic on open racks and makes matching items effortless.
- Use Vertical Wall Space: When floor space is limited, install floating shelves, pegboards, or wall hooks to hold hats, bags, and daily outfits vertically.
- Incorporate Soft Lighting: Place warm LED strip lights or small clip-on lamps around your open garment rack to highlight your favorite pieces and create a warm ambiance.
- Add Natural Textures: Use woven seagrass baskets, linen storage bins, and wooden hangers to soften metallic racks and give your space a warm feel.
Budget-Saving Tips
College budgets can be tight, but creating a stylish and organized clothing setup does not have to cost a lot. Here are simple ways to keep your expenses low:
+--------------------------------+-------------------------------------------------+
| Budget Tip                     | How It Helps You Save                           |
+--------------------------------+-------------------------------------------------+
| Thrift Store Sourcing          | Buy plain jackets, flannels, and wooden racks   |
|                                | at local thrift shops for up to 80% off retail. |
| Multipack Hardware             | Buy wooden beads, hooks, and adhesive strips    |
|                                | in bulk online to lower per-project costs.      |
| Upcycle Scrap Fabrics          | Repurpose old denim jeans or bedsheets into     |
|                                | custom patches, bows, and storage pockets.      |
| Multi-Functional Storage       | Choose storage items like shoe benches that     |
|                                | double as seating to save money and floor space. |
+--------------------------------+-------------------------------------------------+
Frequently Asked Questions
1. How can I plan cute back to college outfits on a tight budget?
Start by organizing what you already own. Focus on building a capsule wardrobe made of basic tops, classic denim, and layering pieces like flannels. Use budget-friendly DIY accents like fabric patches or distress techniques to give older clothes a fresh look without spending much.
2. What are the best storage ideas for tiny dorm closets?
Maximize vertical space using slim velvet hangers, hanging fabric shelves, and over-the-door organizers. Adding a freestanding rack or wall hooks creates additional open storage space without damaging dorm walls.
3. How do I prevent damage to my dorm walls while hanging organizers?
Use heavy-duty adhesive hooks or removable velcro hanging strips. Always double-check the weight limits on adhesive hooks before hanging heavy items like garment racks or filled bags.
4. What are the essential capsule wardrobe pieces for college students?
A versatile college capsule wardrobe includes comfortable high-waisted jeans, plain white and black tees, an oversized denim jacket, a cozy flannel shirt, neutral sneakers, and a spacious canvas tote bag.
5. Can I machine wash hand-painted clothes and tote bags?
Yes! As long as you use permanent acrylic fabric paints, let them dry completely, and heat-set them with an iron. Always wash customized clothes inside out on a gentle cycle using cold water.
6. How do I make my small dorm closet look aesthetic for Pinterest photos?
Use uniform hangers, arrange your clothes by color, and keep floor spaces clear with woven baskets. Adding clean warm lighting makes your closet space look inviting and camera-ready.
7. How do I organize thick winter sweaters without stretching them out?
Fold heavy knit sweaters instead of hanging them on thin hangers, which can pull shoulders out of shape. Store folded knits on open shelf risers or inside fabric bins on your closet shelf.
8. What is the quickest DIY project to upgrade my daily college outfits?
Adding custom fabric patches to an old denim jacket or distressing a classic graphic tee are both quick 45-minute projects that instantly elevate simple everyday outfits.
Final Thoughts
Styling cute back to college outfits does not require a massive wardrobe or a giant budget. By combining thrifted pieces, simple DIY clothing upgrades, and smart small-space storage hacks, you can build a personalized closet that makes getting ready fun and stress-free. From custom patchwork denim to aesthetic copper clothing racks, these creative ideas allow you to show off your style while keeping your dorm room tidy. Pick your favorite project, gather your craft supplies, and build a campus wardrobe you love!
Save This Post on Pinterest!
Did you find these college outfit and closet organization ideas helpful? Pin this post to your favorite College Fashion, Dorm Room Decor, or DIY Closet Ideas board on Pinterest so you can reference these steps whenever you need campus wardrobe inspiration!
📌 Pin Title: 9 Cute Back to College Outfits & DIY Dorm Closet Hacks!
📌 Pin Description: Learn how to create cute back to college outfits and aesthetic dorm closet storage ideas on a budget! Simple DIY wardrobe hacks for college students. Save this pin for campus style tips!