
Introduction
As the cool autumn breeze rolls in and the days grow shorter, there is nothing quite like retreating into a warm, inviting bedroom. Autumn is the ultimate season for slowing down, savoring hot cups of spiced tea, and wrapping yourself in soft, plush blankets. If you have been scrolling through Pinterest admiring dreamy bedroom aesthetic boards, you are not alone. Fall bedroom makeovers are one of the most loved interior trends of the year, and for good reason!
Your bedroom should be your personal sanctuary—a calm space where you can unwind, rest, and reset after a busy day. Creating a cozy fall atmosphere does not mean you need to renovate your entire home or spend a fortune on new furniture. In fact, autumn decor is all about layering textures, bringing in rich organic colors, and making small, thoughtful adjustments that instantly shift the mood.
Whether you love rustic farmhouse touches, minimalist Scandinavian charm, or rich moody tones, autumn decor allows you to experiment with warmth in a way that feels uniquely yours. From chunk knit blankets and ambient fairy lights to rich earthy palettes like burnt orange, warm terracotta, and deep forest green, simple changes can make a massive impact.
In this ultimate guide, we are sharing 8 comprehensive, step-by-step cozy fall bedroom decor projects and styling ideas. Every single idea is designed with Pinterest lovers in mind—easy to recreate, visually stunning, highly budget-friendly, and perfect for any bedroom size. Get ready to turn your bedroom into the ultimate fall getaway!
Why This Trend Is Popular
The craving for cozy spaces—often called hygge—spikes every autumn. People spend more time indoors as temperatures drop, creating a natural desire for spaces that feel safe, grounding, and comfortable.
- Emotional Warmth: Fall decor triggers feelings of nostalgia, comfort, and relaxation. Warm lighting and soft textiles reduce stress and promote restful sleep.
- Affordable Home Updates: Unlike major remodeling, seasonal decorating relies on soft goods like pillows, throws, candles, and natural elements. It is an easy way to refresh your home on a budget.
- Pinterest & Social Inspiration: Visual platforms make it easy to see how simple tweaks—like swapping pillow covers or adding ambient lighting—can completely elevate a room’s aesthetic.
Materials and Tools Needed
Before starting your fall bedroom transformation, gather these basic tools and decorative essentials:
Decor & Styling Essentials
- Chunky knit throw blankets and faux fur throws
- Linen, velvet, and waffle-weave pillow covers
- Flameless LED candles, fairy string lights, and warm accent lamps
- Dried pampas grass, eucalyptus, wheat stalks, and autumn leaves
- Wooden trays, woven baskets, and ceramic vases
- Autumn-themed wall art, oak frames, and warm mirrors
Hardware & Basic Tools
- Command picture hanging strips or small picture nails
- Lightweight hammer and tape measure
- Fabric steamer or iron (for smooth linens)
- Craft scissors and floral tape
Safety Tips for Decorating
- Candle Safety: Always use flameless LED candles near bedding, curtains, or canopy nets to eliminate fire hazards while enjoying a warm flicker.
- Hanging Heavy Decor: Ensure mirrors and heavy framed art above the bed are anchored securely into wall studs using proper hardware.
- Keep Pathways Clear: Avoid stacking excessive floor cushions, long electrical cords, or heavy baskets in walkways to prevent trips in the dark.
- Gentle Adhesives: Use wall-safe hanging strips if you are renting, preventing paint damage when removing seasonal garlands or wall prints.
8 Detailed Cozy Fall Bedroom Decor Ideas
1. Layered Chunky Knit and Waffle-Weave Bedding
    +-------------------------------------------------------+
    |                      HEADBOARD                        |
    +-------------------------------------------------------+
    |  [ Euro Pillow ]   [ Euro Pillow ]   [ Euro Pillow ]  |
    |  [ Standard Bed Pillow ]   [ Standard Bed Pillow ]    |
    |         ( Textured Fall Accent Pillows )              |
    +-------------------------------------------------------+
    |                                                       |
    |                  MAIN DUVET COVER                     |
    |               (Neutral Linen or Cotton)               |
    |                                                       |
    +-------------------------------------------------------+
    | ======= FOLDED CHUNKY KNIT THROW OVER FOOT ========= |
    +-------------------------------------------------------+
Overview
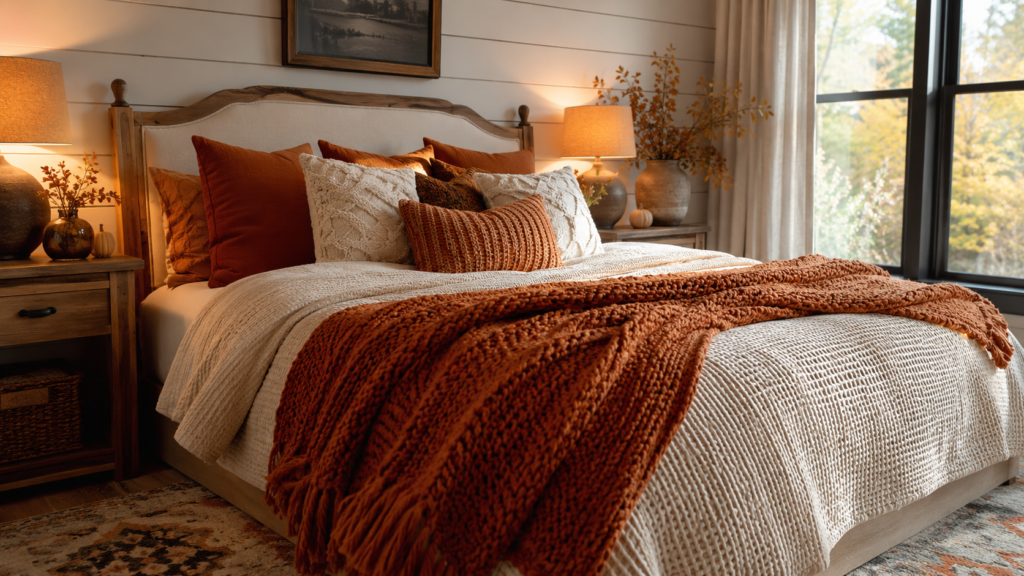
Layered bedding is the secret to getting that hotel-quality, ultra-cozy Pinterest look. Combining different fabrics like crisp cotton, heavy waffle weaves, and chunky chenille knits adds depth and physical warmth without feeling cluttered.
Why You’ll Love This Idea
It instantly turns your bed into a cloud-like focal point. You don’t need to buy a brand-new mattress or bed frame—just changing your textiles transforms the entire atmosphere.
Materials Needed
- 1 Neutral cotton or linen duvet cover set
- 1 Oversized waffle-weave blanket
- 1 Hand-knitted chunky yarn throw blanket
- 2-4 Decorative throw pillow covers (velvet or corduroy)
Step-by-Step Instructions
- Strip and Refresh: Strip your bed and put on clean, crisp sheet sets in off-white or cream.
- Lay the Base Duvet: Spread your main duvet cover neatly across the mattress, smoothing out large wrinkles.
- Add the Mid-Layer: Take your waffle-weave blanket and fold it in half. Drape it across the middle-to-bottom section of the bed.
- Fold Back the Top: Fold the top top-sheet and duvet back about 12 inches to expose the layered sheets beneath.
- Drape the Chunky Knit: Artfully drape or loosely fold your chunky knit throw blanket across the foot of the bed at an angle.
- Arrange Sleep Pillows: Prop up your main sleeping pillows flat against the headboard.
- Add Accent Pillows: Place two textured accent pillows (like rust velvet or mustard corduroy) directly in front of the sleeping pillows.
- Final Styling Fluff: Lightly fluff all pillows and pinch the edge of the chunky throw for a relaxed, lived-in feel.
Beginner Tips
Stick to neutral bases (cream, light beige, soft gray) for main sheets and duvets, saving bold fall colors for your removable throws and pillow covers.
Common Mistakes to Avoid
- Over-matching textures—mixing smooth linen with heavy knits creates better contrast than using all knits.
- Tucking everything in too tightly; fall beds should look soft, approachable, and relaxed.
Styling or Decorating Ideas
Pair this layered look with a small wooden tray placed on top of the folded blanket holding a ceramic mug and a decorative autumn book.
Best Colors and Materials
- Colors: Cream, oat, caramel, warm cinnamon, terracotta.
- Materials: Chunky yarn, waffle cotton, crushed velvet, washed linen.
Project Details
- Estimated Cost: $45 – $120
- Estimated Time: 20 minutes
- Difficulty Level: Very Easy
- Where It Looks Best: Primary bedrooms, guest rooms, studio apartments.
Pinterest-Worthy Tip
Fold the end of your throw blanket over diagonally and let one corner gently cascade off the edge of the bed toward the floor.
Conclusion
Layering textured bedding is the simplest, most effective way to start your autumn home makeover. It gives your room an inviting aesthetic while keeping you ultra-warm on chilly nights.
2. Warm Fairy Light Canopy and Headboard Backdrop
Overview
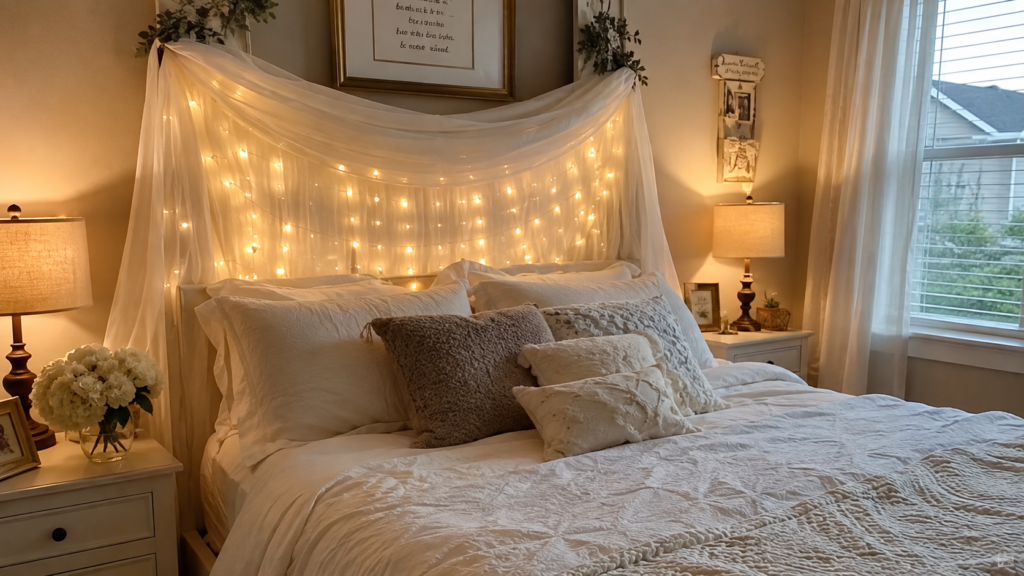
Bring a magical, warm ambient glow to your bedroom by stringing warm white fairy lights behind your headboard or draped through sheer curtain panels.
Why You’ll Love This Idea
Overhead room lighting can feel harsh and bright. Fairy light canopies create a soothing, low-light environment that helps you unwind, read, and relax before sleep.
Materials Needed
- 1 Strand of warm-white LED copper string lights (30–50 ft)
- 2 Sheer white or beige curtain panels
- Clear wall-safe command hooks
- 1 Light curtain rod or tension rod
Step-by-Step Instructions
- Measure Space: Measure the wall space directly behind your bed frame or headboard.
- Install Hooks: Attach 3 to 4 clear command hooks along the top edge of the wall near the ceiling.
- Hang Curtain Rod: Rest a lightweight curtain rod across the installed hooks.
- Drape Sheer Panels: Slide sheer fabric panels onto the rod so they fall gracefully down behind the headboard.
- Weave String Lights: Zigzag your warm LED lights behind or through the sheer fabric layers.
- Secure Cords: Use small adhesive wire clips to run the power cord discreetly down along the baseboard to the nearest outlet.
- Test Lighting: Turn off main ceiling lights and adjust light placement for an even glow.
Beginner Tips
Always select “warm white” (around 2700K temperature) bulbs rather than “cool white” or blue-toned LED lights to achieve a cozy, relaxing ambiance.
Common Mistakes to Avoid
- Using heavy glass bulbs that pull down wall hooks.
- Leaving exposed, messy black or bright green cords hanging down the wall.
Styling or Decorating Ideas
Combine the lit canopy with a woven leaf garland or small dried floral bundles clipped onto the light wires with mini wooden clothespins.
Best Colors and Materials
- Colors: Warm amber light, soft ivory fabric, sheer beige.
- Materials: Copper wire lights, sheer chiffon or linen organza.
Project Details
- Estimated Cost: $20 – $40
- Estimated Time: 45 minutes
- Difficulty Level: Easy
- Where It Looks Best: Small bedrooms, dorm rooms, cozy attic bedrooms.
Pinterest-Worthy Tip
Dim the main lights completely and capture photos during evening blue hour to make the amber glow stand out against soft shadows.
Conclusion
A fairy light canopy brings enchanting warmth to any bedroom setting, instantly creating an aesthetic retreat for chilly autumn evenings.
3. Rustic Wooden Tray Nightstand Vignette
| Item Component | Recommended Material | Color Palette |
| Decorative Base | Reclaimed Oak or Pine | Natural Brown / Walnut |
| Focal Botanical | Amber Glass Vase | Dried Pampas or Wheat |
| Warm Lighting | Ceramic Pillar Holder | Muted Gold / White |
| Accent Accent | Mini Velvet Pumpkins | Rust Orange / Mustard |
Overview
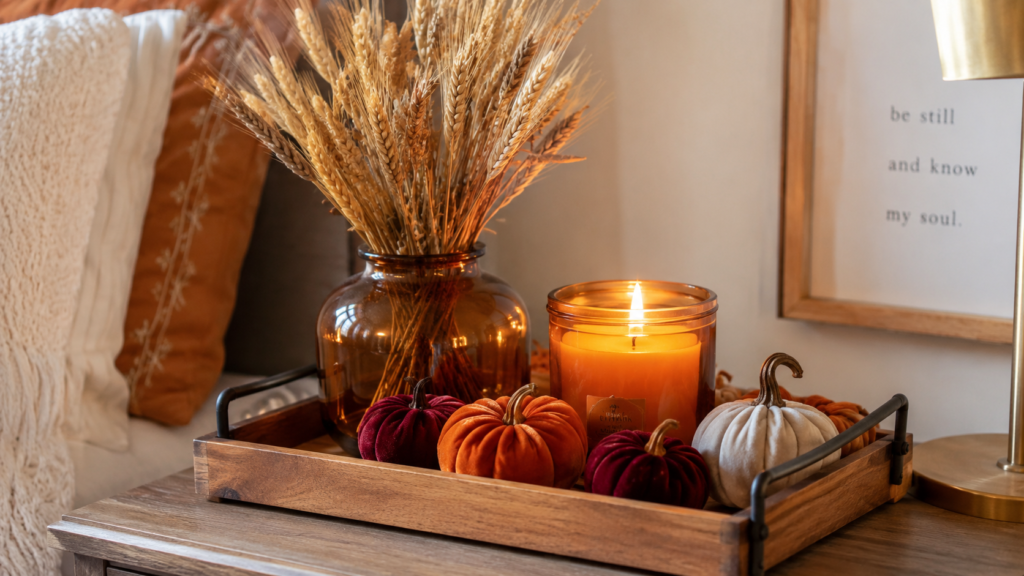
A styled bedside table vignette sets a cozy mood every time you wake up or go to bed. Utilizing a wooden tray organizes your autumn essentials into a tidy, beautiful display.
Why You’ll Love This Idea
It prevents nightstand clutter while instantly updating your decor in under 10 minutes using small seasonal accents.
Materials Needed
- 1 Round or rectangular rustic wooden tray
- 1 Small amber glass vase
- 3–5 Stems of dried wheat or pampas grass
- 1 LED pillar candle
- 2 Fabric or mini faux velvet pumpkins
Step-by-Step Instructions
- Clear Nightstand: Wipe down and clear off your bedside table completely.
- Place Anchor Tray: Position your rustic wooden tray centrally or slightly offset on the table surface.
- Add Height with Vase: Place your amber glass vase on one side of the tray to add structural height.
- Insert Botanicals: Trim your dried wheat stems and drop them inside the vase.
- Set Pillar Candle: Place an LED candle next to the vase for warm illumination.
- Group Mini Pumpkins: Cluster two or three mini velvet pumpkins around the base of the candle and vase.
- Add Final Touch: Rest your favorite paperback book or mug coaster inside the open tray space.
Beginner Tips
Follow the “rule of three” in interior styling—group items in odd numbers (1 vase, 1 candle, 1 pumpkin cluster) for visual balance.
Common Mistakes to Avoid
- Crowding the entire tray so there is no space left for practical items like your phone or water glass.
- Using real candles where sleeping arms or blankets might knock them over.
Styling or Decorating Ideas
Add a drop of cinnamon or clove essential oil to a terra cotta ring placed inside the tray to add a cozy fall scent.
Best Colors and Materials
- Colors: Deep amber, warm brown, burnt orange, off-white.
- Materials: Reclaimed wood, amber glass, velvet, dried grains.
Project Details
- Estimated Cost: $15 – $35
- Estimated Time: 10 minutes
- Difficulty Level: Very Easy
- Where It Looks Best: Bedside tables, dressers, vanity tops.
Pinterest-Worthy Tip
Capture a top-down angled photo featuring a steaming ceramic cup filled with coffee sitting next to the autumn tray setup.
Conclusion
This quick and simple nightstand vignette brings functional organization and rich autumn charm directly beside your bed.
4. Autumn Botanical Dried Floral Wall Gallery
Overview
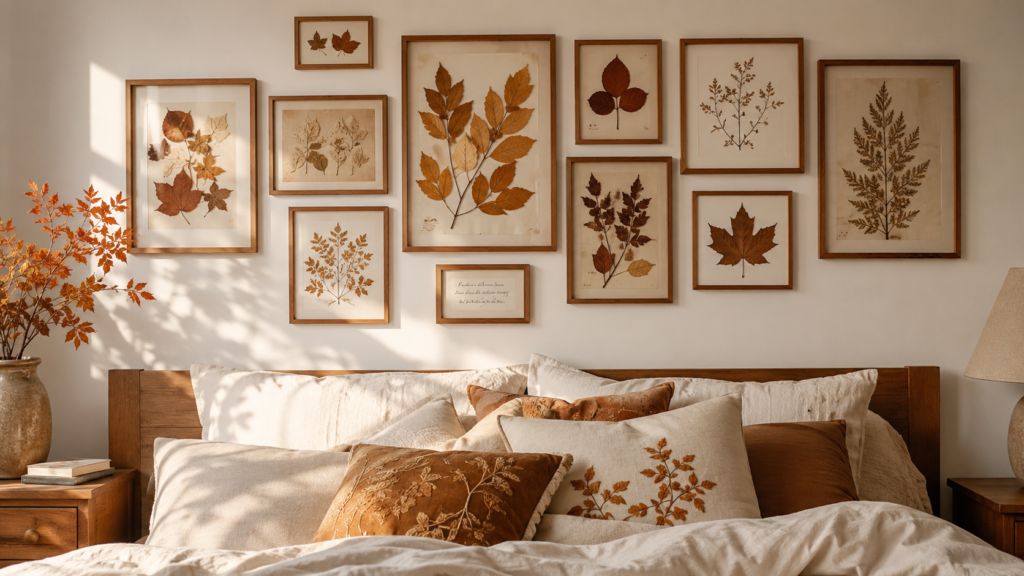
Swap out cool summer prints for a warm, fall-inspired gallery wall featuring dried floral frames, botanical prints, and warm wooden borders.
Why You’ll Love This Idea
It turns blank, plain walls into a high-end seasonal art feature. Using real dried leaves or botanical prints adds natural textures that bring nature indoors.
Materials Needed
- 3–4 Light oak or dark wood picture frames
- Printable autumn botanical art or pressed fall leaves
- Double-sided tape or photo mounting corners
- Wall hanging strips
Step-by-Step Instructions
- Select Artwork: Print warm-toned botanical artwork or collect real leaves (maple, oak) and press them inside heavy books for 3 days.
- Prep Frames: Remove glass and backing from your wooden picture frames.
- Mount Leaf/Art: Mount the pressed leaf or artwork in the center of matte cardstock using double-sided tape.
- Reassemble Frames: Clean the glass and reassemble the art inside the frames securely.
- Plan Layout: Lay your frames out on the floor in front of your bed to test layout spacing (2–3 inches apart).
- Mark Walls: Use painter’s tape to mark frame top edges on the wall above your dresser or bed.
- Mount Art: Secure the frames using wall-safe hanging strips, pressing firmly for 30 seconds.
Beginner Tips
Keep frame finishes consistent (all light wood or all vintage brass) to ensure your gallery wall feels cohesive rather than chaotic.
Common Mistakes to Avoid
- Hanging artwork too high—eyelevel (roughly 57 to 60 inches from the floor) is the ideal placement.
- Using wet, unpressed leaves that will decay and warp inside the frames over time.
Styling or Decorating Ideas
Hang a woven eucalyptus garland gently draped along the top frames to soften the straight lines of the picture frames.
Best Colors and Materials
- Colors: Sage green, mustard yellow, deep ochre, walnut brown.
- Materials: Pressed leaves, natural oak wood, matte linen paper.
Project Details
- Estimated Cost: $25 – $50
- Estimated Time: 1 hour
- Difficulty Level: Intermediate
- Where It Looks Best: Above the bed headboard or opposite a reading nook.
Pinterest-Worthy Tip
Stagger frame sizes—mix one large 11×14 frame with two smaller 8×10 frames for a curated, designer look.
Conclusion
A seasonal botanical wall gallery introduces organic shapes, rich autumn tones, and timeless natural beauty into your bedroom space.
5. Earthy Accent Pillow Refresh
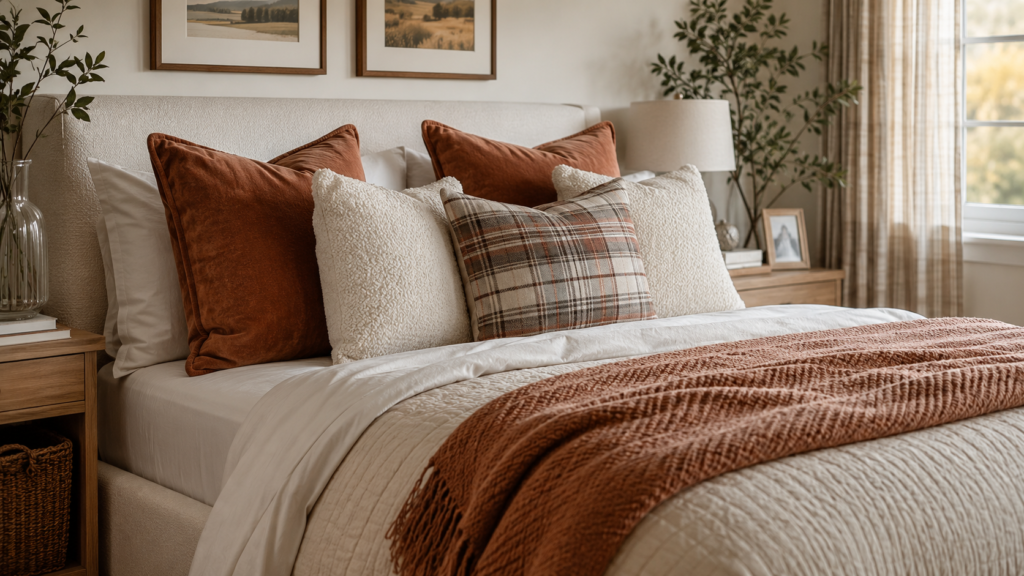
[ Headboard ]
|
+--- [ Back Layer: 24"x24" Neutral Textured Euro Shams ]
|
+--- [ Middle Layer: 20"x20" Earthy Velvet Pillows (Rust/Terracotta) ]
|
+--- [ Front Layer: 12"x20" Patterned Lumbar Pillow (Plaid/Bouclé) ]
Overview
Swapping accent pillow covers is one of the fastest tricks designers use to transform a space. Replace bright summer tones with rich earthy hues like pumpkin spice, warm terracotta, deep sage, and chocolate brown.
Why You’ll Love This Idea
Pillow covers take up minimal storage space when off-season, making this project ultra-convenient for rental apartments and budget decorators.
Materials Needed
- 2 Neutral 24×24 inch Euro sham covers
- 2 Terracotta or rust velvet 20×20 inch pillow covers
- 1 Patterned lumbar pillow cover (plaid, bouclé, or houndstooth)
- High-quality feather or faux-down pillow inserts
Step-by-Step Instructions
- Remove Old Covers: Unzip existing summer pillow covers and set them aside for spring.
- Stuff Pillow Inserts: Insert feather or plush down inserts into your new autumn covers, gently pushing filling into corners.
- Place Base Shams: Set the two large neutral Euro shams against your bed’s headboard.
- Layer Velvet Covers: Position the two terracotta velvet square pillows directly in front of the Euro shams.
- Center Lumbar Accent: Place the patterned lumbar pillow directly in the center front to tie the composition together.
- Karate Chop Finish: Give each pillow a soft “karate chop” down the top center to create an inviting, custom shape.
Beginner Tips
Buy pillow covers that are 2 inches smaller than your inserts (e.g., an 18×18 cover over a 20×20 insert) for a plump, high-end look.
Common Mistakes to Avoid
- Mixing too many competing bold patterns—stick to one pattern and two solid textures.
- Using flat, cheap polyester poly-fill inserts that look stiff and uninviting.
Styling or Decorating Ideas
Echo your pillow colors around the room by draping a matching rust-colored scarf over a nearby chair or vanity mirror.
Best Colors and Materials
- Colors: Terracotta, cinnamon, olive, cream, chocolate brown.
- Materials: Plush velvet, textured bouclé, cable knit, linen.
Project Details
- Estimated Cost: $30 – $60
- Estimated Time: 15 minutes
- Difficulty Level: Very Easy
- Where It Looks Best: Beds, accent armchairs, window seats.
Pinterest-Worthy Tip
Group pillows asymmetrical on an accent chair with a soft throw draped under them for a quick aesthetic snapshot.
Conclusion
An accent pillow refresh updates your color palette instantly, making your bed look rich, layered, and delightfully cozy for fall.
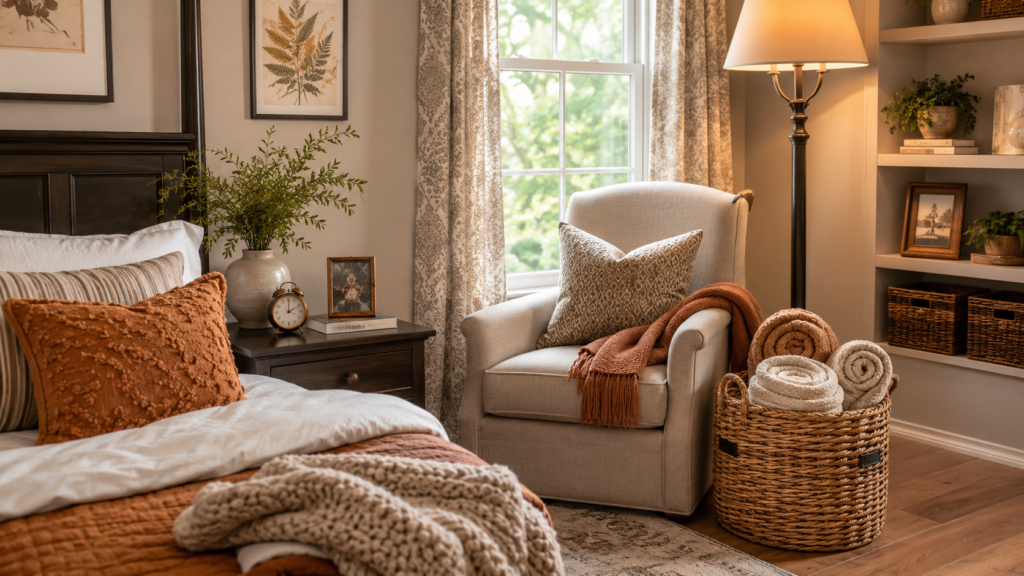
6. Cozy Reading Nook with Woven Floor Baskets
Overview
Turn an underutilized bedroom corner into an inviting fall reading nook complete with an oversized armchair, woven basket storage, and warm blankets.
Why You’ll Love This Idea
It creates a dedicated sanctuary for quiet mornings, journaling, and enjoying books away from digital screens.
Materials Needed
- 1 Cozy accent chair or floor cushion
- 1 Large woven seagrass or rattan floor basket
- 2 Rolled fleece or plush throw blankets
- 1 Floor lamp with warm bulb
- 1 Small side table or stool
Step-by-Step Instructions
- Clear Corner: Select a vacant corner in your bedroom, ideally near a window.
- Position Chair: Angle your accent chair toward the center of the room to create an open, welcoming feeling.
- Place Floor Lamp: Set up a warm floor lamp behind or beside the chair for target reading light.
- Set Up Basket: Position a wide woven basket beside the chair base.
- Roll and Store Throws: Neat fold or roll two plush extra blankets and place them upright inside the basket.
- Add Side Table: Place a compact wooden stool next to the chair to hold a warm drink and books.
- Complete with Cushion: Add a single warm lumbar pillow to the chair for ergonomic back support.
Beginner Tips
If you don’t have room for a full armchair, layer a faux sheepskin rug on the floor with two oversized floor pillows to build a floor-level reading spot.
Common Mistakes to Avoid
- Blocking bedroom doorways or closet access with large furniture.
- Using cold, bright daylight bulbs in reading nook lamps.
Styling or Decorating Ideas
Place a small wool area rug under the nook chair to anchor the floor space and add extra foot warmth over cold hardwood.
Best Colors and Materials
- Colors: Oat, warm taupe, forest green, natural rattan brown.
- Materials: Rattan, seagrass, sheepskin fur, soft fleece.
Project Details
- Estimated Cost: $60 – $150
- Estimated Time: 30 minutes
- Difficulty Level: Easy
- Where It Looks Best: Bedroom corners, beside large windows.
Pinterest-Worthy Tip
Place an open book face-down on the side table next to a steaming mug with a steam trail rising into soft light.
Conclusion
Building a dedicated fall reading nook transforms empty corner space into a functional, relaxing sanctuary you will look forward to using every day.
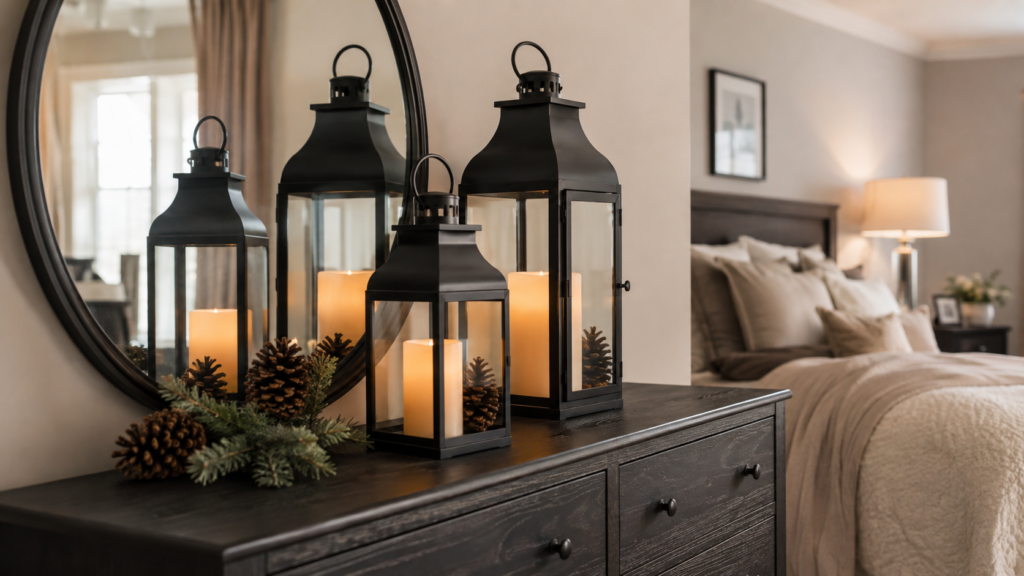
7. Warm Ambient Candle & Lantern Display
Overview
Introduce rich depth and serene relaxation through a styled collection of battery-operated candles placed inside lantern housings across your room.
Why You’ll Love This Idea
Warm candle glow signals your brain that it is time to rest. LED flameless candles give you all the romantic glow without risk of fire or soot.
Materials Needed
- 3 Lanterns of varying heights (matte black, metal, or raw wood)
- 3 LED flameless pillar candles with built-in timers
- Faux autumn leaf garland or pinecones
Step-by-Step Instructions
- Choose Location: Select a safe surface like a fireplace mantel, dresser top, or windowsill.
- Arrange Lanterns: Place the three lanterns together, staggering their heights (e.g., 12-inch, 10-inch, and 8-inch lanterns).
- Insert LED Candles: Set one flameless pillar candle inside each lantern base.
- Set Automatic Timers: Program the candles to turn on automatically every evening around 6:00 PM.
- Wrap Garland Base: Weave a thin faux autumn leaf or berry garland around the outer bases of the lanterns.
- Add Natural Touches: Tuck three or four real pinecones near the base of the displays for natural texture.
Beginner Tips
Look for LED candles with realistic flickering wicks and real wax exteriors to give them an authentic appearance.
Common Mistakes to Avoid
- Placing lanterns in a straight line—clustering them at varying heights produces a far more artistic look.
- Mixing bright yellow LED flickers with harsh white LEDs.
Styling or Decorating Ideas
Place this lantern arrangement inside an unused decorative fireplace or on top of a low storage bench at the foot of your bed.
Best Colors and Materials
- Colors: Warm flame amber, matte black, brushed brass, natural pine brown.
- Materials: Metal, glass, real wax LED candles, pinecones.
Project Details
- Estimated Cost: $35 – $70
- Estimated Time: 20 minutes
- Difficulty Level: Very Easy
- Where It Looks Best: Dressers, mantels, wide windowsills.
Pinterest-Worthy Tip
Dim all main bedroom lights and shoot your photo during dusk so the warm amber flickers reflect off window glass.
Conclusion
A flame-free candle and lantern setup provides safe, cozy ambient lighting that instantly lowers stress levels after long days.
16:9 Image Prompt
Ultra-realistic Pinterest-quality photography of a bedroom dresser displaying matte black lanterns filled with warm flickering flameless candles and pinecone accents, elegant styling, natural daylight mixed with warm ambient glow, modern home decor, highly detailed textures, premium craftsmanship, cozy atmosphere, soft shadows, magazine-quality interior photography, realistic colors, ultra HD, DSLR, 16:9 aspect ratio.
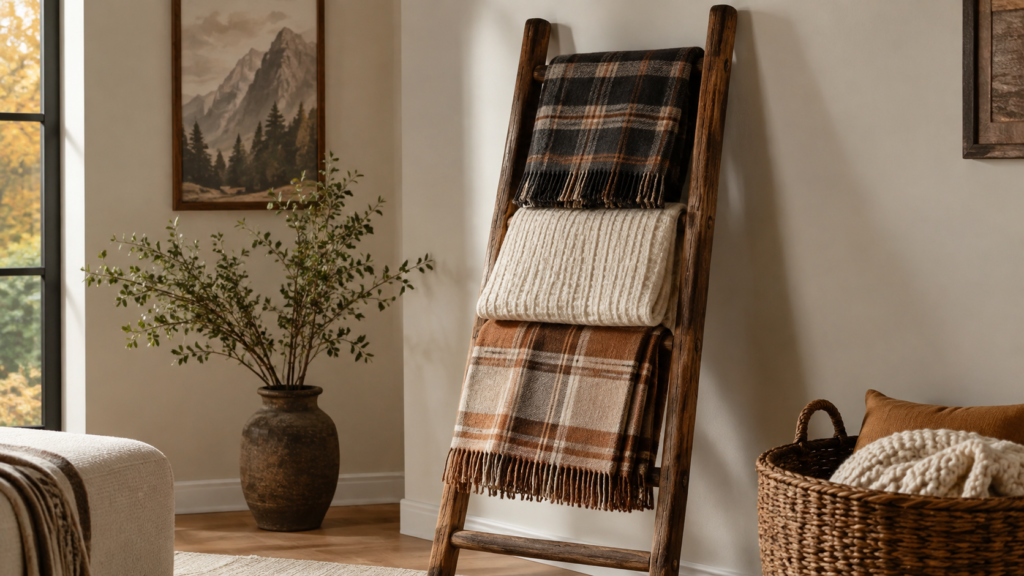
8. Plaid and Wool Throw Blanket Ladder Display
Overview
A rustic wooden blanket ladder is an attractive, space-saving way to display your favorite seasonal plaid, wool, and knitted blankets.
Why You’ll Love This Idea
It turns functional extra bedding into stylish wall art while keeping blankets organized and within easy arm’s reach on cold nights.
Materials Needed
- 1 Wooden blanket ladder (5–6 feet tall)
- 3–4 Autumn throw blankets (plaid, tartan, oversized wool)
- Wall protection felt pads
Step-by-Step Instructions
- Attach Felt Pads: Stick soft felt furniture pads onto the top tips and bottom feet of the ladder to protect your walls and floor from scratches.
- Position Ladder: Lean the ladder against an open wall at a slight 15-degree angle, about 12 inches out from the baseboard.
- Fold Blankets: Neat fold your throw blankets lengthwise into long, uniform strips (about 10–12 inches wide).
- Hang on Rungs: Drape one blanket over each rung, starting from the bottom and working upward.
- Smooth and Layer: Allow the ends of the blankets to hang evenly, smoothing out any bunching or diagonal creases.
- Style Top Rung: Wrap a light autumn berry garland or hang a small felt hat on the top ladder peg for added flair.
Beginner Tips
Put your thickest, heaviest blanket on the bottom rung to keep the ladder visually balanced and grounded.
Common Mistakes to Avoid
- Overloading the ladder with too many bulky blankets so it leans dangerously.
- Leaving the ladder feet unanchored on slippery hardwood floors without non-slip pads beneath them.
Styling or Decorating Ideas
Wrap a thin strand of micro fairy lights down the wooden side rails of the ladder to highlight blanket textures at night.
Best Colors and Materials
- Colors: Tartan plaid, forest green, deep red, cream, camel brown.
- Materials: Natural reclaimed wood, wool, fringe yarn, plaid flannel.
Project Details
- Estimated Cost: $30 – $75
- Estimated Time: 15 minutes
- Difficulty Level: Very Easy
- Where It Looks Best: Next to dressers, beside armchairs, on empty accent walls.
Pinterest-Worthy Tip
Angle the ladder slightly and fold the top blanket so that a soft fringe trim hangs lower than the rest.
Conclusion
A blanket ladder is a timeless, functional autumn accent that fills empty wall space while showcasing cozy winter fabrics beautifully.
Expert Decorating Tips for Fall
- Focus on Texture over Pattern: If you prefer neutral colors, lean heavily on mixed textures (bouclé, chunky knits, velvet, smooth linen) to keep the room visually dynamic without relying on busy prints.
- Layer Your Lighting: Rely on a three-tier lighting scheme—ambient overhead lights (dimmed), task lights (bedside reading lamps), and accent lighting (fairy lights and battery candles).
- Bring Nature Indoors: Collect branches, dried wheat stalks, or real pinecones during outdoor walks. Natural elements cost nothing and bring authentic seasonal charm into your room.
- Engage All Five Senses: Beyond visuals, use warm fall fragrances like cinnamon, spiced apple, cedarwood, and vanilla via reed diffusers or room sprays to complete the experience.
Budget-Saving Tips for Autumn Bedroom Decor
                 +-----------------------------------+
                 |    SMART FALL DECOR SAVINGS       |
                 +-----------------------------------+
                                   |
        +--------------------------+--------------------------+
        |                                                     |
  [ SHOP YOUR HOME ]                                   [ DIY & NATURE ]
  • Swap pillows from living room                      • Collect leaves & pinecones
  • Re-purpose wooden trays                            • Press leaves in wood frames
  • Re-arrange warm lamps                              • DIY yarn tassels on throws
        |                                                     |
        +--------------------------+--------------------------+
                                   |
                         [ SMART PURCHASES ]
                         • Buy pillow COVERS only
                         • Shop thrift stores for glass/wood
                         • Multi-season LED candle sets
- Buy Pillow Covers, Not Whole Pillows: Instead of purchasing brand-new stuffed pillows every season, buy removable pillow covers. They cost a fraction of the price and store flat in closets.
- Thrift for Glass and Wood: Thrift stores and secondhand shops are goldmines for vintage wooden trays, brass candle holders, and amber glass bottles at rock-bottom prices.
- DIY Dried Florals: Don’t pay high prices for pre-dried flower bouquets at specialty boutiques. Buy fresh eucalyptus or harvest wild pampas grass, tie them upside down with string, and let them air-dry at home for free.
- Shop End-of-Season Sales: Purchase higher-priced items like wool throw blankets or battery-operated candle sets right at the end of the season when retailers discount fall inventory.
Frequently Asked Questions
1. How can I make my bedroom feel cozy for fall on a small budget?
Focus on low-cost high-impact swaps: change pillow covers, add a warm-toned throw blanket to the foot of your bed, and use ambient lighting like warm string lights or flameless candles.
2. What are the best colors for fall bedroom decor?
Popular fall palettes include warm neutrals (cream, oat, camel) paired with deep accents like terracotta, rust, burnt orange, mustard yellow, sage green, and rich chocolate brown.
3. How do I transition my bedroom from summer to fall smoothly?
Start by swapping light linen bedding for warmer duvet covers and waffle-weave layers. Replace bright, floral pillow covers with rich textures like velvet or corduroy and introduce warm amber accent lighting.
4. Are real candles or LED candles better for bedroom decor?
LED flameless candles are far better and safer for bedroom environments. They eliminate fire risks near loose bedding or curtains and can be set on automatic timers to glow every night effortlessly.
5. How can I decorate a small bedroom for fall without cluttering it?
Utilize vertical space instead of floor space. Decorate with a gallery wall of pressed leaves, hang string lights across your headboard, or drape a fall blanket over your existing bed setup.
6. Where is the best place to buy affordable fall bedroom decor?
Target, IKEA, HomeGoods, thrift stores, and Amazon offer excellent budget decor options. Look for sales on seasonal throw pillow covers and dried floral bunches.
7. What texture combinations work best for autumn bedding?
Mixing crisp cotton or linen sheets with a heavy waffle-weave mid-layer and a chunky chenille knit or wool throw blanket creates an ideal, cozy balance of textures.
8. How do I make my fall decor look chic rather than tacky?
Avoid overusing bright plastic Halloween items or unnatural orange tones. Stick to sophisticated natural textures, warm wood tones, muted earthy shades, and real dried botanicals.
Final Thoughts
Creating a cozy fall bedroom is all about curating a soothing space that nourishes your mind and body during the cooler months. By focusing on rich layers, soft ambient illumination, organic textures, and warm earthy tones, you can easily turn your room into a peaceful autumn sanctuary.
Remember, you don’t need to implement every idea on this list at once. Start with one simple project—like updating your accent pillow covers or setting up a warm nightstand tray—and build your seasonal sanctuary step-by-step. Embrace the process, light your favorite warm-scented candle, and enjoy every moment of your cozy new space!
Save This Pin!
Loved these ideas? Don’t lose them!
Click the Pin button on your screen to save this guide directly to your Cozy Fall Home Decor or Bedroom Aesthetic boards on Pinterest. That way, you’ll have all these step-by-step styling tips ready whenever you are set to start your seasonal makeover!