I will let you in on a little secret: my first apartment had the most boring blank walls you have ever seen, and the thing that finally made it feel like home cost me less than a pizza. A simple cork board, a wooden frame from a thrift store, and an afternoon of pinning up photos, quotes, and little mementos. That one project taught me something I still believe today: the best decor is personal, useful, and made by you.
Cork boards are one of the most versatile DIY materials out there. They organize your life, decorate your walls, and cost next to nothing. Whether you are decorating a home office, a bedroom, or a craft room, there is a cork board project here for you. Below are my 10 favorite cork board DIY ideas, each with simple steps and pro tips so your finished board looks like something straight out of a magazine.
Related: How to Make Stunning Burlap Flowers for Your Home Decor
10 Creative Cork Board Projects to Try
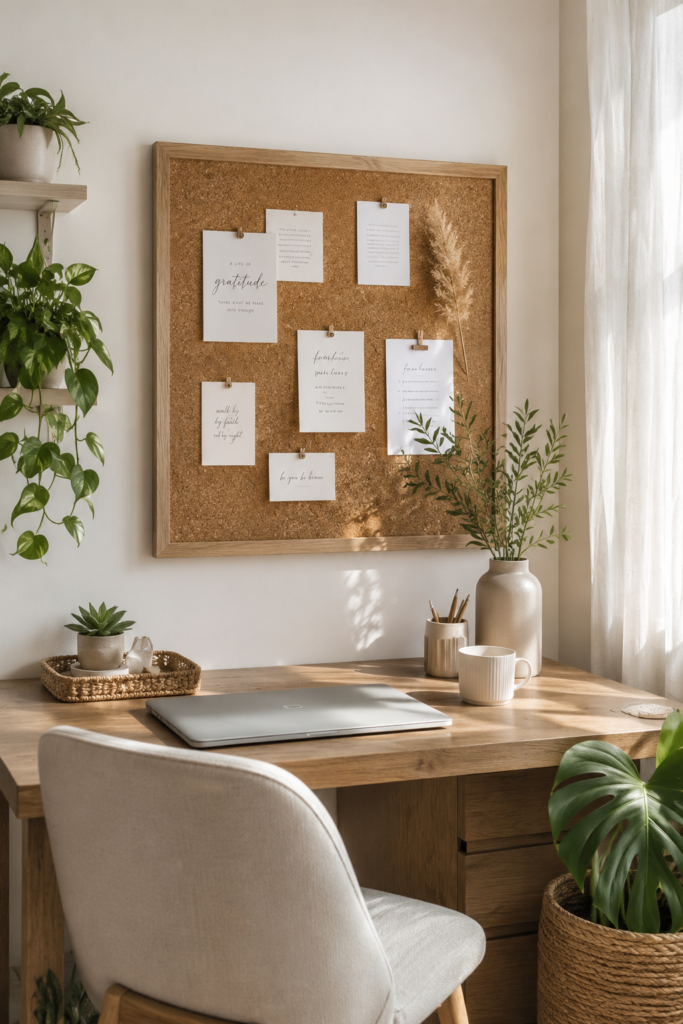
1. Minimalist Office Cork Board
If your desk area feels chaotic, this is the project to start with. A clean cork board in a natural wood frame instantly makes a workspace feel calm and intentional. Why it works: the Scandinavian-inspired look, neutral notes, white push pins, and zero clutter give every reminder a home without visual noise. Who it suits: home offices and study corners, and anyone who thinks more clearly in a tidy space.
How to make it: Start with a plain framed cork board. If the frame is not wood-toned, give it a coat of light wood stain or white paint. Mount it at eye level beside or above your desk using sturdy wall hooks. Stick to a limited color palette: white or kraft paper notes, black ink, and matching pins. Leave breathing room between items.
Pro tip: Dedicate zones on the board: one corner for this week’s priorities, one for reference info, one for inspiration. When a zone fills up, it is time to declutter.
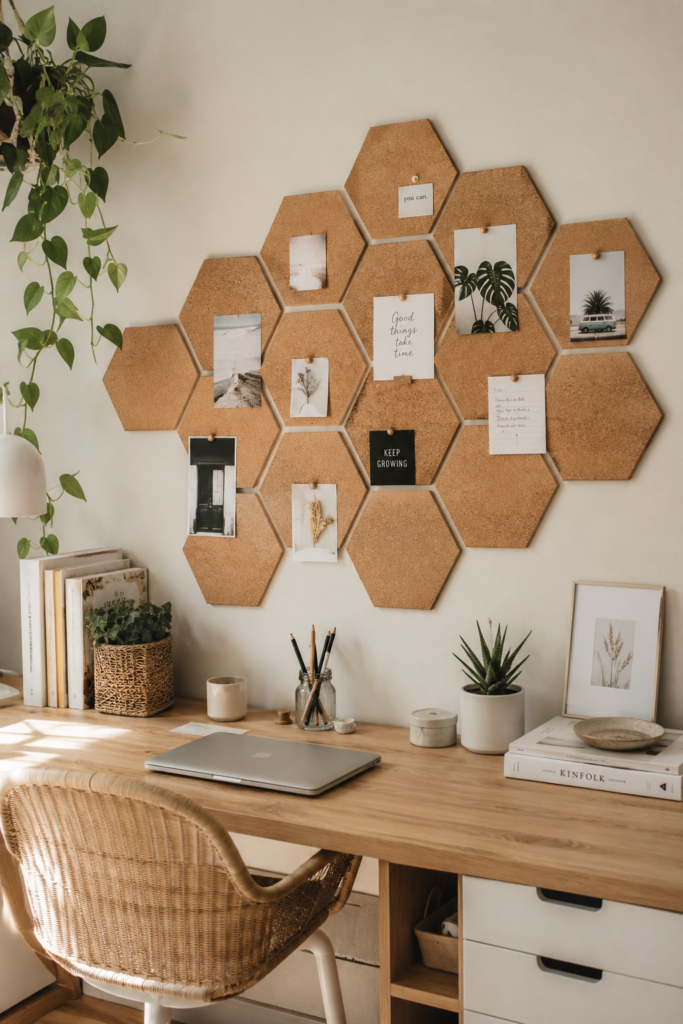
2. Hexagon Cork Board Wall
Why settle for one rectangle when you can build a honeycomb? Hexagon cork tiles turn a plain wall into a geometric art installation that grows with you. Why it works: you can start with just six tiles and add more over time, so there is no big commitment and no big cost up front. Who it suits: renters, mood board lovers, and creative studios that need an inspiring photo wall.
How to make it: Buy self-adhesive hexagon cork tiles, or cut your own from cork sheets with a craft knife and a hexagon template. Plan your layout on the floor first. Stick them to the wall in a honeycomb pattern, pressing firmly. Fill the tiles with photos, ticket stubs, quotes, and small prints.
Pro tip: If you are renting, use removable adhesive strips behind each tile instead of the built-in adhesive. Your walls will thank you when it is time to move out.
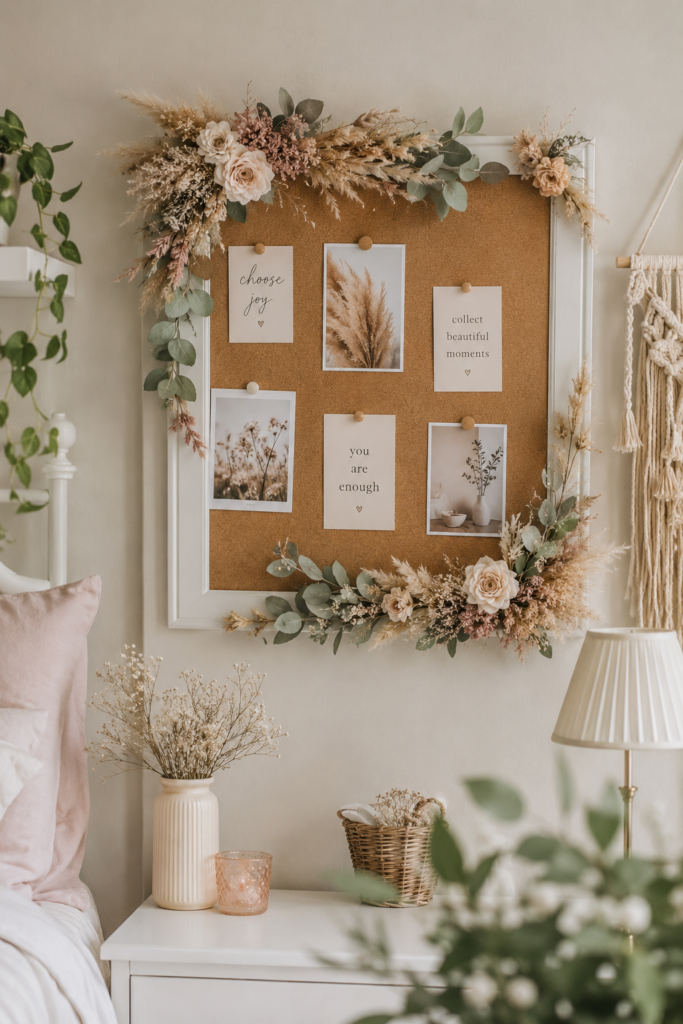
3. Floral Cork Board
This is the cork board for romantics. A simple board dressed up with faux flowers, trailing greenery, or dried pampas grass becomes a dreamy piece of bedroom decor. Why it works: the florals soften the utilitarian cork and turn an organizer into a decorative focal point. It is feminine without being fussy, and it photographs beautifully. Who it suits: bedrooms, dorm rooms, and anyone who loves a Pinterest-worthy space.
How to make it: Choose a framed cork board and hot-glue faux flowers and greenery along the top edge and down one side, letting a few pieces trail naturally. Dried pampas grass or lavender bundles work wonderfully for a softer look. Pin up Polaroids, love notes, and jewelry on delicate pins.
Pro tip: Stick to two or three flower colors that match your bedding. A limited palette keeps the board elegant instead of busy.
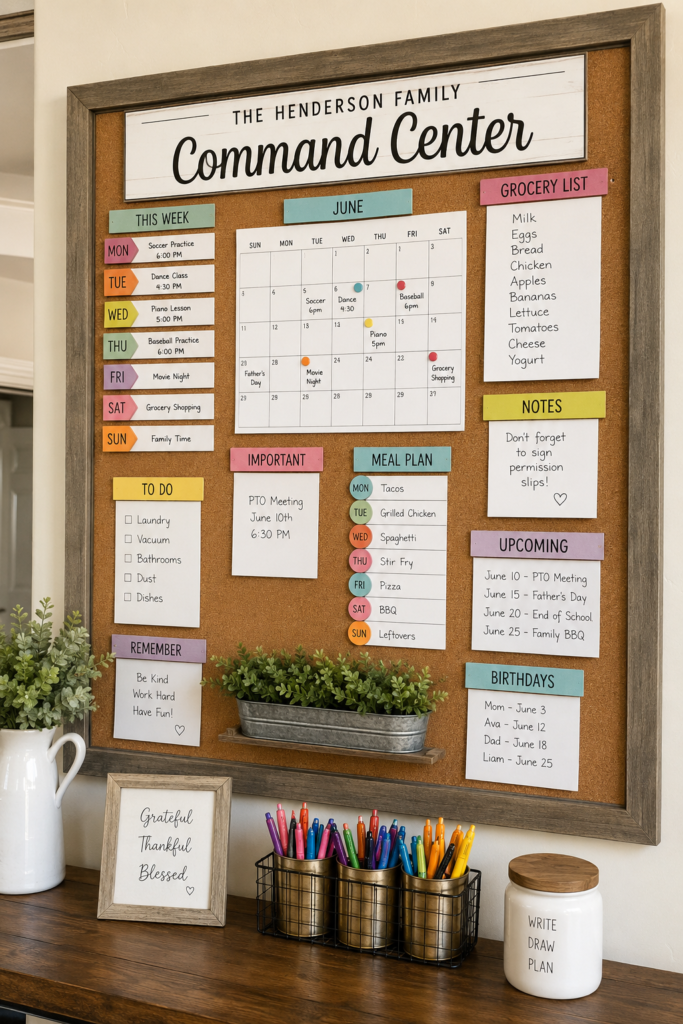
4. Family Command Center
If your household runs on sticky notes stuck to the fridge, you need a command center. A large cork board in the kitchen or hallway becomes mission control: weekly calendars, grocery lists, appointment reminders, chore charts, and permission slips, all in one visible spot. Why it works: when everyone can see the plan, the ‘I did not know about that’ problem disappears for good. Who it suits: busy families, shared apartments, and anyone juggling multiple schedules.
How to make it: Mount the largest cork board your wall can handle near the kitchen or entryway. Divide it into labeled sections with washi tape: calendar, shopping list, each family member’s commitments, and a take-action pocket for forms. Use different colored pins or cards per person. Update it every Sunday evening in five minutes.
Pro tip: Pin a small envelope or pouch to the board for coupons, tickets, and forms that need a signature. Paper with a home never gets lost.
5. Travel Memory Board
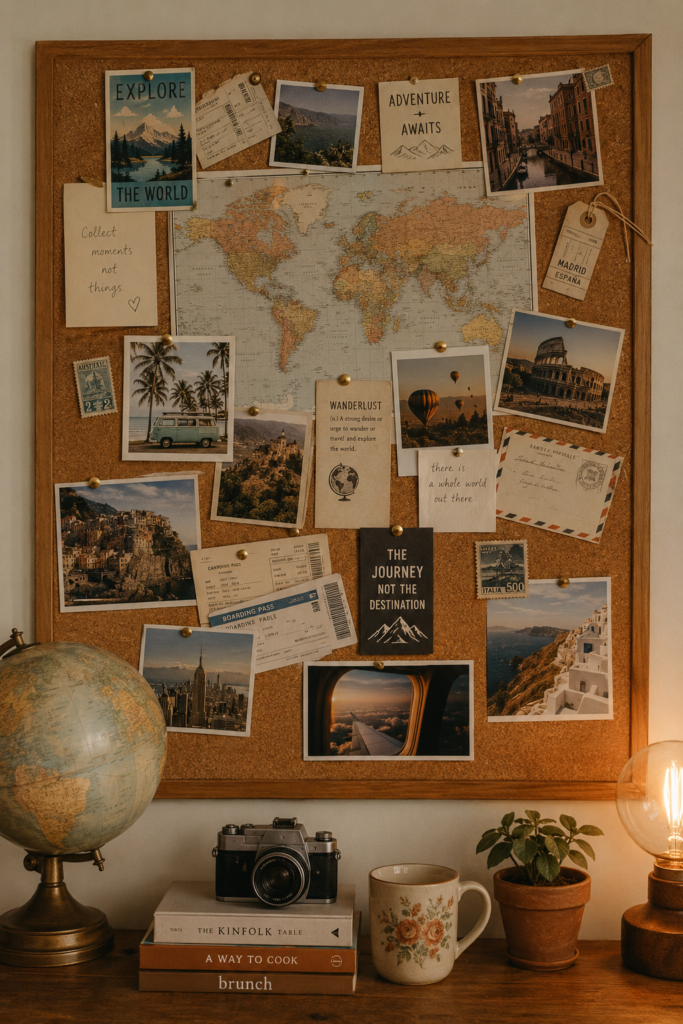
Souvenirs stuffed in a drawer do not spark joy, but a travel memory board does. Maps, postcards, plane tickets, coins, and vacation photos pinned to cork turn your adventures into daily inspiration. Why it works: every glance reminds you where you have been and gets you dreaming about where to go next. It is also a wonderful conversation piece when friends visit. Who it suits: travel lovers, study-abroad students, and memory keepers.
How to make it: Pin a large map as the background layer. Around it, arrange postcards, ticket stubs, photos, and small flat souvenirs like pressed coins or wristbands. Connect the places you have visited with string and tiny pins for a charming travel-route effect. Label each trip with the year on a small tag.
Pro tip: Leave empty space for future trips. A memory board that keeps growing is far more exciting than one that feels finished.
6. Vision Board
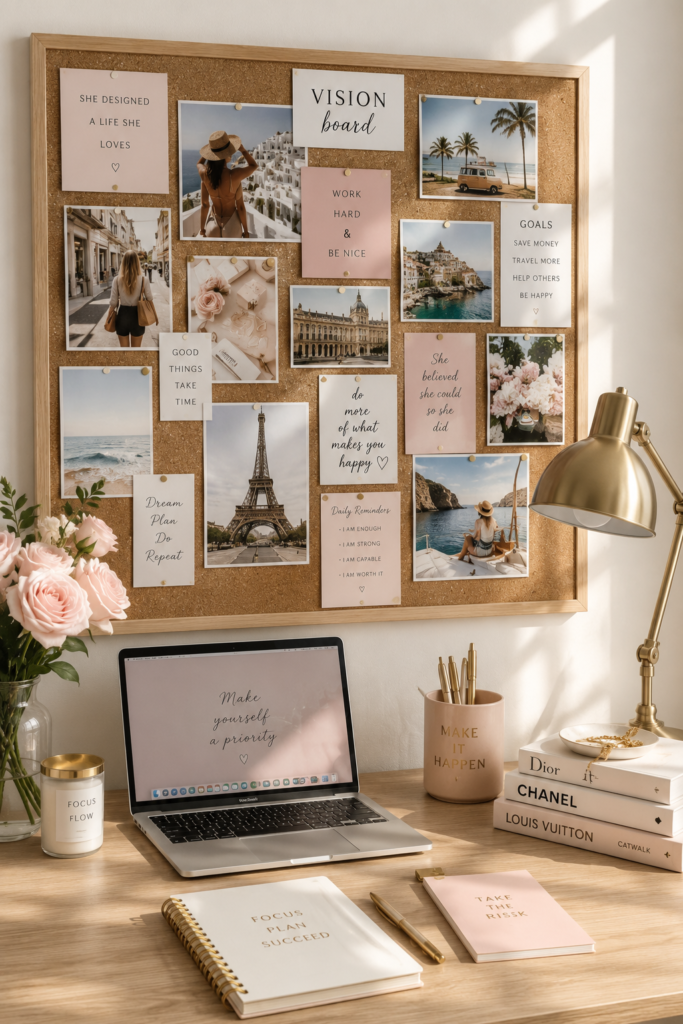
There is real power in seeing your goals every single day. A vision board collects the life you are working toward: magazine cutouts, printed quotes, photos of dream destinations, fitness goals, and career milestones. Why it works: placed where you will see it each morning, it becomes a daily dose of motivation that keeps your priorities front and center. Who it suits: goal setters, students, entrepreneurs, and anyone starting a fresh chapter.
How to make it: Gather magazines, printouts, and photos that represent your goals across categories: health, career, travel, relationships, and personal growth. Arrange them on the cork board before pinning anything, grouping by theme. Pin everything down, then add a few power words or affirmations in bold lettering.
Pro tip: Refresh your vision board every January and July. Goals evolve, and your board should evolve with them. Outdated goals quietly drain motivation.
7. Painted Color Block Cork Board
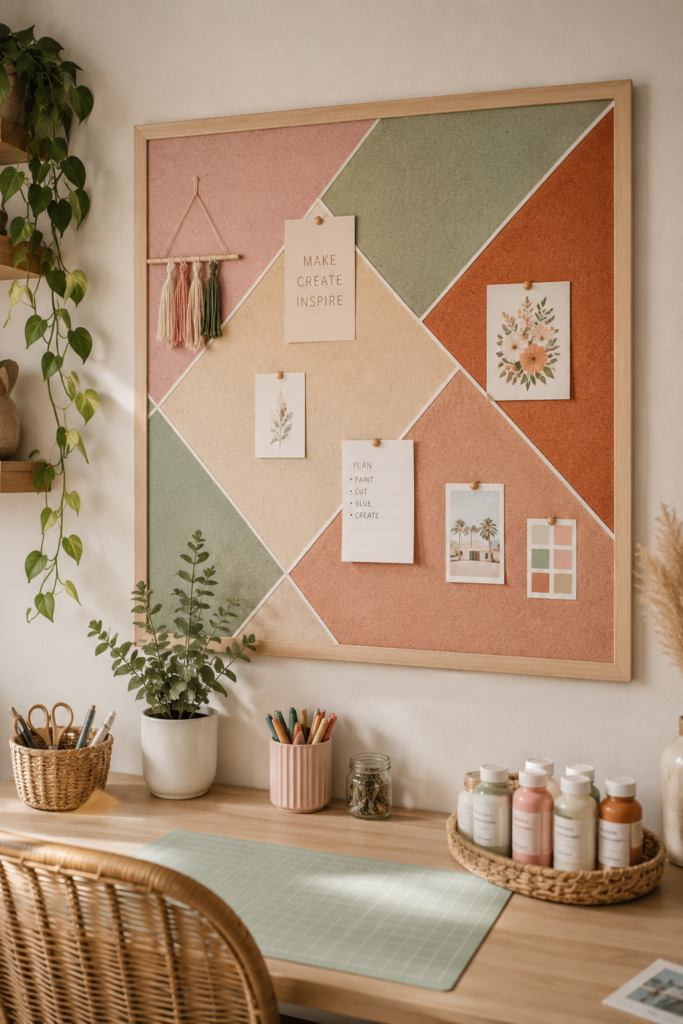
Plain cork is fine, but painted cork is art. By painting bold geometric sections or soft pastel color blocks directly onto the cork, you turn a humble organizer into a modern statement piece. Why it works: the painted design makes the board look intentional and designer-made, even though the technique could not be simpler. Who it suits: beginners, craft rooms, kids’ rooms, and modern or eclectic decor styles.
How to make it: Mask off sections with painter’s tape in geometric shapes: triangles, arches, or simple halves. Paint with acrylic craft paint in your chosen palette (two or three colors is plenty). Let it dry fully, remove the tape, and touch up any bleeds with a small brush. Mount and style with coordinating pins.
Pro tip: Paint the frame a contrasting color for extra impact. A black frame with pastel color blocks looks incredibly chic.
Related: 10 Random Things to Bedazzle for DIY Fun (Easy Sparkly Upgrades)
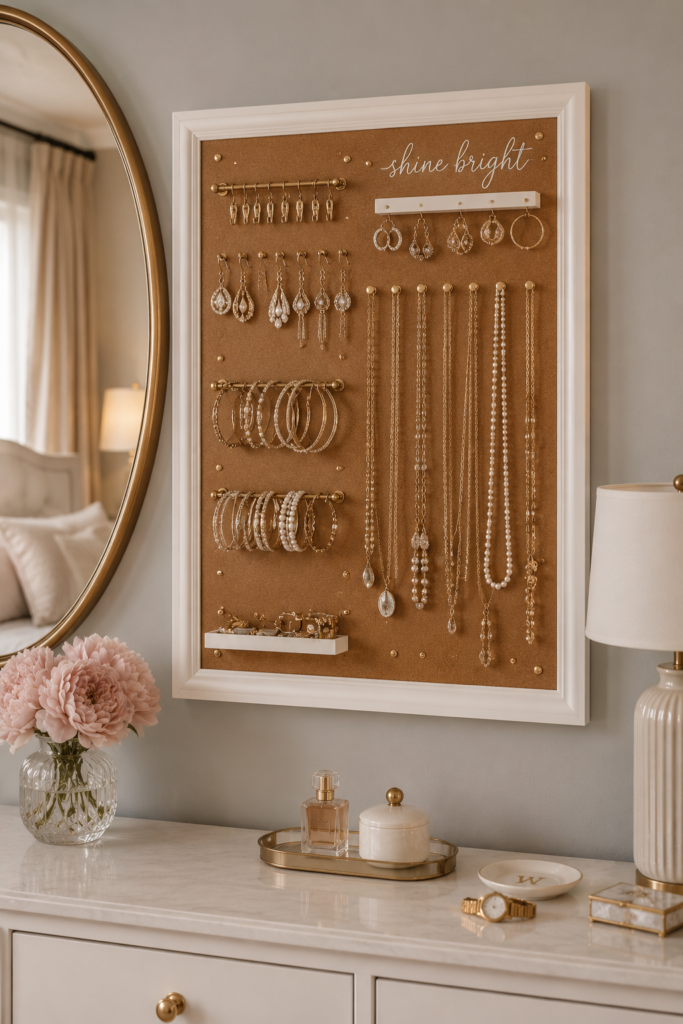
8. Jewelry Organizer Cork Board
Tangled necklaces are the worst, and jewelry boxes hide your prettiest pieces. A cork board jewelry organizer displays everything beautifully while keeping it tangle-free. Why it works: it doubles as wall decor, giving your bedroom that boutique-display look for almost no money, and you will actually wear what you can see. Who it suits: accessory lovers, small bedrooms with no dresser space, and dorm rooms.
How to make it: Screw small cup hooks into the bottom half of a framed cork board for necklaces and bracelets (pre-drill tiny pilot holes to avoid cracking the frame). Use decorative push pins across the top for earrings and brooches. Hang longer necklaces from the hooks so they do not tangle.
Pro tip: Line the back of the frame with a pretty fabric before inserting the cork. The fabric peeking around your jewelry looks far more expensive than it is.
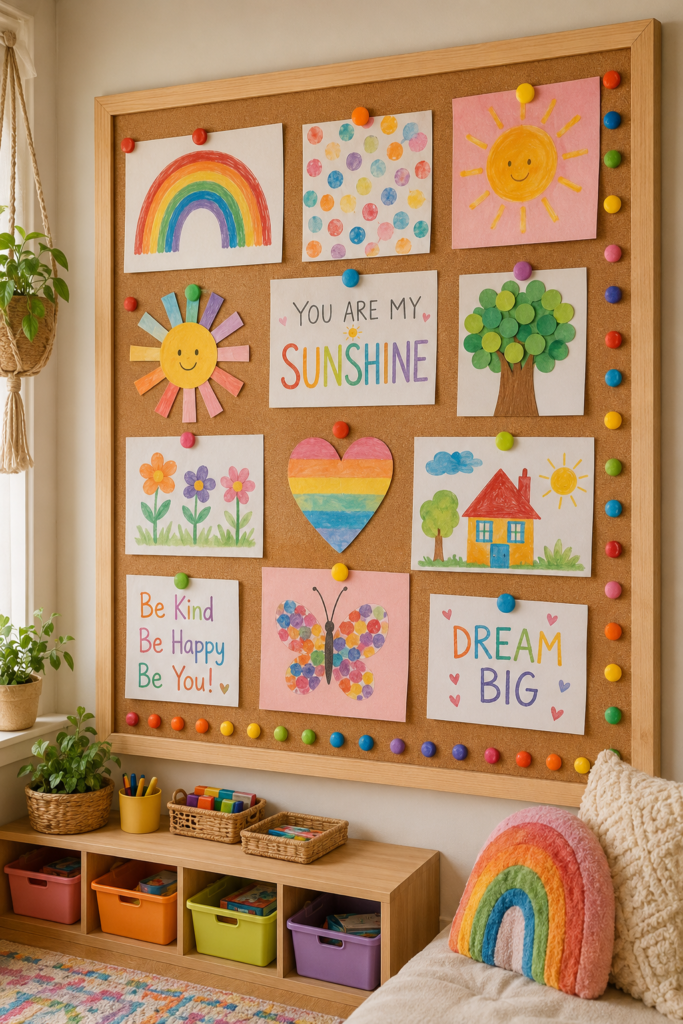
9. Kids’ Art Display Board
Kids produce an astonishing volume of artwork, and the fridge only holds so much. A dedicated art display board celebrates their creativity and makes rotating new masterpieces easy. Why it works: children love seeing their work honored on the wall, and it adds joyful color to any room. It also teaches them to curate and take pride in what they make. Who it suits: families with young artists, playrooms, and grandparents’ houses.
How to make it: Choose a large board and frame it in a bright color your child picks out. Mount it low enough for them to pin their own work with safe, chunky push pins (or use clips for little fingers). Let them curate which pieces go up. Swap in new art every few weeks and photograph old favorites before recycling.
Pro tip: Add a small ‘artist of the month’ label with your child’s name and age. It turns the board into a proud gallery they will treasure.
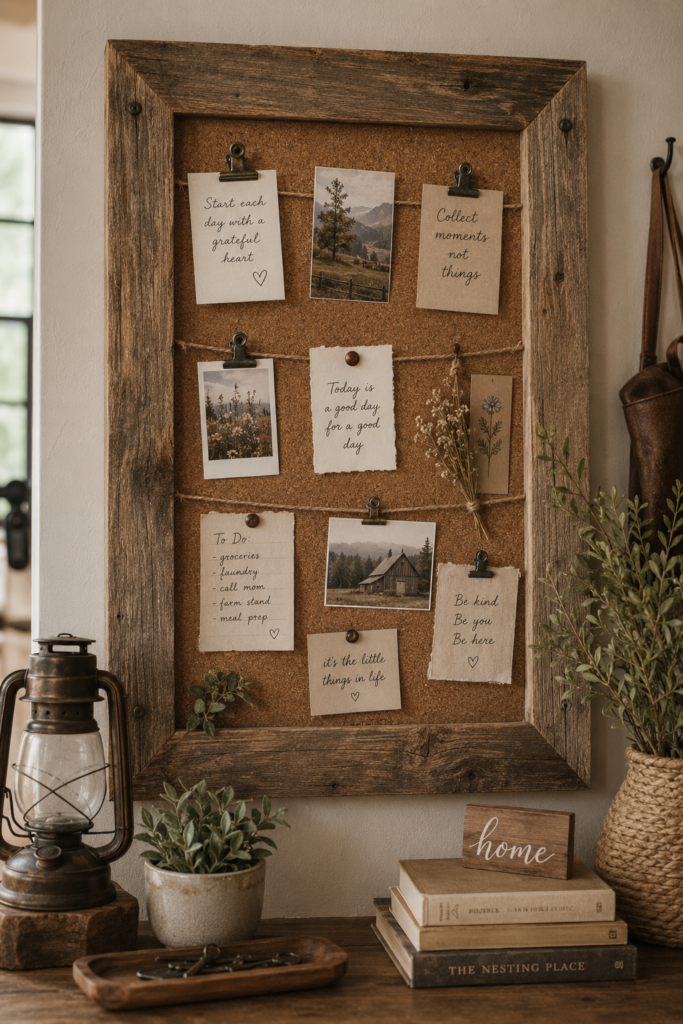
10. Rustic Farmhouse Cork Board
If your style leans cozy and rustic, this is your board. Reclaimed wood, twine, metal clips, and vintage accents give a cork board warm farmhouse charm that works perfectly in entryways, kitchens, and mudrooms. Why it works: the natural textures and vintage details make it feel collected over time, not store-bought. It is the kind of piece that makes guests ask where you bought it. Who it suits: farmhouse and cottage decor lovers, entryways, and mudrooms.
How to make it: Build or buy a frame from reclaimed or distressed wood (a light whitewash keeps it farmhouse-fresh). Stretch twine or wire across the board in rows and attach mini metal clips or clothespins for hanging notes and photos. Add small vintage touches: an old key, a tiny chalkboard label, or dried wheat.
Pro tip: Check thrift stores for old wooden frames first. Distressed wood with character beats new lumber every time, and it costs a fraction of the price.
How to Choose the Right Cork Board Project
Ten ideas is a lot, so here is how I would narrow it down:
- Start with your purpose. Need organization? Go for the command center, office board, or jewelry organizer. Want decor? The floral, hexagon, or farmhouse boards are your friends. Most boards do both, so pick the one that solves your biggest frustration first.
- Measure your wall. A tiny board on a huge empty wall looks lost, while an oversized board overwhelms a small nook. As a rule of thumb, your board should fill about two-thirds of the available wall width.
- Be honest about your skill level. First DIY? Try the painted color block or hexagon tile board: no power tools needed. Comfortable with a drill? The jewelry organizer and farmhouse frame will be a breeze.
- Set a budget. Most of these projects cost under $25 if you thrift the frame. Cork tiles and boards are cheapest at craft stores with a coupon, and push pins cost pennies in bulk.
- Think about mounting. Lightweight boards can hang on adhesive strips, but large or framed boards need proper wall anchors. Always mount into a stud or use the right drywall anchor for the weight.
Related: Transform Your Space: 25+ Stunning Dining Room Decoration Ideas You’ll Love
Frequently Asked Questions
What tools and supplies do I need for a basic cork board DIY?
For most projects on this list, you need surprisingly little: a cork board or cork tiles, a frame (optional), push pins, a hammer or drill for mounting, and any decorations you like. A hot glue gun is handy for the floral board, and painter’s tape plus acrylic paint cover the color block project. Start simple and add tools only as projects demand them.
How do I hang a heavy framed cork board securely?
Use two D-ring hangers on the back of the frame and hang them from wall hooks rated for the board’s weight. For drywall, use toggle bolts or heavy-duty anchors. If you can hit a stud, even better. Always check that the board is level before loading it up with decorations.
Can you paint cork board?
Yes, and it takes paint beautifully. Use acrylic craft paint or chalk paint for best coverage, and apply two thin coats rather than one thick one. Mask off sections with painter’s tape for crisp geometric designs. Just keep paint off the areas where pins need to grip if you want maximum hold.
How do I keep my cork board from looking cluttered?
The secret is restraint: stick to a color palette of two or three colors, leave breathing room between items, and give everything a zone. Remove or file items weekly. A cork board should display what matters now, not archive everything forever.
Can I make a cork board without a frame?
Absolutely. Frameless cork tiles or a cork sheet mounted directly on the wall with adhesive strips looks modern and minimal. You can also wrap the edges with washi tape or ribbon for a finished look without a bulky frame.
How often should I refresh or reorganize my cork board?
Give it a quick tidy once a month — remove expired coupons, outdated reminders, and anything you no longer reference. A seasonal refresh, where you swap in new photos and update goals, keeps the board useful and prevents it from turning into a cluttered time capsule.
What is the best way to clean a cork board?
Dust it regularly with a dry cloth or a soft brush, and dab stains with a lightly damp cloth — never soak the cork, since excess moisture can warp it. Let it air-dry completely before pinning anything back up.
Can I use a cork board in a humid room?
It is not ideal, because moisture can warp cork and loosen pins over time. If you want one in a bathroom or laundry room, choose a sealed or framed board, keep it away from direct steam, and make sure the room is well ventilated.
Final Thoughts
A DIY cork board is more than just an organizer. It is a stylish way to express your personality while keeping your life running smoothly, and every project on this list can be finished in a single afternoon. Start with the one that made you smile, and do not be surprised if you end up making a second one for another room.
Which of these 10 ideas is calling your name? Have you made a cork board project I should feature? Leave a comment below and tell me all about it. And if this post inspired your next weekend project, please share it with a fellow DIY lover.

Mehboob Hussain is the founder and editor of MubStyle, where he covers fashion, beauty, home decor and wellness. He personally reviews and edits every article on MubStyle, and directs the original visuals for each guide. Based in Multan, Pakistan.