Introduction
There is something truly magical about the crisp autumn air. As the leaves begin to turn shades of deep amber, rust, and burnt orange, our homes naturally become our sanctuaries. While most people jump straight to decorating their front porches or living room mantelpieces, there is one space that deserves just as much seasonal love: the kitchen.
The kitchen is undeniably the heart of the home. It is where morning coffee brews, where family recipes come alive, and where friends cluster together during weekend gatherings. Bringing autumn into your kitchen does not require a complete redesign or a massive budget. In fact, simple changes—like swapping out hand towels, creating a warm center island tray, or gathering natural foliage from your yard—can instantly shift the mood of your entire home.
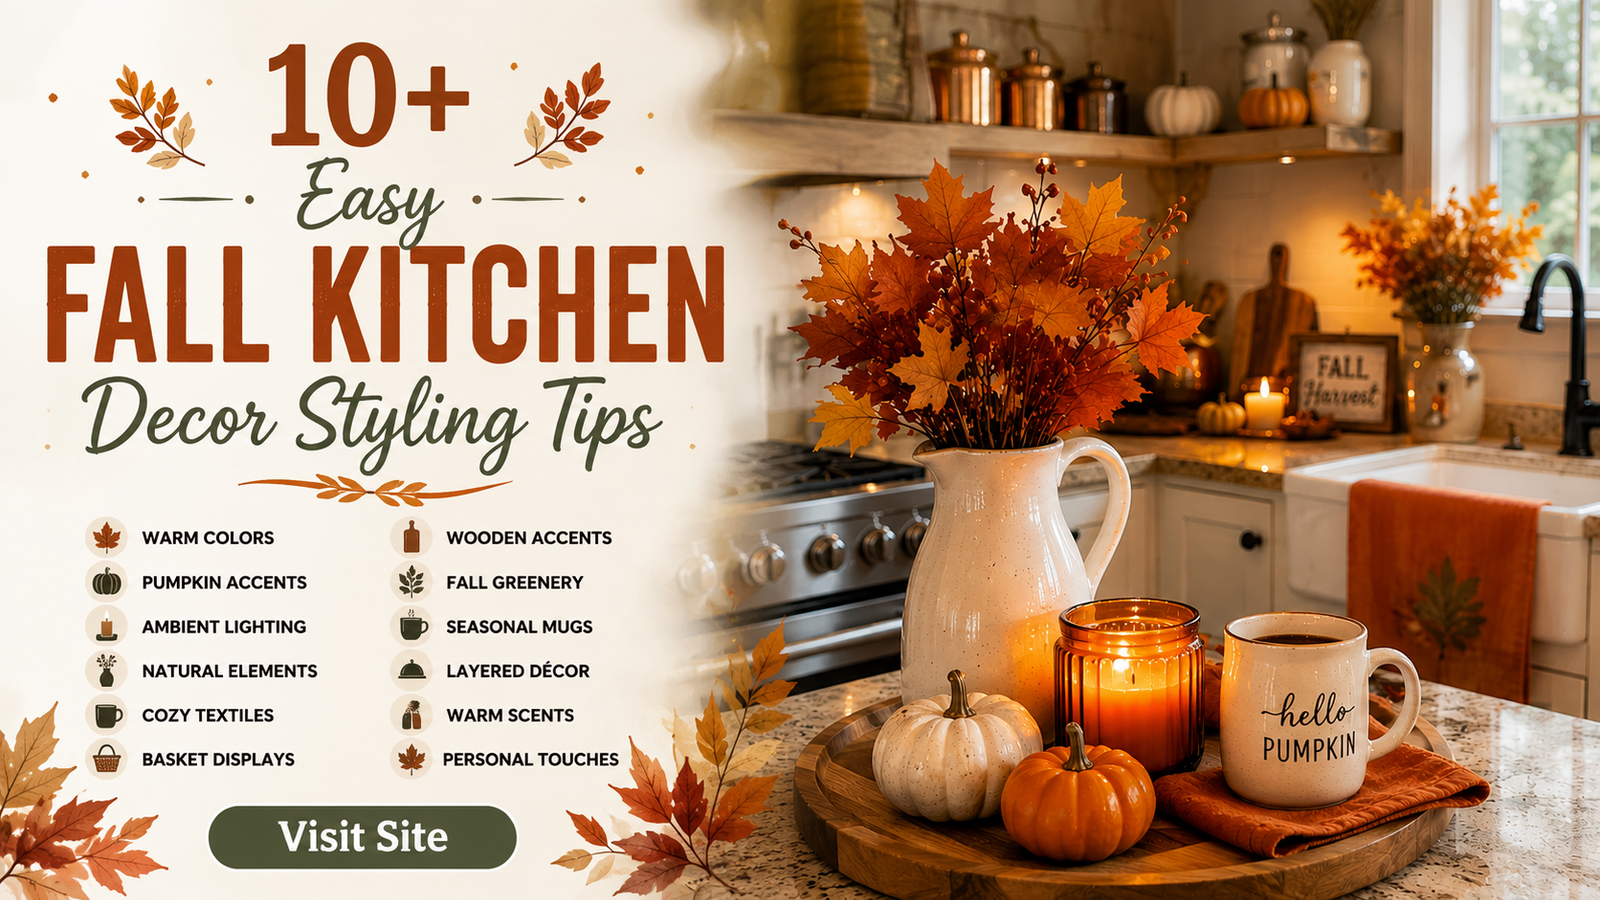
In this guide, we are sharing the absolute best easy fall kitchen decor styling tips to turn your cooking area into a warm, inviting haven. Whether your home aesthetic leans toward modern farmhouse, rustic chic, sleek contemporary, or traditional vintage, these styling ideas will help you seamlessly blend functionality with seasonal beauty. Get ready to embrace rich textures, moody color palettes, and cozy ambient lighting that will make you want to stay in and bake all season long!
Why Fall Kitchen Decor Is So Popular
Decorating the kitchen for autumn has exploded in popularity across Pinterest and home decor blogs over the last few years. Here is why homeowners and renters alike are obsessed with this seasonal shift:
- Heart-of-the-Home Energy: Since we spend so much time in the kitchen preparing warm soups, baking apple pies, and hosting loved ones, decorating this space makes the entire house feel immediately cozy.
- High Visual Impact: Kitchens are filled with hard surfaces like granite, quartz, tile, and stainless steel. Adding autumn decor introduces soft textures, warm woods, and organic shapes that balance those hard lines.
- Budget-Friendly Flexibility: You do not need to buy expensive seasonal furniture. Small details like produce, greenery, ceramic mugs, and woven linens create maximum aesthetic appeal with minimal investment.
- Pinterest and Social Inspiration: Autumn kitchen styling yields some of the most viral photos on social media because it blends functional cooking spaces with lifestyle aesthetics.
Essential Materials and Tools Needed
Before you start styling, gather a few versatile decor staples. Having these basics on hand makes seasonal transitions effortless year after year:
| Decor Essential | Primary Purpose | Best Material / Finish |
| Wooden Trays & Boards | Anchoring counter displays and creating layers | Reclaimed oak, dark walnut, acacia wood |
| Amber Glass Bottles | Holding autumn stems and catching natural sunlight | Vintage apothecary glass, warm amber glass |
| Faux or Real Greenery | Adding height, color, and natural texture | Dried eucalyptus, faux maple stems, oat stalks |
| Ceramic Vases & Pitchers | Creating focal points on islands or countertops | Matte white, terracotta, stone stoneware |
| Woven Baskets | Storing produce or organizing kitchen textiles | Rattan, seagrass, water hyacinth |
| Faux & Heirloom Pumpkins | Instant seasonal cue | Velvet, ceramic, concrete, or real Cinderella pumpkins |
Kitchen Safety Tips for Seasonal Decorating
Decorating a kitchen requires a balance between beauty and safety. Keep these simple safety rules in mind while styling your space:
- Keep Clear of Heat Sources: Never place fabric, dried plants, or wooden items near your stove top, oven vents, or toaster.
- Maintain Working Counter Space: Leave plenty of prep area open. Group your decor together on trays so items can easily be moved when it is time to cook.
- Avoid Hanging Hazards: Ensure garlands or hanging greenery placed above cabinets or range hoods are securely anchored so they do not fall onto hot surfaces.
- Use Battery-Operated Candles: Swap real flame candles for flameless LED candles on countertops to eliminate fire risks while keeping that warm evening glow.
8 Detailed Fall Kitchen Decor Styling Ideas
1. Style a Cozy Autumn Island Tray Vignette
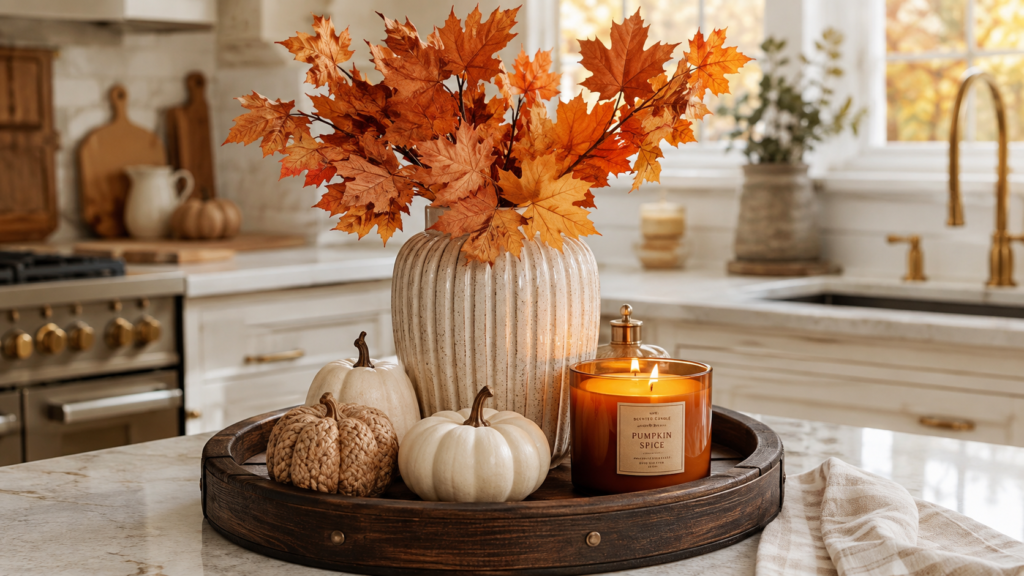
Grouping decorative elements on a large wooden tray is one of the easiest ways to bring fall charm to your kitchen island without creating messy clutter.
Why You’ll Love This Idea
It anchors your space instantly and makes cleaning simple. When you need the entire island for food prep or entertaining, you simply pick up the single tray and move it to the dining table or side counter!
Materials Needed
- Large round or rectangular wooden tray
- 1 tall stoneware vase or amber glass bottle
- 3–4 faux fall foliage branches (maple, oak, or eucalyptus)
- 2–3 mini heirloom pumpkins
- 1 small flameless pillar candle or amber jar candle
Step-by-Step Instructions
- Clear and Clean: Clear off your kitchen island completely and wipe down the surface.
- Set the Base: Place your wooden tray in the exact center of the island.
- Add Height: Position your tall stoneware vase on the back-left corner of the tray to establish your highest visual point.
- Insert Stems: Fluff your foliage stems and place them inside the vase, bending the wire branches outward so they spread naturally.
- Add the Candle: Place your flameless candle on the opposite side of the vase to balance the weight.
- Incorporate Produce: Scatter your mini heirloom pumpkins around the base of the vase and candle.
- Create Overlap: Let one mini pumpkin rest slightly over the edge of the tray onto the countertop for an organic look.
- Final Inspection: Step back a few feet to check the proportions from all sides of the island.
Beginner Tips
Stick to the “Rule of Threes” when grouping items inside your tray. Items grouped in odd numbers always feel more visually pleasing to the eye.
Common Mistakes to Avoid
- Using a tray that is too small, which makes decor look crowded.
- Making the stems so tall that they block sightlines across the kitchen.
Styling and Color Ideas
Combine rich dark walnut wood with cream-colored pottery, muted sage green foliage, and white pumpkins for a modern organic aesthetic.
- Estimated Cost: $25 – $45
- Estimated Time: 15 minutes
- Difficulty Level: Very Easy
- Where it Looks Best: Center of a kitchen island or a large breakfast bar.
- Pinterest-Worthy Tip: Mix textures by combining smooth ceramic, rough wood, and soft linen napkins inside the tray.
Conclusion
A cozy island tray vignette offers big seasonal style with zero stress. It keeps your counters organized while serving as a beautiful focal point every time you walk into the room.
2. Layer Warm Wooden Cutting Boards Against the Backsplash
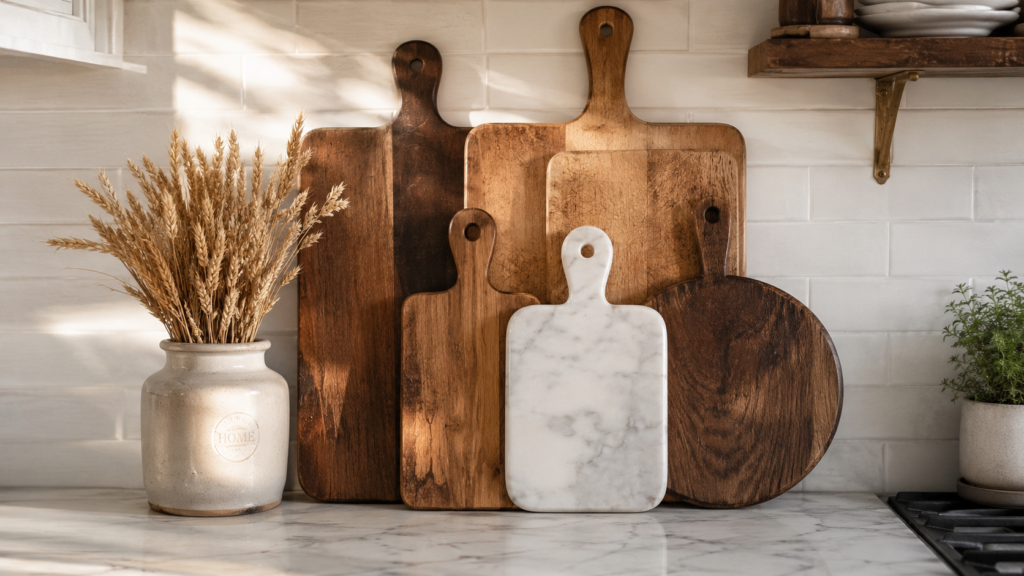
Layering cutting boards of different shapes, sizes, and wood tones creates an instant feeling of warmth and homey charm behind your stove or on an empty counter corner.
Why You’ll Love This Idea
It utilizes items you likely already own! It adds depth to plain tile backsplashes and adds a touch of rustic warmth without losing functionality.
Materials Needed
- 1 large rectangular wooden cutting board or breadboard
- 1 medium round wooden board with a handle
- 1 small arched or marble cutting board
- A small vase or jar with dried wheat or oat stalks
Step-by-Step Instructions
- Prepare the Space: Clean the backsplash area behind your stove or along an unused counter corner.
- Anchor the Base: Lean your largest rectangular cutting board flush against the wall in a vertical orientation.
- Layer the Second Board: Place the medium round board directly in front of the first board, overlapping it slightly to the left or right side.
- Add the Third Board: Rest the smallest board in front, creating three distinct visual layers.
- Secure the Setup: Ensure all boards are resting securely so they do not slip forward.
- Add Accent Decor: Place a small jar of dried wheat or a ceramic salt cellar right in front of the layered boards.
- Adjust Angles: Tilt the front boards slightly to create depth and dimension.
Beginner Tips
Mix your materials! Pair a rough, dark reclaimed-wood board with a smooth white marble board to create a high-contrast, high-end look.
Common Mistakes to Avoid
- Leaning boards at too steep of an angle, causing them to slide forward.
- Using boards that are all the exact same size and shape.
Styling and Color Ideas
Pair deep walnut, warm acacia, and light maple boards against a classic white subway tile backsplash for a timeless farmhouse look.
- Estimated Cost: $0 – $40 (if using boards you already own)
- Estimated Time: 10 minutes
- Difficulty Level: Beginner
- Where it Looks Best: Countertop corners, behind the stove, or next to the kitchen sink.
- Pinterest-Worthy Tip: Hang a small sprig of dried rosemary or lavender from the handle of the top cutting board using twine.
Conclusion
Layering wooden boards is a classic styling trick that transforms empty counter space into a cozy, professional-looking kitchen vignette.
3. Create a Warm Open Shelving Display with Fall Ceramics
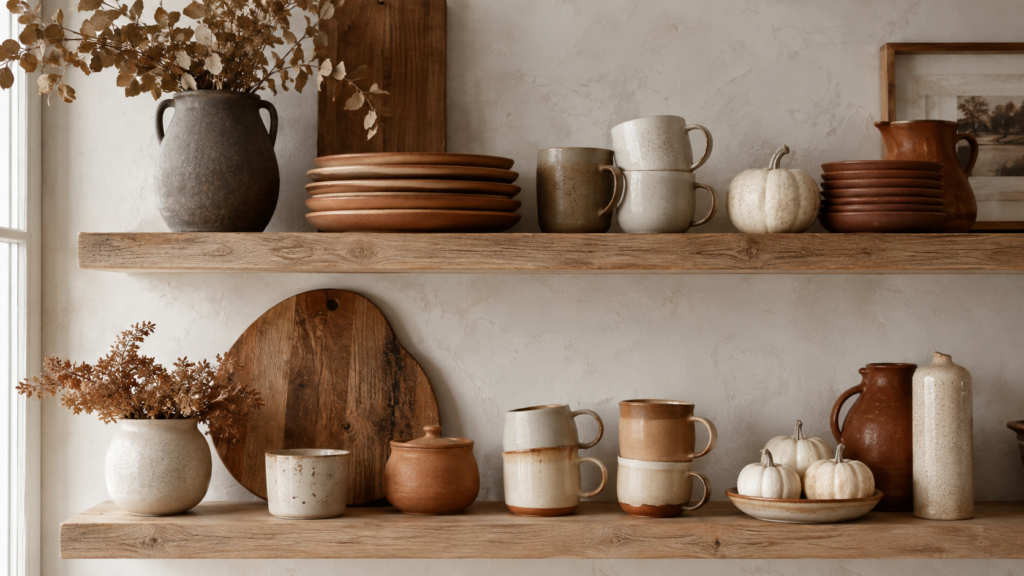
If you have open shelves or glass-front cabinets in your kitchen, swapping in warm-toned ceramic dishware is a wonderful way to celebrate autumn.
Why You’ll Love This Idea
Open shelves give you a dedicated place to show off your favorite seasonal mugs, stoneware bowls, and autumn glassware without cluttering your prep surfaces.
Materials Needed
- Stoneware plates and bowls in neutral, terracotta, or warm cream colors
- 4–6 cozy ceramic mugs (earthy tones)
- 2–3 mini terracotta pots with small succulents or dried foliage
- A few small faux pumpkins or acorn accents
Step-by-Step Instructions
- Clear the Shelves: Take everything off your open shelves and dust them thoroughly.
- Organize by Weight: Place heavier items like stacks of dinner plates or large ceramic bowls on the bottom shelf.
- Stack Plates Creatively: Stack 3–4 plates neatly, then place a small bowl or faux pumpkin right on top of the stack.
- Display Mugs: Group your fall mugs together on the middle shelf, either lined up or hanging from under-shelf hooks.
- Add Seasonal Fillers: Tuck mini pumpkins, terracotta pots, or wooden bowls into the open gaps between dishware.
- Incorporate Natural Elements: Place a small vase with dried eucalyptus on the top shelf to draw the eye upward.
- Step Back and Balance: Check that the colors and visual weights are evenly distributed across all shelves.
Beginner Tips
Keep your color palette limited to 3 main shades (for example: cream, terracotta, and warm brown) to prevent shelves from looking messy.
Common Mistakes to Avoid
- Overcrowding the shelves with too many decorative items.
- Forgetting to leave open “breathing space” between dishware groups.
Styling and Color Ideas
Mix rustic terracotta pottery with warm cream dinnerware and copper accents for a rich, Mediterranean-inspired fall look.
- Estimated Cost: $25 – $60
- Estimated Time: 30 minutes
- Difficulty Level: Easy
- Where it Looks Best: Kitchen open shelving, floating wall shelves, or glass display cabinets.
- Pinterest-Worthy Tip: Turn a few coffee mugs sideways so their handles face outward, adding texture and interest to your shelf setup.
Conclusion
Styling open shelves with fall ceramics brings a curated, boutique-hotel feel to your kitchen, showing off everyday dishware in a fresh seasonal light.
4. Build a Cozy Autumn Coffee & Hot Cocoa Bar
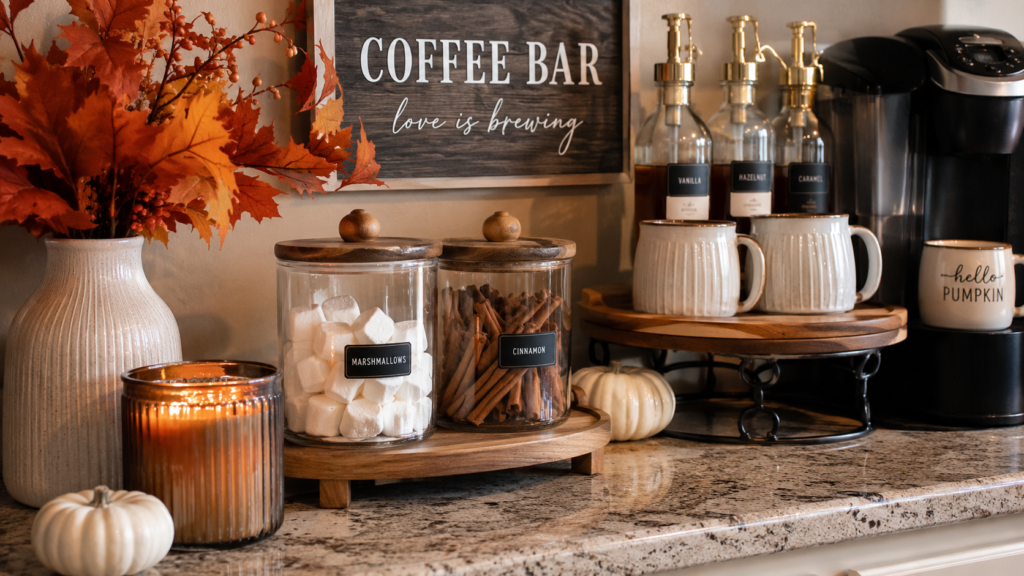
Transform a corner of your kitchen counter into an inviting autumn beverage station dedicated to hot cider, warm pumpkin spice lattes, and hot chocolate.
Why You’ll Love This Idea
It is both functional and delightful for family members and guests. It creates an interactive spot where everyone can make their favorite warm drinks on chilly mornings.
Materials Needed
- A small wooden or woven basket
- 3–4 clear glass jars with wooden lids
- Seasonal drink ingredients (marshmallows, cinnamon sticks, cocoa powder, pumpkin spice)
- 2–3 cozy autumn mugs
- A small tier tray or riser
Step-by-Step Instructions
- Select the Spot: Choose a clean corner near an electric outlet for your coffee maker or kettle.
- Define the Zone: Place a wooden tray or runner on the counter to designate the drink station area.
- Fill the Storage Jars: Pour marshmallows, cinnamon sticks, and cocoa powder into clear glass jars with wooden lids.
- Arrange the Jars: Place the jars in a neat row on your tray or wooden riser.
- Hang or Stack Mugs: Set out your favorite fall-themed mugs right next to the drink jars.
- Add Stirrers: Place wooden coffee spoons or cinnamon sticks inside a small ceramic cup.
- Decorate with Fall Accents: Tuck a mini pumpkin or a small fall sign near the back of the tray to finish the look.
Beginner Tips
Use labels or chalk tags on your glass jars to make your coffee bar look clean, organized, and custom-designed.
Common Mistakes to Avoid
- Leaving ugly, branded store packaging out on the counter instead of decanting into glass jars.
- Overcrowding the coffee maker so it becomes hard to use.
Styling and Color Ideas
Use clear glass, warm bronze hardware, dark wood risers, and creamy white ceramics for a sleek, modern coffee bar experience.
- Estimated Cost: $20 – $35
- Estimated Time: 20 minutes
- Difficulty Level: Easy
- Where it Looks Best: Empty kitchen counter corners, dry bars, or side buffets.
- Pinterest-Worthy Tip: Place a small glass bowl filled with wrapped caramel candies or cinnamon sticks right at the front of your station.
Conclusion
An autumn coffee bar makes chilly mornings feel like a luxury ritual while giving your kitchen an ultra-cozy, hospitable vibe.
5. Hang a Natural Fall Botanical Wreath on the Range Hood or Pantry Door
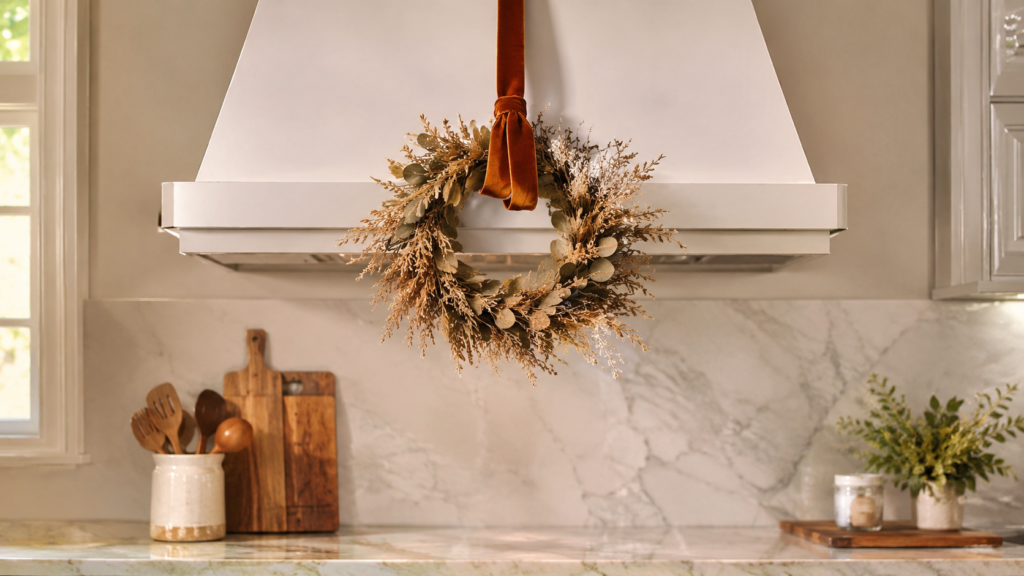
Hanging a botanical wreath inside the kitchen adds vertical interest, natural texture, and instant seasonal charm to central focal points.
Why You’ll Love This Idea
It draws the eye upward and breaks up large expanses of cabinetry or metal range hoods with soft, organic foliage.
Materials Needed
- 1 small to medium wreath (14–18 inches) made of dried eucalyptus, wheat, or faux magnolia leaves
- 1 roll of wide velvet or burlap ribbon in olive green, rust, or cream
- 1 removable clear adhesive hook (like a Command hook)
Step-by-Step Instructions
- Choose Your Location: Decide whether to hang your wreath on your range hood, pantry door, or over a kitchen window.
- Clean the Surface: Wipe down the mounting area with rubbing alcohol and let it dry completely.
- Apply the Hook: Attach a heavy-duty removable adhesive hook upside down on the inside top edge of a door, or right on the front of the range hood.
- Cut Your Ribbon: Cut a length of velvet ribbon long enough to loop through the wreath and reach your hook.
- Thread and Loop: Loop the ribbon through the top of the wreath frame.
- Hang the Wreath: Attach the ribbon ends to your hook, letting the wreath hang smoothly at eye level.
- Tie a Decorative Bow: Tie a loose, elegant bow at the top of the wreath where the ribbon meets the frame.
- Trim Excess Ribbon: Cut the tails of your ribbon at a clean diagonal angle.
Beginner Tips
Opt for lightweight wreaths made from dried plants or faux foliage so they stay securely in place on adhesive hooks.
Common Mistakes to Avoid
- Hanging a wreath that is too large for the space, which can overwhelm your range hood or pantry door.
- Using bright, shiny synthetic ribbon instead of matte velvet or natural linen.
Styling and Color Ideas
A muted olive-green eucalyptus wreath paired with a rich rust-orange velvet ribbon provides a high-end look that suits almost any kitchen style.
- Estimated Cost: $15 – $35
- Estimated Time: 15 minutes
- Difficulty Level: Beginner
- Where it Looks Best: Range hoods, pantry doors, or centered over kitchen windows.
- Pinterest-Worthy Tip: Leave the ribbon tails long so they drape down gracefully behind the wreath.
Conclusion
Hanging a delicate botanical wreath inside your kitchen adds immediate elegance and makes the space feel thoughtfully styled.
6. Swap Out Kitchen Linens for Warm Autumn Textures
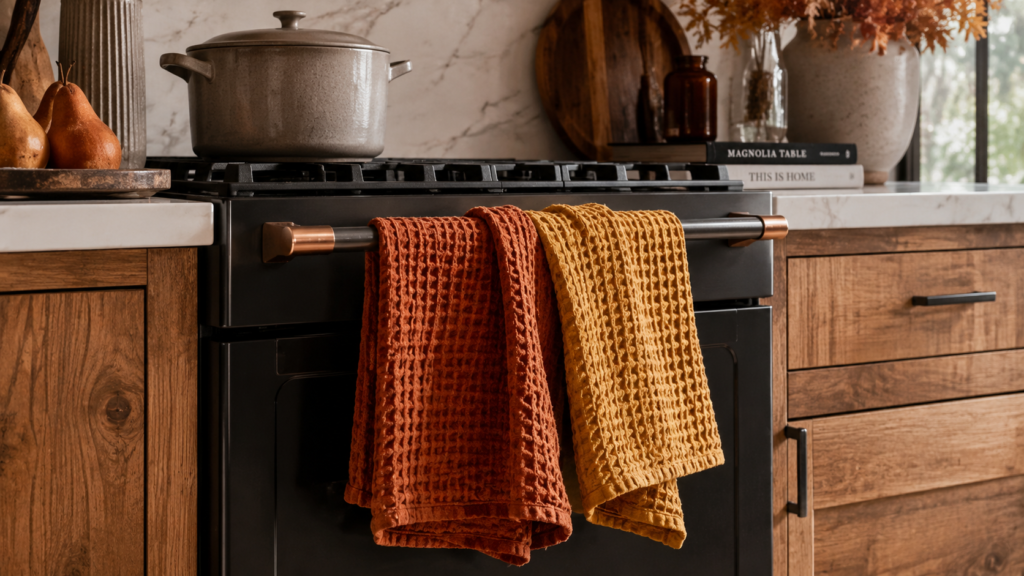
Swapping standard kitchen dish towels and oven mitts for rich autumn-colored textiles is the absolute fastest and most affordable decor change you can make.
Why You’ll Love This Idea
It takes under five minutes, costs very little, and serves a daily practical purpose while instantly updating your color scheme.
Materials Needed
- 2–3 waffle-weave or linen kitchen towels in mustard yellow, rust, olive, or warm amber
- 1 matching linen apron
- 1 woven seagrass or rattan basket for clean towels
Step-by-Step Instructions
- Remove Summer Linens: Gather up all bright white, nautical, or summer-patterned towels and store them away.
- Iron or Steamer Check: Briefly iron or steam your autumn towels to remove deep fold creases.
- Hang at the Sink: Fold one waffle-weave towel into thirds vertically and drape it neatly over your kitchen sink handle or front edge.
- Decorate the Oven Handle: Layer two contrasting towels (e.g., one solid rust and one subtle plaid) over the main oven door handle.
- Display an Apron: Hang a matching linen apron on a wall hook or pantry door peg for a relaxed “home cook” aesthetic.
- Basket Storage: Roll 2–3 extra clean towels and place them vertically inside a small woven counter basket.
Beginner Tips
Mix your textile textures! Pair smooth woven linen towels with thick waffle-weave cotton towels for visual depth.
Common Mistakes to Avoid
- Using worn-out or stained towels for display purposes.
- Choosing loud, cartoonish Halloween towels instead of elegant autumnal tones.
Styling and Color Ideas
Combine deep mustard yellow, warm terracotta, and neutral cream waffle towels to create a warm color palette across your kitchen handles.
- Estimated Cost: $10 – $25
- Estimated Time: 5 minutes
- Difficulty Level: Very Easy
- Where it Looks Best: Oven handles, sink fronts, towel hooks, and counter baskets.
- Pinterest-Worthy Tip: Pinch the top center of a folded towel before hanging it to give it a relaxed, designer drape.
Conclusion
Updating your kitchen linens is a budget-friendly way to introduce seasonal color without adding extra clutter to your countertops.
7. Display Seasonal Produce and Heirloom Pumpkins in Woven Baskets
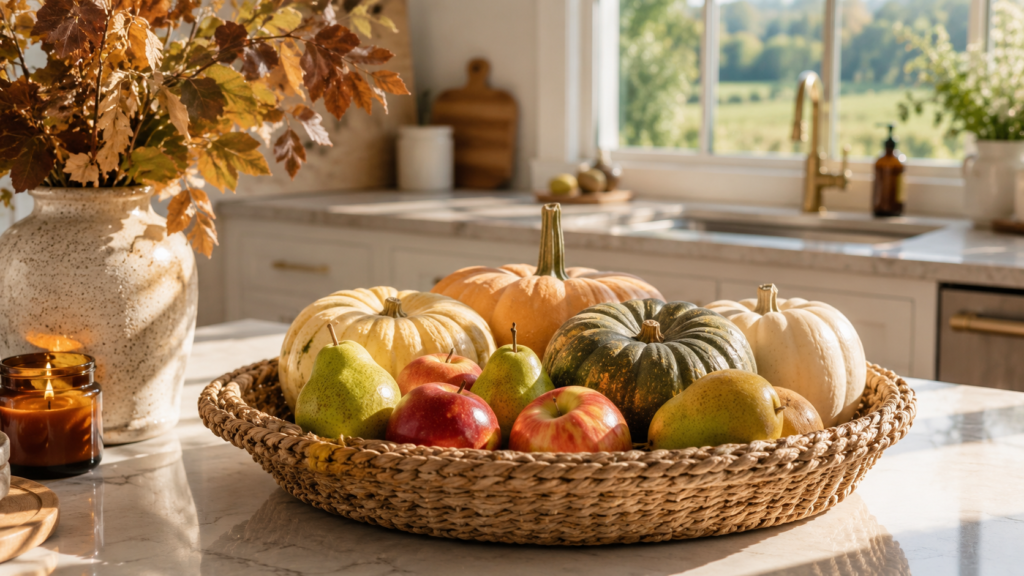
Instead of using plastic storage or hiding produce in drawers, display beautiful autumn fruits and heirloom pumpkins out in the open using natural woven baskets.
Why You’ll Love This Idea
It merges organic food storage with seasonal styling, celebrating autumn’s natural harvest right on your countertops.
Materials Needed
- 1 wide, shallow seagrass or water hyacinth basket bowl
- An assortment of heirloom mini pumpkins (green, white, and striped varieties)
- Seasonal produce (crisp red apples, pears, walnuts, or pomegranates)
Step-by-Step Instructions
- Clean Your Baskets: Wipe down your woven baskets to ensure they are free of dust.
- Line the Bottom: Lay a folded linen napkin inside the basket base to catch any natural debris.
- Add Large Items First: Place your largest heirloom pumpkins or pears in the center of the basket.
- Fill In Around the Base: Tuck smaller apples, walnuts, and mini white pumpkins around the larger items.
- Mix Colors: Alternate light and dark produce so similar shades are not sitting directly next to each other.
- Add Organic Touches: Tuck a few real dried bay leaves or small cinnamon sticks between the fruit for extra texture and aroma.
- Position on Counter: Place your bowl on a prominent spot like the kitchen island or breakfast table.
Beginner Tips
Incorporate real edible fruits like pears and apples alongside your decorative heirloom pumpkins to keep the display looking fresh and functional.
Common Mistakes to Avoid
- Overpacking the basket so much that fruit gets bruised.
- Using bright orange plastic pumpkins that look artificial.
Styling and Color Ideas
Combine pale green jarrahdale pumpkins, white muted lumina pumpkins, brown pears, and dark wicker baskets for an organic look.
- Estimated Cost: $10 – $25
- Estimated Time: 10 minutes
- Difficulty Level: Very Easy
- Where it Looks Best: Kitchen islands, dining tables, or side countertops.
- Pinterest-Worthy Tip: Choose pumpkins with unique, twisted stems to give your basket display a high-end designer look.
Conclusion
Displaying seasonal produce in natural baskets is an eco-friendly, effortless way to bring the warm beauty of the autumn harvest straight into your kitchen.
8. Add Warm Ambient Lighting with Amber Glass and Warm-Tone Candles
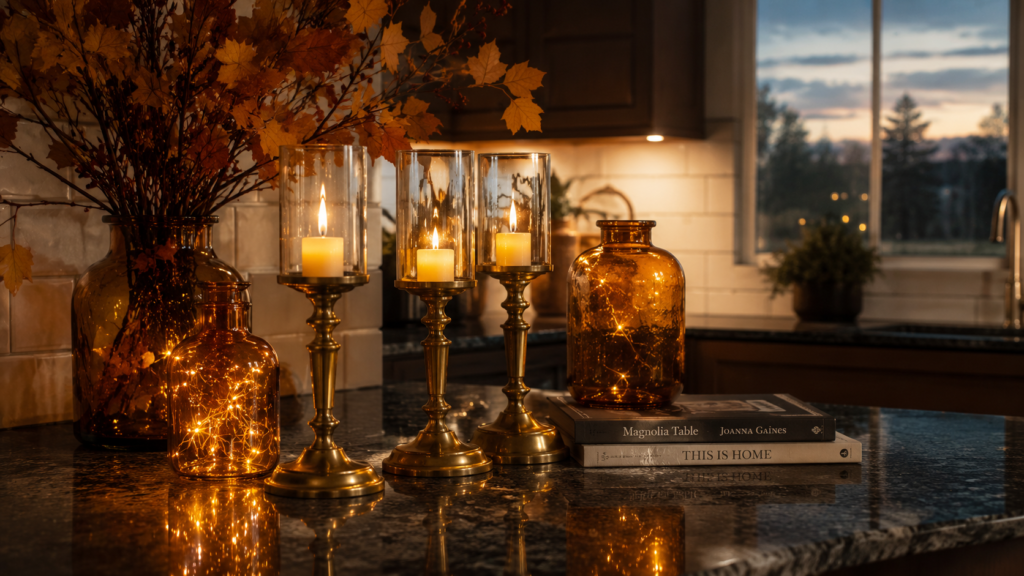
Bright overhead kitchen lights can feel harsh in the evenings. Swapping to soft, ambient lighting using amber glass and warm candles creates an irresistible autumn mood.
Why You’ll Love This Idea
It instantly turns your kitchen into a cozy sanctuary during early fall sunsets, perfect for relaxing after a long workday.
Materials Needed
- 2–3 amber glass apothecary bottles or jars
- Flameless LED taper candles or pillar candles with moving wicks
- Small brass or vintage wooden candle holders
- Warm fairy light string (battery-operated)
Step-by-Step Instructions
- Identify Dim Corners: Find darker areas of your kitchen, such as counter corners, open shelves, or next to the sink.
- Arrange Candle Holders: Set out 2–3 brass or wooden candle holders at varying heights.
- Insert Candles: Insert warm white LED taper candles into your holders.
- Style Amber Bottles: Place empty amber glass bottles nearby where they can catch the warm candlelight glow.
- Weave Fairy Lights: If styling open shelving, weave a small string of delicate fairy lights behind your dishes or glassware.
- Set Timers: Set your LED candles to auto-timer mode so they turn on automatically every evening at sunset.
Beginner Tips
Always choose warm-white bulbs (around 2200K to 2700K color temperature) for your candles and fairy lights to avoid harsh blue tones.
Common Mistakes to Avoid
- Leaving real open flame candles unattended near paper towels or cabinets.
- Mixing cold white lights with warm ambient candles.
Styling and Color Ideas
Pair warm amber glass bottles with vintage brass candle holders and cream-colored taper candles for an elegant evening glow.
- Estimated Cost: $15 – $35
- Estimated Time: 10 minutes
- Difficulty Level: Easy
- Where it Looks Best: Counter corners, window sills, open shelving, and island centers.
- Pinterest-Worthy Tip: Place amber glass bottles directly in front of a window so they glow under natural daytime sunlight even when candles are off.
Conclusion
Warm ambient lighting shifts your kitchen’s energy from a busy daytime workspace to a relaxing, cozy evening retreat.
Expert Fall Kitchen Decorating Tips
Take your seasonal kitchen styling to the next level with these expert interior design guidelines:
- Stick to an Organic Palette: Draw inspiration directly from nature. Focus on warm hues like terracotta, deep olive green, mustard yellow, creamy ivory, and warm chocolate brown.
- Mix Hard and Soft Textures: Kitchens are full of hard surfaces like stone, tile, and metal. Always balance them by adding soft elements like linen towels, woven baskets, and velvet ribbons.
- Vary Heights and Levels: When styling countertops or trays, group items of different heights together. Combine a tall vase, a medium candle, and a low pumpkin to keep the eye moving naturally.
- Keep Countertops Functional: Never sacrifice utility for decor. Group decorative items together on trays or risers so prep areas remain open and easy to clean.
Budget-Saving Tips for Fall Kitchen Styling
Decorating your home for autumn does not have to cost a fortune. Here are clever ways to style your kitchen on a budget:
+-----------------------------------------------------------------------+
|                       BUDGET FALL STYLING HACKS                       |
+-----------------------------------------------------------------------+
| 1. Forage Outside: Collect pinecones, fallen oak branches, and dried  |
|    wheat from your backyard for free natural vase fillers.            |
|                                                                       |
| 2. Shop Your Pantry: Display real apples, walnuts, cinnamon sticks,    |
|    and star anise in glass jars or woven bowls.                       |
|                                                                       |
| 3. Thrift for Vintage Pottery: Look for secondhand stoneware crocks,  |
|    amber glass bottles, and wooden boards at local thrift stores.     |
|                                                                       |
| 4. Spray Paint Mini Pumpkins: Buy cheap plastic pumpkins and paint    |
|    them with matte chalk paint in ivory, sage green, or terracotta.   |
+-----------------------------------------------------------------------+
Frequently Asked Questions (FAQs)
1. When should I start decorating my kitchen for fall?
Most home decor enthusiasts begin styling their kitchens for autumn in late August or early September. This transitions your home into the new season right as the weather begins to cool.
2. How can I decorate a small kitchen for fall without cluttering counters?
Focus on vertical surfaces and functional decor! Use wall hooks to hang seasonal towels, add a small wreath to your pantry door, or swap your daily mugs for autumn-toned cups on floating shelves.
3. Are real or faux pumpkins better for indoor kitchen decor?
Both work wonderfully! Real heirloom pumpkins last for weeks indoors if kept cool and dry. However, high-quality ceramic, velvet, or chalk-painted faux pumpkins can be reused year after year.
4. What are the best colors for fall kitchen decor?
Classic autumnal palettes include warm terracotta, rust orange, mustard yellow, olive green, warm taupe, and creamy off-white.
5. How do I make my kitchen smell like fall naturally?
Simmer a small pot of water on the stove with sliced apples, orange peels, cinnamon sticks, whole cloves, and a dash of vanilla extract for an instant cozy fragrance.
6. How can I style a modern white kitchen for fall without losing its clean look?
Keep it minimalist! Stick to neutral shades like white heirloom pumpkins, dried eucalyptus in stone vases, light wood cutting boards, and warm amber glass.
7. What type of stems work best in kitchen vases during autumn?
Dried eucalyptus, faux maple leaf branches, dried wheat stalks, oat stems, and faux berry branches are all durable options that bring rich color and height.
8. How do I clean and store my fall kitchen decor after the season ends?
Wipe down all faux greenery and ceramics with a micro-fiber cloth. Wrap delicate items in bubble wrap and store them in labeled clear plastic bins in a cool, dry place until next year.
Final Thoughts
Styling your kitchen for autumn is all about creating a warm, cozy space where your family and friends feel loved and welcomed. By focusing on simple touches—like warm wooden cutting boards, amber glass bottles, soft waffle-weave linens, and cozy coffee bars—you can transform your cooking space into a fall sanctuary without spending a fortune or cluttering your prep space.
Pick two or three of your favorite ideas from this list and start styling today! Remember, there are no strict rules—just have fun bringing the cozy magic of autumn into the heart of your home.
📌 Save This Pin for Later!
Loved these easy fall kitchen decor styling tips? Don’t lose them! Click the button below to pin this article directly to your Fall Decor, Kitchen Inspiration, or Cozy Home Ideas boards on Pinterest so you can reference it all season long!