Introduction
If you have been scrolling through Pinterest lately, you have probably noticed one major thing: medium-length haircuts are taking over every mood board! Getting a major haircut can feel scary, but letting your locks grow too long can leave them looking flat, lifeless, and hard to manage. That is exactly why shoulder-length hair is the ultimate sweet spot. It gives you the lightness and bouncy volume of a short haircut while keeping enough length to pull your hair back into a cute top knot, a sleek low ponytail, or a chic braided updo.
Shoulder-length hair—often lovingly called the “lob” (long bob)—is famously versatile. It flatters almost every face shape, works beautifully across all hair textures, and drastically cuts down your morning styling routine. Whether you have thick straight hair, delicate fine strands, bouncy curls, or beachy waves, there is a shoulder-length style that will make you feel like you just stepped out of a high-end salon.
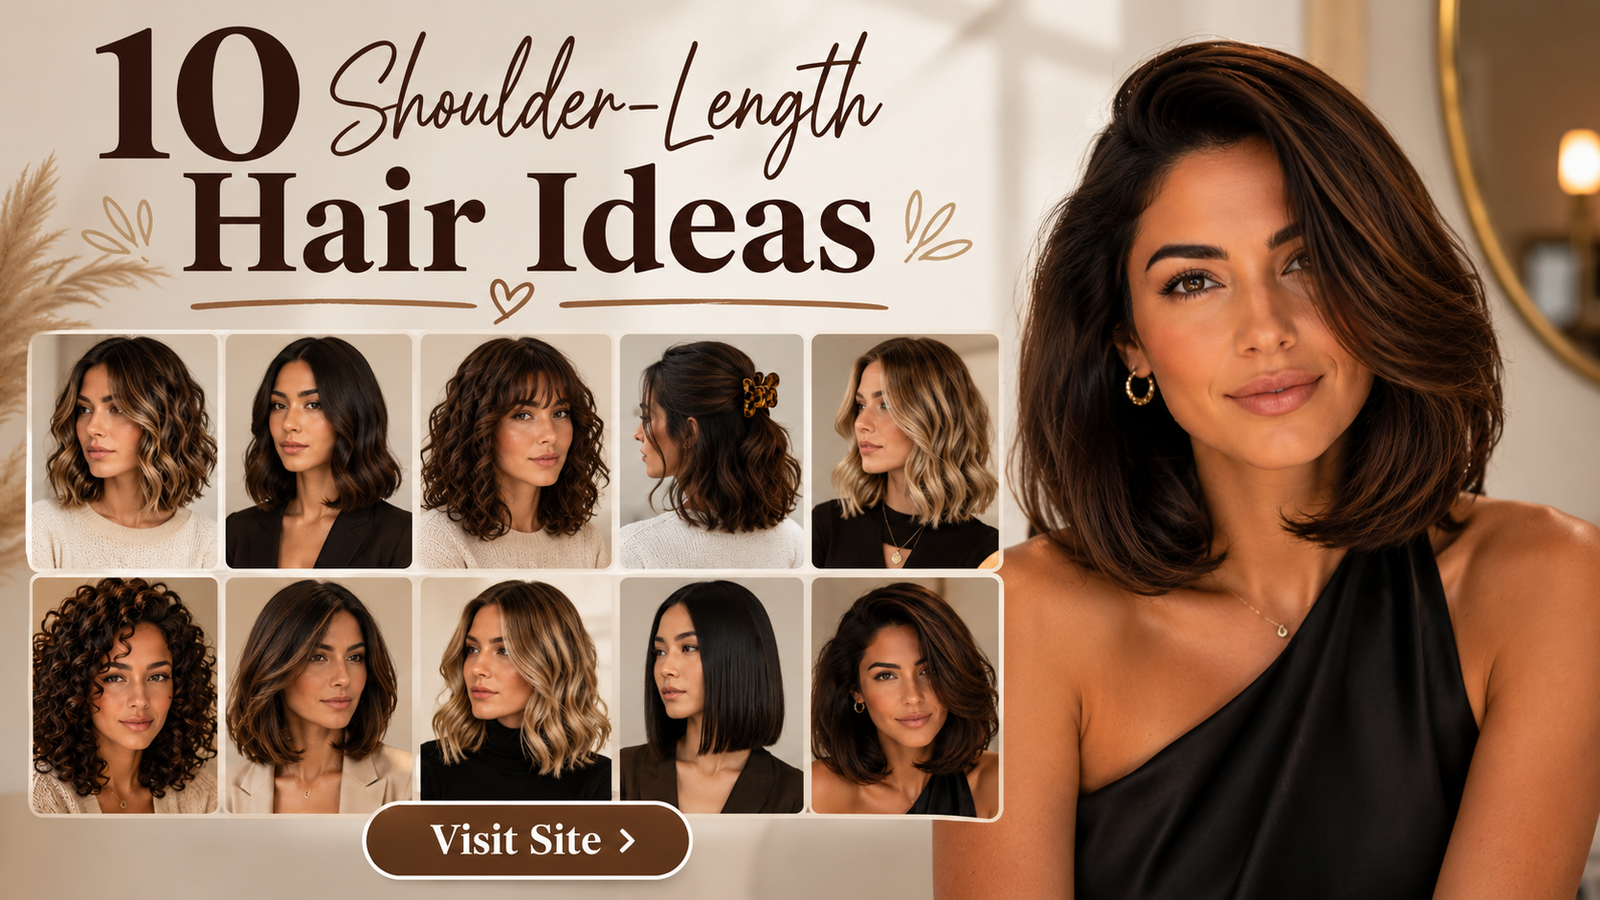
In this comprehensive guide, we are diving deep into the absolute best 10 shoulder-length hair ideas to inspire your next salon visit. We will break down everything you need to know about each look: who it suits best, how to style it at home step-by-step, the exact products you need, beginner tips, common mistakes to avoid, and even budget estimates. Get ready to screenshot your favorites and upgrade your hair game today!
Why Shoulder-Length Hair Is the Ultimate Hair Trend
There is a reason shoulder-length cuts consistently top the search charts on Pinterest year after year. Here is why this versatile length remains an undisputed favorite:
- Unmatched Versatility: You can wear it down in loose waves, slick it back for a sophisticated event, or toss it up in a casual claw-clip when running errands.
- Healthy Hair Reset: Cutting your hair to your shoulders chops away split ends and heat damage, giving your strands an instant reset and a healthier, thicker look.
- Dramatically Faster Styling: Less length means less time drying, straightening, or curling. You can easily style your hair in under fifteen minutes.
- Universally Flattering: By simply adjusting layers, bangs, or parting, a shoulder-length cut can be tailored to frame round, oval, square, or heart-shaped faces perfectly.
- Cost-Effective Maintenance: You use significantly less shampoo, conditioner, and styling product, saving you money in the long run.
Essential Styling Tools & Products You Will Need
Before jumping into the styles, make sure your hair care toolkit is stocked with these essentials:
| Tool / Product Category | Essential Items | Primary Purpose |
| Heat Styling Tools | 1-inch Curling Iron, Flat Iron, Blow Dryer with Concentrator | Creating curls, sleek finishes, and volume. |
| Brushes & Combs | Round Ceramic Brush, Wide-Tooth Comb, Tail Comb | Blowdrying, detangling, and precise sectioning. |
| Prep & Protection | Heat Protectant Spray, Leave-In Conditioner | Preventing heat damage and hydrating strands. |
| Styling & Texture | Dry Shampoo, Texturizing Sea Salt Spray, Volumizing Mousse | Adding grip, lift, and touchable texture. |
| Finishing Touches | Lightweight Hair Oil, Flexible-Hold Hairspray | Taming flyaways and locking in the style. |
Crucial Hair Safety & Damage Prevention Tips
- Always Apply Heat Protection: Never touch a hot tool to your hair without spraying a generous layer of heat protectant first. Keep iron temperatures under $350^\circ\text{F}$ ($175^\circ\text{C}$) for fine hair and under $400^\circ\text{F}$ ($200^\circ\text{C}$) for thick hair.
- Avoid Wet Heat Styling: Straightening or curling wet or damp hair causes wet hair fibers to boil from the inside, leading to severe breakage. Always dry your hair $100\%$ before using hot irons.
- Gentle Detangling: Always detangle starting from the ends and working your way up to the roots using a wide-tooth comb or wet brush to prevent snapping.
Idea 1: The Classic Textured Lob with Soft Layers
                       +-------------------------+
                       |   Classic Textured Lob  |
                       +-------------------------+
                                    |
            +-----------------------+-----------------------+
            |                                               |
   [ Styling Steps ]                               [ Key Benefits ]
   1. Wash & towel dry                             * Adds instant volume
   2. Apply mousse & heat protectant               * Works on all face shapes
   3. Blow-dry with round brush                    * Quick 15-minute routine
   4. Alternate 1-inch iron curls
   5. Leave ends straight
   6. Cool, shake out & mist spray
Overview
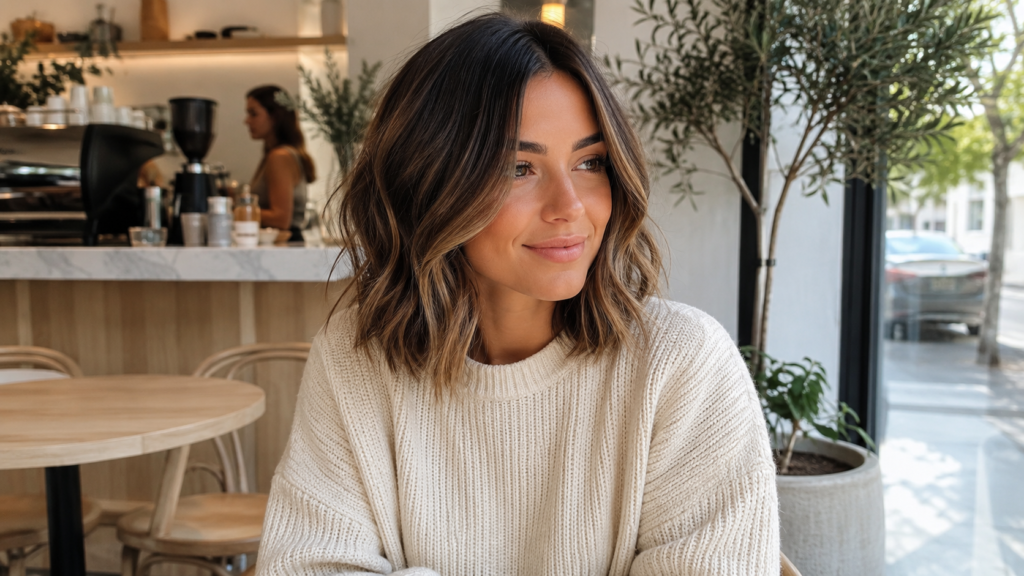
The classic textured lob rests right at the collarbones with soft, weight-reducing layers throughout. It is designed to look effortlessly chic, bouncy, and airy without feeling overly styled.
Why You’ll Love This Idea
It brings instant movement to limp hair and removes bulk from overly thick hair. It gives you that enviable “cool girl” French-chic aesthetic with minimal daily effort.
Materials Needed
- Heat protectant spray
- Volumizing mousse
- 1-inch curling wand or iron
- Texturizing spray
Step-by-Step Instructions
- Prep the Hair: Wash your hair and towel dry until damp. Spray heat protectant evenly from mid-lengths to ends.
- Apply Mousse: Work a golf-ball-sized dollop of volumizing mousse into your roots for lift.
- Rough Dry: Blow-dry your hair using your hands until it is about $80\%$ dry, lifting roots upward.
- Smooth the Top: Use a round brush on the remaining $20\%$ to smooth out the top crown section.
- Section Hair: Clip top sections away, leaving the bottom layer exposed.
- Create Loose Waves: Wrap 1-inch sections of hair around your curling iron, keeping hair wrapped for only 5–7 seconds.
- Alternate Directions: Curl one section away from your face and the next toward your face for an unstructured, natural texture.
- Leave the Ends Out: Keep the bottom inch of your ends straight out of the iron for a modern, relaxed finish.
- Cool and Shake: Let the curls cool completely for 3 minutes, then run your fingers through them to break them up.
- Lock in Texture: Finish with a generous mist of dry texturizing spray through the mid-lengths.
Beginner Tips
If you struggle with curling irons, try twisting random sections of damp hair into small buns, letting them air dry, and shaking them loose!
Common Mistakes to Avoid
- Curling the ends under (this makes the style look dated rather than modern).
- Combing through curls while they are still warm, which ruins the wave pattern.
Styling Ideas
Pair this style with statement earrings or a chunky knit sweater. A side part gives it extra glamour, while a center part looks modern and edgy.
Best Colors and Materials
- Best Hair Colors: Honey blonde balayage, dimensional brunette, or warm chestnut.
- Best Accessories: Tortoiseshell hair clips and silk scrunchies.
Quick Details
- Estimated Cost: $0 (if styling at home) | $60–$120 (for salon haircut)
- Estimated Time: 15–20 minutes
- Difficulty Level: Beginner
- Where It Looks Best: Everyday wear, casual office environments, weekend brunches.
- Pinterest-Worthy Tip: Take your selfie facing a bright window, slightly tilting your head down so the airy layers frame your jawline clearly.
Conclusion
The classic textured lob is the ultimate versatile haircut. It requires minimal maintenance while giving you maximum style points every single day.
Idea 2: Sleek Blunt Cut with Middle Part
                    [ Damp Hair + Heat Protectant ]
                                   |
                          ( Direct Blow-Dry )
                                   |
                       [ Flat Iron Small Sections ]
                                   |
                      ( Apply Lightweight Shine Serum )
                                   |
                      [ Tuck Behind Ears for Definition ]
Overview
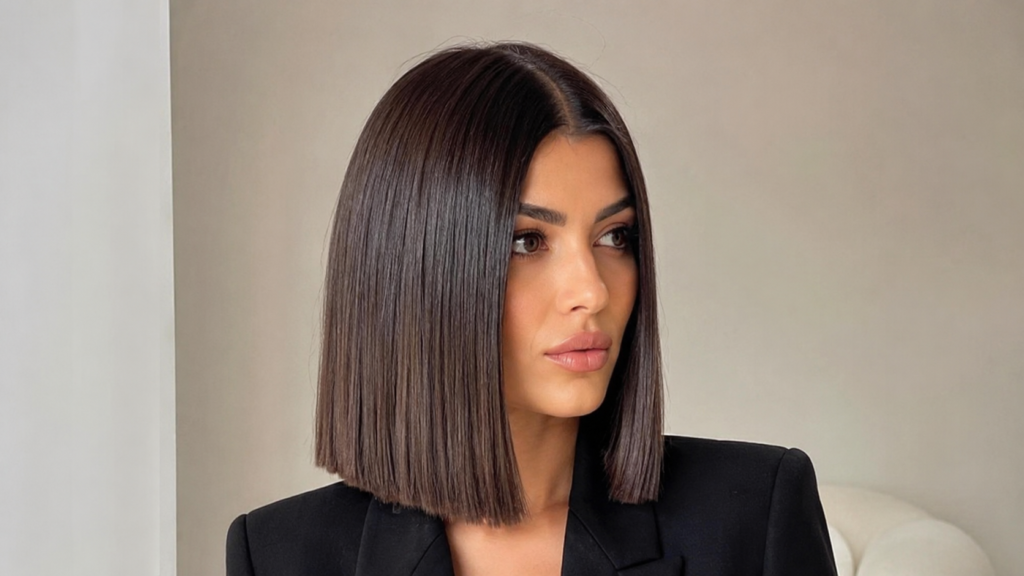
A sharp, blunt shoulder-length cut features clean, straight-across ends with zero layers. Combined with a crisp center part, this style exudes high-fashion confidence.
Why You’ll Love This Idea
Blunt cuts make fine and thin hair look instantly thicker and healthier by creating a dense baseline at your shoulders.
Materials Needed
- Smoothing styling cream
- Flat iron (hair straightener)
- Fine-tooth comb
- High-shine finishing oil
Step-by-Step Instructions
- Prep and Part: Apply heat protectant and a smoothing cream to damp hair. Use a fine-tooth comb to draw a precise center part from your forehead back to your crown.
- Blow-Dry Downward: Blow-dry your hair using a flat paddle brush, directing the airflow strictly downward to flatten the cuticle.
- Section Precisely: Divide hair into small $1$-inch horizontal sections starting at the nape of your neck.
- Straighten in Small Passes: Clamp down with your flat iron near the roots and glide slowly down to the ends. Keep tension firm and steady.
- Comb as You Straighten: Chase your flat iron with a fine-tooth comb for ultra-sleek, pin-straight results.
- Smooth Top Flyaways: Dab a tiny drop of shine oil onto your palms and smooth over the crown to flatten flyaways.
- Protect the Ends: Lightly run remaining serum through the bottom blunt ends to highlight the sharp cut line.
- Set the Style: Lightly mist with a shine-enhancing hairspray.
Beginner Tips
Focus on taking very small sections when flat ironing. One slow, precise pass over a small section is far safer and more effective than running over a thick section five times.
Common Mistakes to Avoid
- Curving the flat iron inward at the ends (keep the iron completely vertical for that sleek glass-hair look).
- Using too much heavy oil, which weighs down the blunt baseline.
Styling Ideas
Tuck both front sections behind your ears to highlight your cheekbones and jawline, or add sleek metal bobby pins for a minimalist vibe.
Best Colors and Materials
- Best Hair Colors: Jet black, deep espresso, platinum blonde, or glossy dark chocolate.
- Best Accessories: Minimalist gold or silver hair cuffs.
Quick Details
- Estimated Cost: $0 (at home) | $70–$130 (salon cut)
- Estimated Time: 20 minutes
- Difficulty Level: Beginner to Intermediate
- Where It Looks Best: Formal events, high-end dinners, professional business settings.
- Pinterest-Worthy Tip: Pose against a plain neutral backdrop with dramatic side lighting to highlight the glossy, reflective “glass hair” finish.
Conclusion
If you love clean lines, sharp symmetry, and glass-like shine, the sleek blunt cut is your dream shoulder-length style.
Idea 3: Shaggy Shoulder Cut with Curtain Bangs
                      +----------------------------+
                      |  Shaggy Cut + Curtain Bangs |
                      +----------------------------+
                                     |
              +----------------------+----------------------+
              |                                             |
   [ Framing the Face ]                            [ Adding Texture ]
   * Blow-dry bangs out/away                       * Sea salt spray application
   * Use round brush for sweep                     * Scrunch to activate waves
   * Frame cheekbones smoothly                     * Air-dry or diffuse roots
Overview
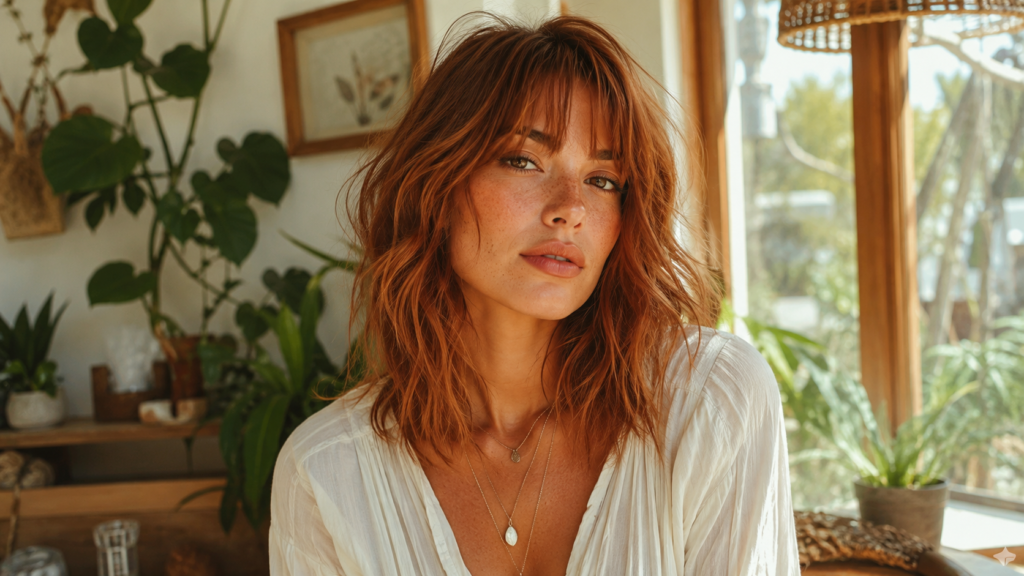
This retro-inspired look combines heavy razored layers through the crown with soft, cheekbone-framing curtain bangs. It offers maximum volume with a relaxed 70s rock-and-roll vibe.
Why You’ll Love This Idea
Curtain bangs frame your face beautifully without the commitment of full front bangs. The heavy shaggy layering creates natural volume at the crown without heavy styling.
Materials Needed
- Sea salt spray or dry volume paste
- Medium round brush
- Blow dryer with nozzle attachment
- Diffuser attachment (optional for wavy hair)
Step-by-Step Instructions
- Prep Wet Hair: Spray damp hair generously with sea salt spray to encourage natural texture.
- Style Bangs First: Section out your curtain bangs. Wrap them forward around a round brush, blow-drying straight down first.
- Sweep Bangs Back: Roll the brush backward away from your face and direct the heat down to create that signature sweep.
- Diffuse or Blow-Dry Layers: Attach a diffuser to your dryer and cup sections of hair upward to form natural, messy waves.
- Lift the Crown: Lift top layers straight up from your scalp while drying to maximize root height.
- Pinch Bang Ends: Take a tiny amount of styling paste between your fingertips and pinch the tips of your curtain bangs to create piecey definition.
- Scrunch Hair: Apply volume paste to your palms and scrunch upward from the bottom layers.
- Final Shake: Toss your hair upside down, shake the roots loose, and flip back up.
Beginner Tips
When styling curtain bangs, always blow-dry them forward first before sweeping them back. This creates proper root direction so they don’t lie flat against your forehead.
Common Mistakes to Avoid
- Over-styling with a curling iron (this cut relies on messy, lived-in texture rather than perfect curls).
- Using heavy silicone serums that flatten the razzled, feathery layers.
Styling Ideas
Pair with vintage denim, graphic tees, or layered gold necklaces. You can also pull the back into a messy claw clip while leaving the curtain bangs framing your face.
Best Colors and Materials
- Best Hair Colors: Copper red, warm strawberry blonde, or dimensional blonde with shadow roots.
- Best Accessories: Claw clips and vintage fabric headbands.
Quick Details
- Estimated Cost: $0 (at home) | $80–$150 (salon cut)
- Estimated Time: 12–15 minutes
- Difficulty Level: Easy (great for low-effort morning routines)
- Where It Looks Best: Music festivals, casual outings, vintage clothing lovers.
- Pinterest-Worthy Tip: Capture a action-shot while gently running your fingers back through your curtain bangs for a natural, movement-filled photograph.
Conclusion
The shoulder-length shag with curtain bangs is cool, casual, and incredibly easy to maintain. It gives you maximum movement with almost zero effort.
Idea 4: Romantic Beach Waves for Medium Hair
                  [ Heat Protectant + Texture Spray ]
                                  |
                   ( Alternating Wand Curls )
                                  |
                     [ Keep 1-Inch Ends Straight ]
                                  |
                   ( Cool + Finger Comb Through )
                                  |
                     [ Finish with Sea Salt Spray ]
Overview
Soft, beachy waves are the gold standard for shoulder-length hair. This look mixes relaxed loose bends with tousled ends for a gorgeous, sun-kissed aesthetic.
Why You’ll Love This Idea
It works for almost any occasion—from a casual day running errands to a formal summer wedding. Plus, beach waves actually look better as the day goes on!
Materials Needed
- 1.25-inch curling iron (or beach waver)
- Flexible hold hairspray
- Sea salt texturizing spray
- Wide-tooth comb
Step-by-Step Instructions
- Prep Clean Hair: Ensure your hair is completely dry. Apply heat protectant and comb through thoroughly.
- Section Hair into Tiers: Divide hair horizontally into three tiers (bottom, middle, top).
- Curl Middle Sections: Grab a $1.5$-inch section of hair, clamp near the eye level, and rotate outward away from your face.
- Leave Ends Out: Stop curling about 1 to 1.5 inches before reaching your ends to keep the look beachy rather than dressy.
- Alternate Direction: On the next section, curl inward toward your face. Alternate directions across each tier.
- Keep Face-Framing Pieces Outward: Always curl the front two sections on either side away from your face.
- Allow Waves to Set: Leave the waves alone until your entire head is complete and cool to the touch.
- Comb Through: Mist a wide-tooth comb with flexible hairspray and gently comb through the entire head.
- Add Texture: Spritz sea salt spray through the ends and scrunch lightly with your hands.
Beginner Tips
If your hair struggles to hold a curl, spray each section with a light mist of hairspray before wrapping it around the hot iron, then let it cool in your palm for a few seconds.
Common Mistakes to Avoid
- Curling all sections in the exact same direction (this creates a uniform, retro Hollywood wave rather than relaxed beach waves).
- Using an iron that is too small (e.g., $0.5$-inch), which creates tight ringlets instead of loose beachy bends.
Styling Ideas
Add a small boho side braid or tuck one side behind your ear with a pearl hairpin for a touch of romance.
Best Colors and Materials
- Best Hair Colors: Sun-kissed blonde, caramel balayage, or golden highlights.
- Best Accessories: Pearl hairpins and delicate hair ribbons.
Quick Details
- Estimated Cost: $0 (at home)
- Estimated Time: 15 minutes
- Difficulty Level: Beginner
- Where It Looks Best: Vacations, beach trips, date nights, summer parties.
- Pinterest-Worthy Tip: Take your photo outdoors during golden hour so the sunlight captures the dimension in your waves and highlights.
Conclusion
Effortless, beachy waves give shoulder-length hair a touch of summer beauty all year round. It is a timeless style every girl should master!
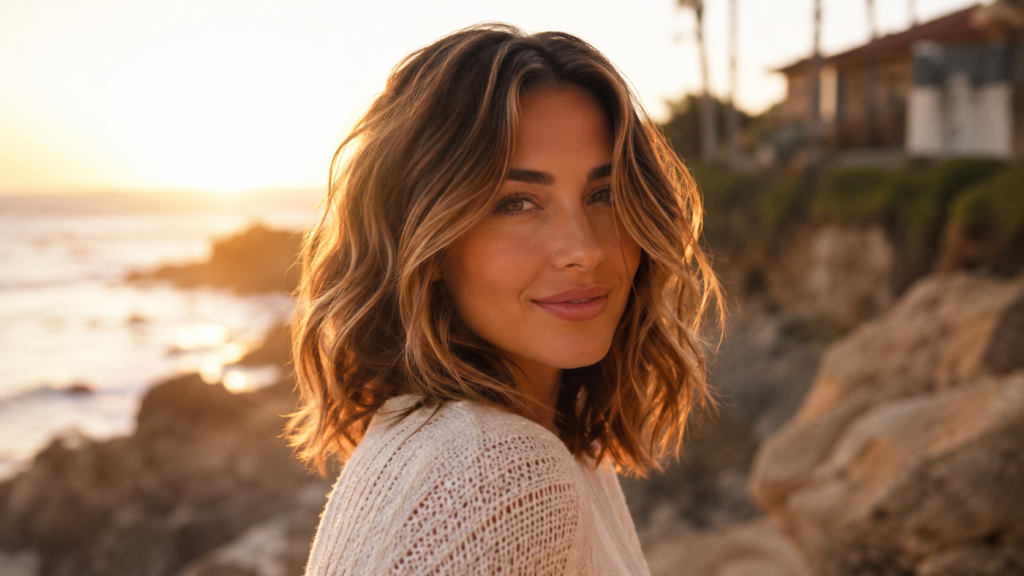
Idea 5: Shoulder-Length Curly Cut with Root Volume
                       +---------------------------+
                       | Curly Cut with Root Lift  |
                       +---------------------------+
                                     |
              +----------------------+----------------------+
              |                                             |
   [ Moisture Prep ]                              [ Diffusing Process ]
   * Leave-in cream on wet hair                   * Low heat & low speed setting
   * Apply curl-defining gel                      * Cup sections gently upward
   * Scrunch to form curl clumps                  * Flip head to lift root volume
Overview
Designed specifically for natural ringlets and waves, this shoulder-length haircut uses strategic interior layering to prevent the dreaded “triangle head” shape and maximize natural curl volume.
Why You’ll Love This Idea
It embraces your natural texture while keeping curls light, springy, and full of bouncy life without weighing them down.
Materials Needed
- Leave-in conditioner
- Curl defining gel or mousse
- Microfiber towel or cotton t-shirt
- Blow dryer with deep diffuser attachment
Step-by-Step Instructions
- Start Soaking Wet: Apply your styling products while your hair is still soaking wet in the shower.
- Apply Leave-In: Rake a curl-friendly leave-in conditioner through your hair using your fingers.
- Glaze and Scrunch Gel: Glaze a medium-hold curl gel over your hair, then scrunch upward toward your scalp to encourage natural ringlets.
- Remove Excess Water: Gently cup and scrunch hair with a microfiber towel to squeeze out excess moisture without causing frizz.
- Attach Diffuser: Set your blow dryer to medium heat and low speed.
- Diffuse Roots First: Tilt your head to the side, place sections of curls into the diffuser bowl, and gently press up to your scalp.
- Flip for Crown Volume: Flip your head completely upside down and diffuse the crown area to build extra root lift.
- Break the Gel Cast: Once hair is $100\%$ dry, squeeze your curls using a few drops of lightweight oil to break the hard gel cast, leaving soft, bouncy ringlets.
Beginner Tips
Never touch your curls with a normal terry-cloth towel or your bare fingers while they are drying! Touching wet curls disrupts the curl pattern and creates instant frizz.
Common Mistakes to Avoid
- Drying without a diffuser attachment (direct airflow blows curl clusters apart into a fuzzy cloud).
- Skipping leave-in moisture (curl patterns need intense hydration to remain defined and shiny).
Styling Ideas
Gather top ringlets into a half-up mini ponytail using a silk scrunchie to highlight your face while letting the rest hang full and voluminous.
Best Colors and Materials
- Best Hair Colors: Rich mocha, deep brunette, auburn, or ombre tips.
- Best Accessories: Silk scrunchies and wide stretch headbands.
Quick Details
- Estimated Cost: $0 (at home styling) | $90–$180 (specialized curl cut)
- Estimated Time: 25–30 minutes (including drying)
- Difficulty Level: Intermediate
- Where It Looks Best: Everyday wear, creative studios, social gatherings.
- Pinterest-Worthy Tip: Pose looking over your shoulder with your curly mane softly catching side daylight to showcase ringlet definition and dimension.
Conclusion
Embrace your natural texture! A targeted shoulder-length curly cut brings out the very best in your natural pattern with healthy volume and bounce.
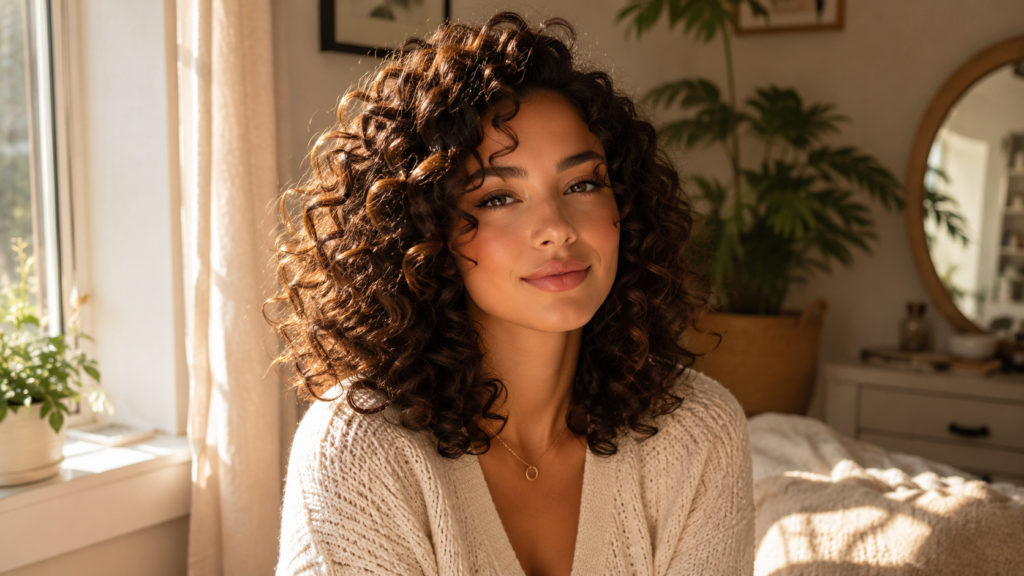
Idea 6: The Modern Half-Up Claw Clip Style
                    [ Prep Hair with Soft Texture ]
                                   |
                     ( Gather Top Half Above Ears )
                                   |
                      [ Twist Upward at Crown ]
                                   |
                   ( Secure with Medium Claw Clip )
                                   |
                     [ Pull Out Face-Framing Tendrils ]
Overview
The classic 90s claw clip remains one of Pinterest’s favorite quick styles. This half-up design keeps hair out of your face while showing off the bouncy length at your shoulders.
Why You’ll Love This Idea
It takes literally under two minutes to execute, requires zero heat styling, and instantly looks intentional, stylish, and put-together.
Materials Needed
- Medium-sized decorative claw clip (2 to 3 inches)
- Small clear elastic band (optional)
- Volumizing dry shampoo
- Tail comb
Step-by-Step Instructions
- Add Grip: Spray a quick blast of dry shampoo onto your roots to give your hair texture and grip.
- Section Hair: Using your thumbs, gather the top section of your hair starting right above your ears and pull it toward the back of your crown.
- Smooth or Leave Messy: Smooth the top gently with your fingers (leave it slightly loose for a modern, effortless feel).
- Twist the Section: Twist the gathered ponytail section once or twice upward against your head.
- Attach the Claw Clip: Open your claw clip and clamp it securely over the twisted section, securing it against your scalp.
- Let Ends Fall: Allow the remaining hair from the twist to cascade naturally over the top of the clip.
- Pull Face Framing Pieces: Gently pull out two soft face-framing strands around your temples and ears.
- Adjust Volume: Gently tug on the hair at your crown to add a little lift so the top doesn’t lie flat.
Beginner Tips
If your hair is super smooth or fine and the clip keeps sliding down, secure the half-up section with a small clear elastic first, then clamp the claw clip right over the band!
Common Mistakes to Avoid
- Using a clip that is too large (large clips weigh down shoulder-length hair; stick to medium or small sizes).
- Pulling the hair back too tightly, which can look harsh rather than soft and flattering.
Styling Ideas
Match your claw clip style to your outfit! Use a matte neutral clip for work, a tortoiseshell clip for daily errands, or a sparkly crystal clip for evening dinners.
Best Colors and Materials
- Best Hair Colors: Works amazingly across all colors and highlight styles!
- Best Accessories: Matte pastel, tortoiseshell, or metal claw clips.
Quick Details
- Estimated Cost: $5–$15 (for claw clips)
- Estimated Time: 2 minutes
- Difficulty Level: Absolute Beginner
- Where It Looks Best: College classes, office work, cozy study days, running errands.
- Pinterest-Worthy Tip: Take a photo from the back angle showing off the chic clip design against textured hair waves.
Conclusion
When you are in a rush but still want to look stylish, the half-up claw clip style is your reliable go-to choice!
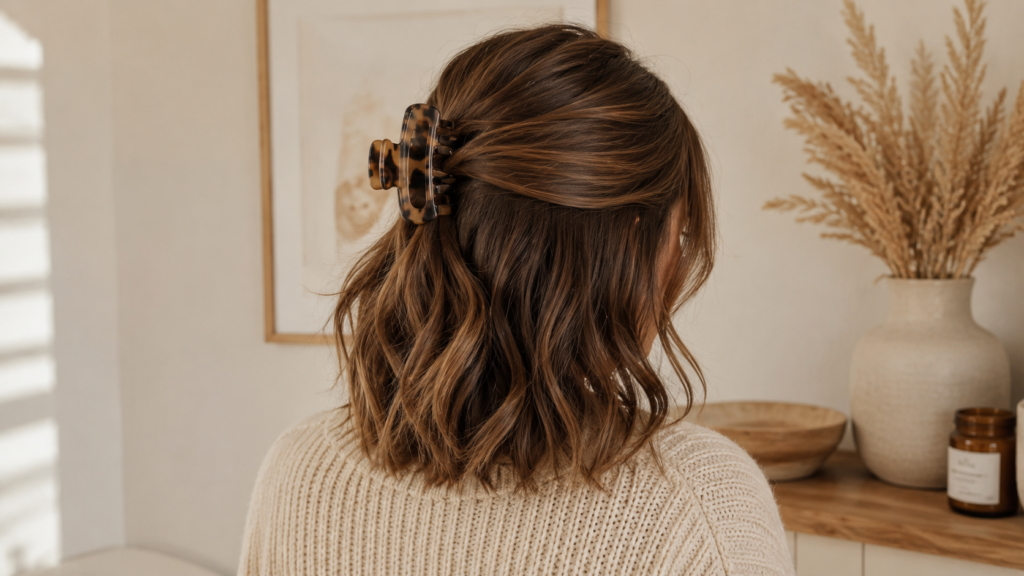
Idea 7: Retro Inverted Flicked Ends
                       +---------------------------+
                       | Retro Flicked-Out Ends    |
                       +---------------------------+
                                     |
              +----------------------+----------------------+
              |                                             |
   [ Preparation ]                                [ Straightening ]
   * Blow-dry smooth with paddle brush            * Run flat iron smooth down shaft
   * Apply lightweight shine spray                * Curve iron outward 90° at ends
   * Create deep side or center part              * Hold 2 seconds to set flick
Overview
This playful 60s-inspired look keeps hair sleek and straight down the lengths, finishing with sharp, outward-flicked ends right at the collarbones.
Why You’ll Love This Idea
It is chic, preppy, and brings fun vintage personality to a simple shoulder-length haircut.
Materials Needed
- Flat iron
- Round blow-dry brush
- Strong-hold finishing hairspray
- Anti-frizz serum
Step-by-Step Instructions
- Prep Hair Straight: Blow-dry your hair completely straight using a flat paddle brush.
- Apply Heat Shield: Spray heat protectant light throughout all strands.
- Divide into Small Sections: Section off your hair so you can work neatly from back to front.
- Glide Iron Downward: Clamp your flat iron near the roots and glide straight down down the hair shaft smoothly.
- Flick Out at the Bottom: When you reach the final 2 inches at the bottom, rotate your flat iron outward $90^\circ$ to $180^\circ$ away from your neck.
- Hold Momentarily: Hold the iron at that flicked angle for 2 seconds before releasing.
- Set with Fingers: Hold the flipped end with your fingers for a moment until it cools to lock in the flare.
- Repeat Around Head: Continue this process all around your head, ensuring all flips turn outward at a consistent height.
- Lock with Hairspray: Spray each flick with strong-hold hairspray to prevent sagging.
Beginner Tips
You can also create this look using a hot round blow-dry brush! Simply wrap the bottom ends around the top of the barrel brush and direct hot air downward against the bend.
Common Mistakes to Avoid
- Flipping the ends inward instead of outward (inward flips create a traditional bob, whereas outward flips give the desired vintage vibe).
- Flipping at uneven heights around your neck.
Styling Ideas
Pair with a sleek turtleneck sweater, hoop earrings, and a sharp winged eyeliner for a full retro moment.
Best Colors and Materials
- Best Hair Colors: Vibrant solid shades like deep jet black, rich mahogany, or icy blonde.
- Best Accessories: Wide satin headbands and pearl stud earrings.
Quick Details
- Estimated Cost: $0 (at home styling)
- Estimated Time: 15–20 minutes
- Difficulty Level: Intermediate
- Where It Looks Best: Fashion-forward events, dinner dates, theme parties, artistic workplaces.
- Pinterest-Worthy Tip: Pose in profile (side-view) so the crisp flicked ends stand out sharply against your shoulder line.
Conclusion
Bring a fun vintage touch to your daily routine with this sleek retro flicked style. It is bold, stylish, and guaranteed to turn heads!
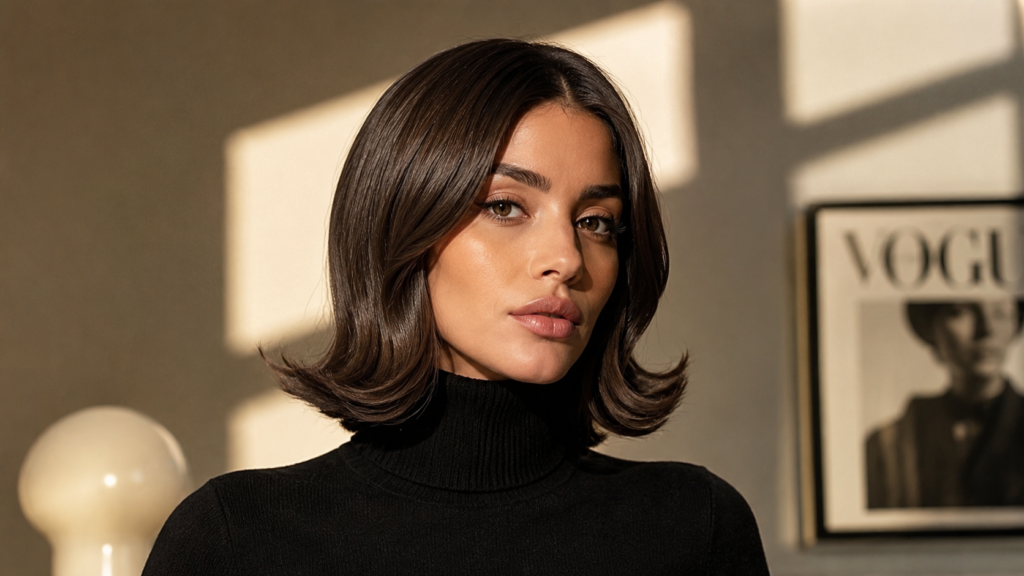
Idea 8: Soft Side-Swept Shoulder Lob with Deep Part
                    [ Start with Dry, Volumized Hair ]
                                    |
                     ( Create Deep Side Part )
                                    |
                     [ Sweep Hair Over Crown ]
                                    |
                   ( Apply Volumizing Powder at Root )
                                    |
                     [ Light Wave on Fuller Side ]
Overview
By shifting your standard part deep to one side, you instantly transform a casual shoulder-length cut into a sultry, high-volume glam style.
Why You’ll Love This Idea
Changing your part costs nothing and takes zero cutting, yet instantly changes your look while providing impressive root lift on flat hair days.
Materials Needed
- Fine-tooth rat tail comb
- Root-lifting volumizing powder or dry shampoo
- Light hair oil
- 1.5-inch large barrel curling iron
Step-by-Step Instructions
- Locate the Deep Part: Use a rat tail comb to draw a line starting directly above the outer arch of your left or right eyebrow, extending straight back.
- Flip Hair Across: Sweep the larger portion of hair across your crown to the opposite side.
- Apply Root Powder: Dust a tiny amount of root volumizing powder onto the exposed roots under the deep part.
- Massage for Lift: Massage your scalp with your fingertips to activate the powder and build height.
- Add Large Soft Bends: Use a large $1.5$-inch iron to add soft, loose curves to the heavier side of hair.
- Tuck the Slim Side: Smooth the side with less hair sleekly behind your ear or pin it back with bobby pins.
- Add Shine: Apply a single drop of hair oil through the ends to keep the sweep looking smooth and luxurious.
- Set the Lift: Spray a mist of flexible hairspray underneath the swept side to hold the volume up.
Beginner Tips
Train your roots to stay in a deep side part by parting your hair while wet and clipping it in place with a flat hair clip while it air dries!
Common Mistakes to Avoid
- Parting too far down near your ear (keep the line aligned with the outer arch of your eyebrow for the most flattering balance).
- Weighing down the heavy side with excessive styling products.
Styling Ideas
Pin the sleek tucked side with decorative crystal bobby pins, and pair with off-the-shoulder tops or asymmetrical necklines.
Best Colors and Materials
- Best Hair Colors: Deep espresso, warm honey highlights, silver ash blonde.
- Best Accessories: Rhinestone hairpins and statement drop earrings.
Quick Details
- Estimated Cost: $0 (at home)
- Estimated Time: 10 minutes
- Difficulty Level: Easy
- Where It Looks Best: Date nights, cocktail parties, weddings, evening dinners.
- Pinterest-Worthy Tip: Angle your camera slightly from above on the side with full volume to emphasize the dramatic height and glam sweep.
Conclusion
A deep side part is the easiest trick in the book to instantly add volume, drama, and glamour to shoulder-length hair without a trip to the salon!
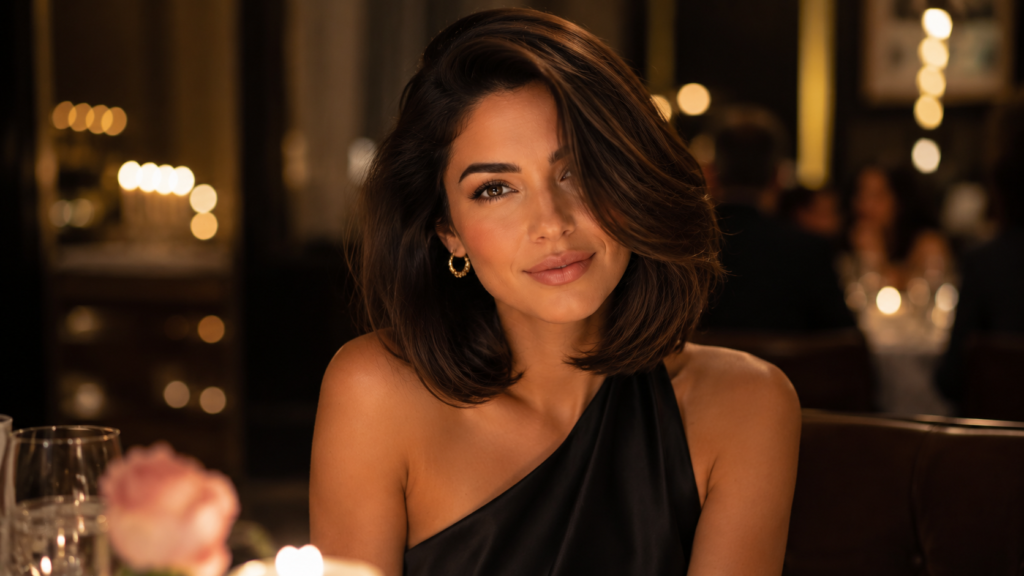
Idea 9: The Piecey Textured Bob with Micro Highlights
                    [ Wash & Towel Dry Thoroughly ]
                                   |
                     ( Apply Sea Salt Spray )
                                   |
                      [ Hand Rough-Dry Hair ]
                                   |
                   ( Twist Random Sections with Wax )
                                   |
                     [ Diffuse for Piecey Texture ]
Overview
This modern look pairs a textured shoulder-length cut with delicate, paper-thin micro highlights (babylights) to give your hair incredible multi-dimensional movement.
Why You’ll Love This Idea
Micro highlights catch light from every angle, making your hair look fuller and thicker without harsh contrast or obvious regrowth lines.
Materials Needed
- Sea salt spray
- Texturizing hair wax or pomade
- Blow dryer with concentrator or diffuser
- Wide-tooth comb
Step-by-Step Instructions
- Prep Damp Strands: Spritz sea salt spray through damp, towel-dried hair.
- Rough-Dry with Hands: Dry your hair using your hands to lift and toss strands around for natural texture.
- Warm Up Wax: Rub a pea-sized amount of styling wax between your fingers until warm.
- Pinch Individual Strands: Gently pinch random $1$-inch sections of hair at the ends to create piecey, defined tips.
- Enhance Highlight Strands: Focus product application on highlighted sections to make the dimensional colors pop.
- Scrunch Mid-Lengths: Lightly scrunch the mid-lengths upward to encourage natural movement.
- Lock in Place: Set with a light dusting of dry texturizing spray.
Beginner Tips
Use pomade very sparingly—you can always add more, but applying too much at once can make hair look greasy rather than piecey.
Common Mistakes to Avoid
- Applying pomade directly to roots (keep styling wax strictly to mid-lengths and ends).
- Using heavy gel that creates stiff, crunchy strands.
Styling Ideas
Pair with oversized sunglasses, a leather jacket, and a casual white t-shirt for an effortless streetwear style.
Best Colors and Materials
- Best Hair Colors: Babylights in beige blonde, caramel ribbons on dark brown, or multidimensional brunette.
- Best Accessories: Minimalist sunglasses and silver hoops.
Quick Details
- Estimated Cost: $0 (at home styling) | $120–$250 (for custom micro highlights at salon)
- Estimated Time: 10–12 minutes
- Difficulty Level: Easy
- Where It Looks Best: Casual weekends, music festivals, city outings.
- Pinterest-Worthy Tip: Take your photo outdoors under indirect bright daylight to make every soft highlight strand stand out clearly.
Conclusion
Piecey texture combined with micro highlights delivers an effortless, sun-kissed aesthetic that keeps shoulder-length hair looking full of life.
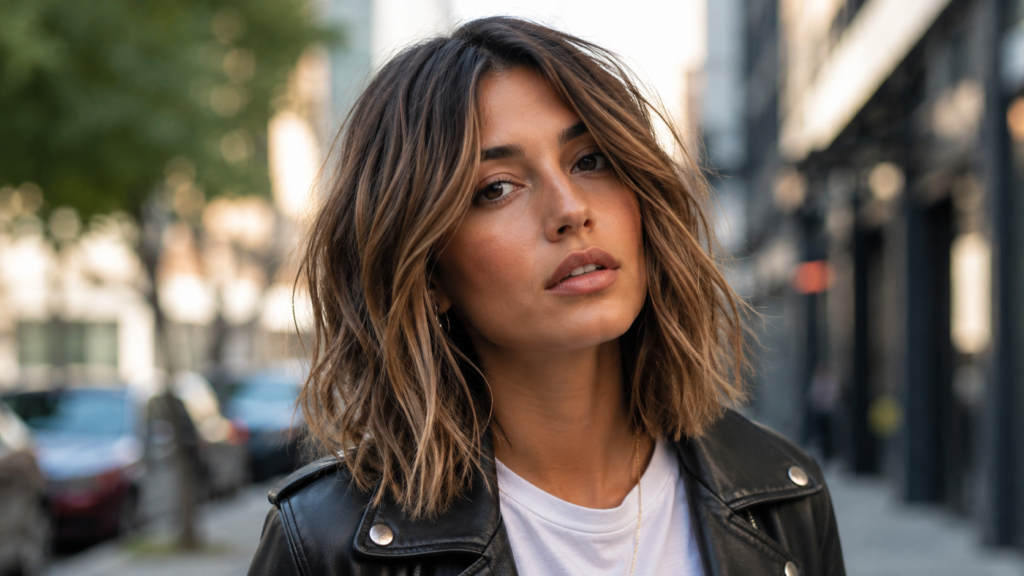
Idea 10: Smooth Face-Framing Lob with Rounded Ends
                    [ Damp Hair + Smoothing Cream ]
                                   |
                     ( Blow-Dry with Round Brush )
                                   |
                      [ Roll Ends Inward 180° ]
                                   |
                   ( Apply Light Finishing Oil )
                                   |
                     [ Soft, Clean Face Frame ]
Overview
A timeless classic, this style features polished, face-framing layers softly turned inward toward your neck. It creates a neat, silky frame for your features.
Why You’ll Love This Idea
It is clean, professional, and brings out your facial structure while maintaining a soft, touchable feel.
Materials Needed
- Large round ceramic brush
- Blow dryer with concentrator nozzle
- Smoothing blowout cream
- Finishing shine spray
Step-by-Step Instructions
- Apply Blowout Cream: Apply a quarter-sized amount of blowout cream evenly from roots to tips on damp hair.
- Section Hair: Divide hair into manageable horizontal sections.
- Place Brush Underneath: Position a large round brush underneath a 2-inch section of hair near the roots.
- Follow with Dryer: Place the concentrator nozzle above the hair, sandwiching strands between brush and dryer.
- Pull Down Smoothly: Glide both brush and dryer down the length together slowly under medium-high heat.
- Turn Ends Inward: As you reach the ends, roll the round brush inward toward your neck $180^\circ$ and hold the heat for 3 seconds.
- Use Cool Shot: Press the cool shot button on your blow dryer for 5 seconds to lock the inward curve in place.
- Set Face Framing Layers: Roll front layers around the brush angled back toward your ears for a soft, face-framing finish.
- Add Final Polish: Mist lightweight shine spray over the surface.
Beginner Tips
Always use the concentrator nozzle on your blow dryer! It directs airflow straight down the hair shaft, smoothing the hair cuticle and eliminating frizz.
Common Mistakes to Avoid
- Blow-drying without a nozzle, which scatters air and creates unwanted frizz.
- Pulling the brush too fast through hair before heat can smooth out the texture.
Styling Ideas
Pair with delicate gold jewelry, button-down shirts, or tailored blazers for a polished, elegant workplace look.
Best Colors and Materials
- Best Hair Colors: Warm chestnut brown, rich honey brown, dark chocolate.
- Best Accessories: Silk neck scarves and delicate gold stud earrings.
Quick Details
- Estimated Cost: $0 (at home) | $40–$70 (salon blowout)
- Estimated Time: 20 minutes
- Difficulty Level: Intermediate
- Where It Looks Best: Office settings, job interviews, formal dinners, family celebrations.
- Pinterest-Worthy Tip: Capture your photo looking directly into the camera with soft, warm interior lighting to showcase the polished frame around your face.
Conclusion
The soft, face-framing rounded lob is the ultimate professional, neat, and elegant style for shoulder-length locks.
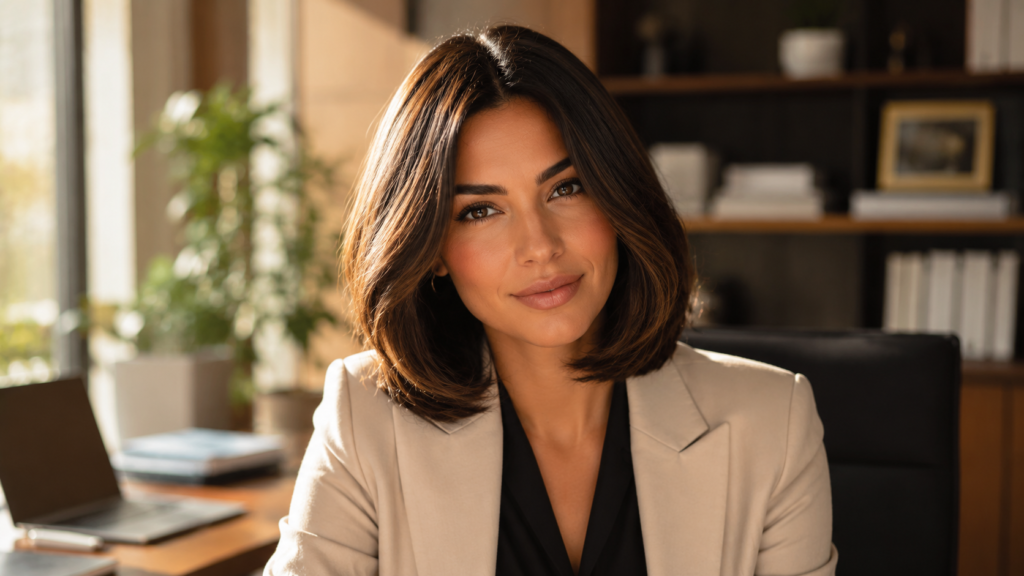
Expert Styling Tips for Shoulder-Length Hair
                  +-----------------------------------+
                  |  Pro Tips for Medium-Length Hair  |
                  +-----------------------------------+
                                    |
          +-------------------------+-------------------------+
          |                                                   |
 [ Scalp & Root Care ]                              [ Heat-Free Hacks ]
 * Wash with clarifying shampoo 1x/week            * Heatless silk curling rods
 * Apply dry shampoo before bedtime                 * Damp hair braids overnight
 * Use lightweight volumizing sprays                * Soft foam rollers for ends
- Master the Overnight Dry Shampoo Trick: Spray dry shampoo onto your roots before going to bed, not just in the morning! As you sleep, the powder absorbs oil as it is produced, leaving you with fresh volume when you wake up.
- Switch Your Part Regularly: Wearing your part in the exact same spot every single day trains your hair to lie flat. Flip your part to the opposite side every few weeks for instant, natural root volume.
- Use the Right Brush Size: For shoulder-length hair, a $1.25$-inch to $1.5$-inch ceramic round brush is ideal. Brushes that are too large won’t grip medium length properly, while smaller brushes create tight curls instead of smooth volume.
- Embrace Heatless Style Options: Save your hair from heat damage by using satin heatless curling rods or plaiting damp hair into two braids before sleeping.
Budget-Saving Tips for Salon Looks at Home
Styling your hair should not break the bank. Here is how to maintain a gorgeous shoulder-length style on a budget:
- Extend Salon Cuts: Shoulder-length hair is very forgiving as it grows! You can stretch salon visits to every 10–12 weeks instead of every 6 weeks.
- DIY Hair Masks: Deep condition your ends weekly using a simple mixture of equal parts coconut oil and olive oil warmed up for 10 seconds.
- Invest in Multi-Use Tools: Buy a 2-in-1 flat iron with rounded outer edges. It straightens hair smoothly and creates curls or beach waves, saving you from buying separate irons.
- Buy Salon Products in Bulk: Purchase your favorite shampoo, conditioner, and heat protectants during seasonal beauty sales or in bulk sizes to save up to $30\%$ annually.
Frequently Asked Questions (FAQs)
1. Is shoulder-length hair easy to maintain?
Yes! Shoulder-length hair is widely considered the easiest hair length to maintain. It dries quickly, requires far less styling product than long hair, and is still long enough to pull back into claw clips or ponytails when you are in a rush.
2. Will shoulder-length hair suit round face shapes?
Absolutely. A shoulder-length cut with subtle layers or a deep side part elongates round face shapes. Keeping the length slightly below the chin helps draw the eyes downward, creating a slimming effect.
3. How often should I trim shoulder-length hair?
To keep your ends sharp and healthy, aim for a trim every 8 to 12 weeks. If you are growing your hair out, you can extend trims to every 12 to 14 weeks.
4. How can I add volume to flat, fine shoulder-length hair?
Try adding long layers to remove weight, use lightweight volumizing mousse on damp roots, and blow-dry your hair upside down. Dry shampoo applied at night also works wonders for boosting flat roots.
5. Can I wear shoulder-length hair in updos?
Yes! You can easily style shoulder-length hair into half-up top knots, claw-clip updos, low messy buns, sleek low ponytails, and crown braids.
6. What is the difference between a lob and shoulder-length hair?
A “lob” (long bob) is a specific type of haircut where the hair falls right between the chin and collarbones, usually cut with a clear structure. “Shoulder-length hair” is a general term for any style where hair rests at or near the shoulders.
7. Does shoulder-length hair make you look younger?
Many hair stylists agree that shoulder-length cuts bring youthful energy! Removing long, weighed-down ends lifts your facial features and draws attention up toward your eyes and cheekbones.
8. How do I stop shoulder-length hair from flipping out at my shoulders?
When hair hits your shoulders, it naturally bends against your collarbones. To prevent unwanted flips, use a flat iron angled slightly inward, or embrace the flip intentionally with a textured cut or soft beach waves!
Final Thoughts
Shoulder-length hair offers the absolute best of both worlds: the fun, fresh lightness of shorter hair combined with the styling versatility of long locks. Whether you fall in love with a sleek blunt cut, a retro shaggy look with curtain bangs, or breezy beach waves, there is a shoulder-length style in this guide ready to elevate your daily look. Don’t be afraid to experiment with new parting styles, fun hair accessories, and different textures until you find the look that makes you feel amazing!
Save This Pin for Later! 📌
Love these shoulder-length hair ideas? Don’t lose these styling tips! Click the Save button in the top corner of your screen to pin this article directly to your favorite Hair Inspiration or Beauty Tips board on Pinterest. That way, you’ll have all these step-by-step styling guides and photo inspirations handy for your next salon appointment!