Introduction
As warm sunny days slowly shift into cool crisp evenings, finding the perfect manicure can feel like a challenge. You are probably not ready to let go of your bright poolside colors, but full-on autumn shades like dark chocolate brown or heavy charcoal feel a little too early. That is where trendy end of summer nails for 2026 come into play! The late-summer transitional period is all about combining the best of both worlds. You get to keep the fun, glossy finishes and playful motifs of summer while introducing the warm, earthy undertones and rich chrome reflections that prepare your style for fall.
This year, late-summer nail fashion takes inspiration from warm sunsets, coastal breezes, golden wheat fields, and cozy home aesthetic moments. Whether you are setting up a cozy afternoon manicuring station at your kitchen table, looking for quick DIY nail art ideas, or planning a chic photoshoot to share with your social followers, these transitional designs bring effortless elegance directly to your fingertips.
In this ultimate guide, we will walk you through the top 8 nail art trends dominating late 2026. Each look comes complete with detailed materials lists, beginner-friendly instructions, styling suggestions, cost breakdowns, and custom photo styling prompts to help you create stunning Pinterest-worthy imagery right in your living room. Grab your favorite nail polishes, set up your workspace in natural daylight, and let us dive into the ultimate late-summer nail inspiration!
Why This Trend Is Popular
Transitioning your nail design from August through September has become one of the biggest beauty movements on social media platforms like Pinterest and Instagram. Instead of making an abrupt jump from hot neon corals into deep dark burgundies, late-summer transitional nails act as a gentle bridge between seasons.
- Versatility across your wardrobe: Late-summer nails pair seamlessly with late-August sundresses, light denim jackets, linen shorts, and early September knit cardigans.
- High visual appeal on Pinterest:Soft golden glows, muted pastels, glazed chrome finishes, and botanical art photograph beautifully under natural golden-hour lighting.
- Budget-friendly DIY appeal: You do not need expensive weekly salon visits. Most transitional looks rely on clever color mixing, simple line art, dotting techniques, or subtle chrome powders that anyone can master at home.
- Flattering on all lengths:Whether you prefer short natural square nails or long elegant almonds, transitional palettes look balanced and modern on every hand shape.
Materials and Tools Needed
To create salon-quality late-summer manicures in your own home, build a basic nail art kit with these essential supplies:
| Tool / Material | Purpose & Description |
| Fine Liner Brushes | Ultra-thin nail art brushes for creating crisp French tips, swirl lines, and micro botanical leaves. |
| Dotting Tools | Dual-ended metal dotting tools for perfect polka dots, flower centers, and tiny star accents. |
| Chrome Powder & Sponge | Fine iridescent or golden chrome powders with foam applicators for high-shine glazed finishes. |
| Soak-Off Gel / Nail Polish Set | Quality base coats, top coats (both glossy and matte), and key transitional shade polishes. |
| Nail Prep Tools | Glass nail file, cuticle pusher, cuticle oil, and 91% isopropyl alcohol wipes for nail plate cleaning. |
| UV/LED Curing Lamp | Essential for curing gel polish layers, chrome powders, and 3D textured gel art. |
Safety Tips
Before starting any DIY nail project, keep these essential safety practices in mind to preserve your natural nail health:
- Work in a well-ventilated space: Always apply polish, monomer, or gel products near an open window or in a large, airy room to avoid inhaling fumes.
- Avoid skin contact with uncured gel: Clean up any gel polish that touches your skin or cuticles using a brush dipped in alcohol before curing under your LED lamp. Curing gel on skin can lead to contact allergies over time.
- Never peel or pick off polish: Peeling gel polish or acrylics strips off the top protective layers of your natural nail plate. Always soak off gel using pure acetone and cotton wraps.
- Hydrate regularly: Apply nourishing cuticle oil twice daily to keep your skin hydrated and prevent hangnails as seasonal humidity changes.
8 Detailed Late Summer Nail Ideas for 2026
1. Sunset Terracotta French Tips
Introduction
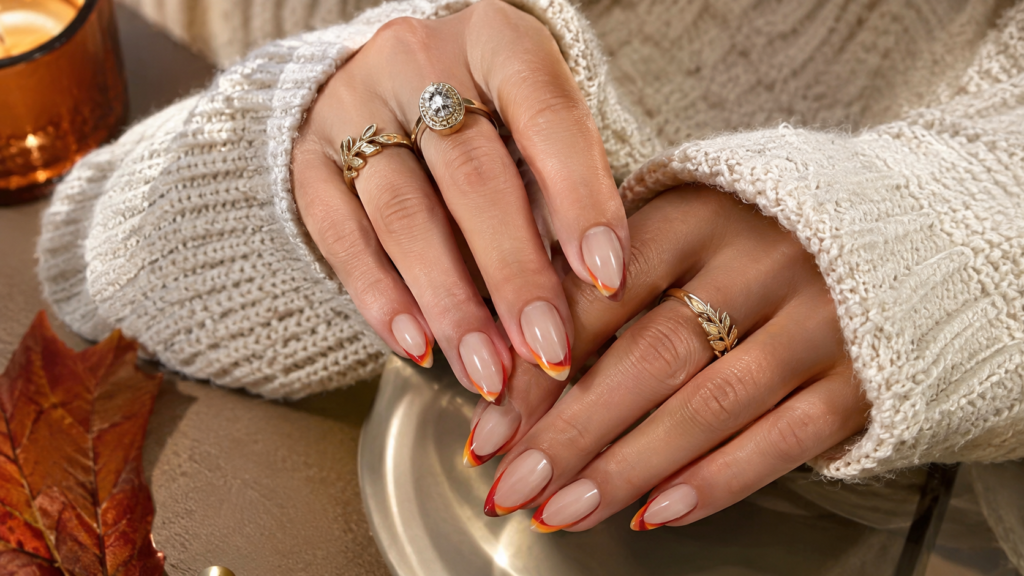
Sunset Terracotta French Tips reimagines the classic white French manicure using warm, sun-baked earth tones. By pairing a warm terracotta orange edge with a clean sheer nude base, this design captures the exact warmth of late-August golden hours.
Why You’ll Love This Idea
It delivers a subtle nod to upcoming cozy fall weather while maintaining the airy, fresh feel of summer. It is professional enough for office environments yet stylish enough for weekend beach trips.
Materials Needed
- Nude or pale pink sheer base coat
- Terracotta or warm burnt orange nail polish
- Thin nail striping brush
- High-shine gel top coat
- Nail clean-up brush dipped in acetone
Step-by-Step Instructions
- Shape nails into an almond or soft square silhouette and file smooth.
- Wipe the nail plate clean with alcohol to remove natural oils.
- Apply one layer of nourishing base coat and cure under your LED lamp for 60 seconds.
- Apply two thin coats of sheer nude polish, curing between each layer.
- Dip your fine liner brush into terracotta polish.
- Outline the curved smile line along the free edge of your nail.
- Fill in the tip smoothly from corner to corner.
- Clean up any uneven edges using a clean brush dipped in acetone.
- Cure the terracotta tips for 60 seconds.
- Seal the entire nail with a glossy top coat and cure completely.
Beginner Tips
Use sticky French tip guide strips if you struggle to freehand smooth curves with a brush.
Common Mistakes to Avoid
Avoid making the terracotta line too thick; a sleek, thin tip keeps the hand looking elongated and elegant.
Styling or Decorating Ideas
Pair this manicure with gold stackable rings, woven straw totes, and cream-colored linen dresses.
Best Colors and Materials
Terracotta, warm amber, dusty rose, and sheer peach gel polish.
Estimated Details
- Estimated Cost: $8 – $15
- Estimated Time: 35 minutes
- Difficulty Level: Easy to Intermediate
- Where It Looks Best: Medium-length almond or oval nails.
Pinterest-Worthy Tip
Pose your hand holding a warm iced cinnamon latte against a rustic wooden tabletop in warm afternoon sunlight.
Conclusion
Sunset Terracotta French Tips are the ultimate entry point for transitional nail art, offering effortless sophistication that bridges two seasons beautifully.
2. Glazed Champagne Chrome
Introduction
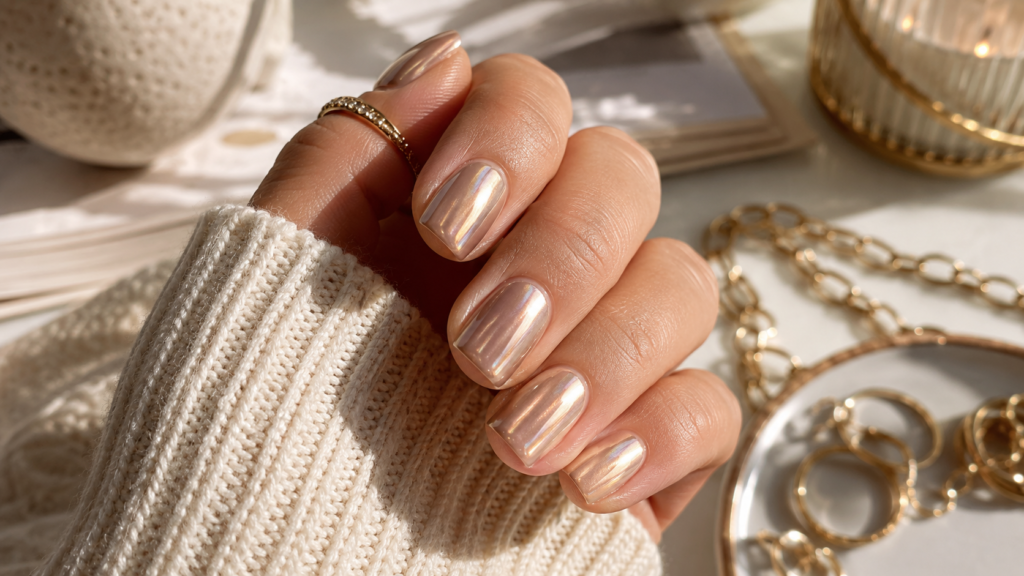
Building on the popular glazed donut nail craze, Glazed Champagne Chrome swaps cool pearl white for warm, glowing champagne and soft bronze shimmer. It provides a subtle golden sheen that shines brilliantly under natural sunlight.
Why You’ll Love This Idea
It works like a neutral color while offering an eye-catching, high-fashion metallic reflection that looks expensive and high-end.
Materials Needed
- Milky nude or soft beige base polish
- No-wipe gel top coat
- Champagne or soft gold chrome powder
- Silicone tool or eyeshadow sponge applicator
- Soft dusting brush
Step-by-Step Instructions
- Prep and shape nails to your desired length.
- Apply base coat and cure under your LED lamp.
- Apply two coats of milky beige polish, curing each coat.
- Apply a layer of no-wipe gel top coat and cure for exactly 30 seconds (it should feel slightly warm and rubbery).
- Dip the sponge applicator into champagne chrome powder.
- Gently buff the powder across the nail using smooth circular motions until a mirror-like shine appears.
- Dust away loose powder using a clean fluffy brush.
- Apply a generous layer of glossy top coat over the chrome, capping the free edge carefully.
- Cure for a full 60 seconds.
- Massage cuticle oil around all nail beds.
Beginner Tips
Make sure your top coat is completely no-wipe; traditional top coats leave a sticky layer that prevents chrome powder from creating a mirror finish.
Common Mistakes to Avoid
Buffing chrome powder onto an over-cured top coat will result in a grainy, glittery look instead of a seamless mirror reflection.
Styling or Decorating Ideas
Complements champagne silk blouses, gold jewelry collections, and warm beige home aesthetic decor.
Best Colors and Materials
Champagne chrome powder, pale biscuit gel base, no-wipe top coat.
Estimated Details
- Estimated Cost: $12 – $20
- Estimated Time: 30 minutes
- Difficulty Level: Easy
- Where It Looks Best: Short natural square nails or delicate oval shapes.
Pinterest-Worthy Tip
Photograph your nails resting over a textured cream wool blanket next to a brass candle holder.
Conclusion
Glazed Champagne Chrome delivers an opulent, effortless radiance perfect for late-summer weddings, sunset dinners, and cozy days at home.
3. Muted Olive & Sage Botanical Art
Introduction
Botanical leaf art paired with muted olive and sage green tones creates a soothing, nature-inspired manicure that celebrates late-summer garden harvests.
Why You’ll Love This Idea
Green is widely recognized as one of the easiest transition shades. Combining soft sage with darker olive accent leaves creates depth, texture, and organic charm.
Materials Needed
- Sage green polish
- Olive green polish
- Off-white or cream polish
- Ultra-fine nail detail brush
- Matte or glossy top coat
Step-by-Step Instructions
- Prepare nails with standard trimming, filing, and dehydrating steps.
- Apply base coat and cure.
- Paint three nails with full-coverage sage green polish.
- Paint your accent nails (index and ring fingers) with cream polish.
- Cure all base colors.
- Dip your fine brush into olive green polish.
- Paint a delicate curved center stem down the cream accent nails.
- Pull tiny oval leaf shapes out from the stem using quick pressure releases.
- Add subtle micro-dots along the vine using a dotting tool for extra detail.
- Cure the nail art, then seal with a velvety matte or ultra-glossy top coat.
Beginner Tips
Practice painting simple leaf strokes on a sheet of wax paper before trying them on your actual nails.
Common Mistakes to Avoid
Using too much polish on your liner brush can make leaf details look blobby instead of crisp.
Styling or Decorating Ideas
Matches beautifully with olive linen aprons, indoor eucalyptus plant displays, and botanical home decor prints.
Best Colors and Materials
Sage green, olive green, warm cream, matte gel top coat.
Estimated Details
- Estimated Cost: $10 – $18
- Estimated Time: 45 minutes
- Difficulty Level: Intermediate
- Where It Looks Best: Oval or almond-shaped medium nails.
Pinterest-Worthy Tip
Hold a small ceramic planter filled with fresh garden herbs under natural window light to capture rich botanical textures.
Conclusion
Muted Olive & Sage Botanical Art offers a tranquil, hand-crafted aesthetic that brings earthy elegance straight to your hands.
4. Butter Yellow & Smoky Amber Swirls
Introduction
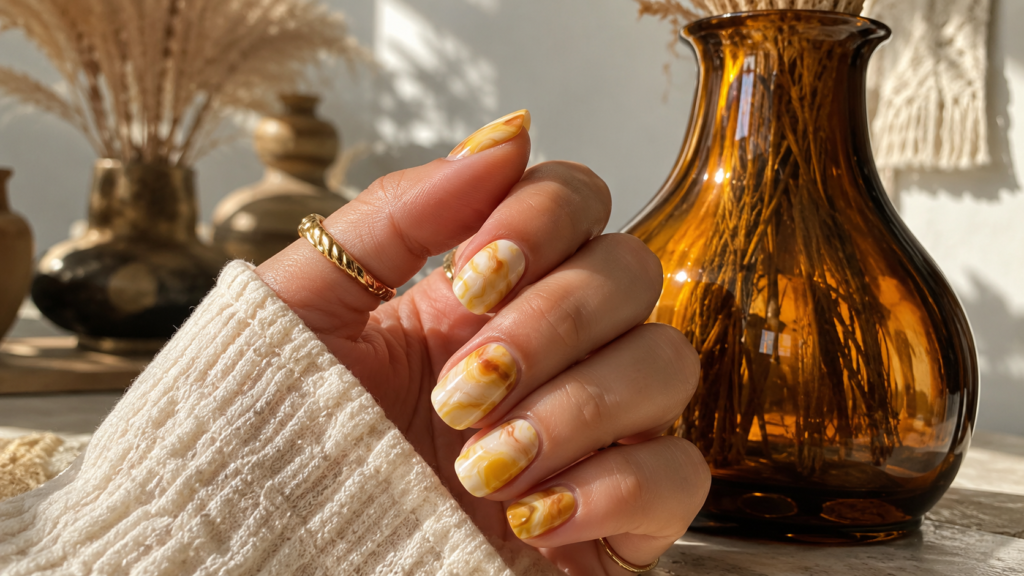
Butter yellow was the star color of summer 2026. To take this sunny hue into late August, layer creamy butter yellow with smoky amber waves to create a mesmerizing retro marble effect.
Why You’ll Love This Idea
It saves your favorite soft yellow summer shade while adding the rich depth of amber, generating a warm sunset-inspired swirl pattern.
Materials Needed
- Soft butter yellow polish
- Translucent smoky amber or burnt caramel gel polish
- Clear blooming gel or clear base coat
- Fine swirling brush or toothpick
- Glossy gel top coat
Step-by-Step Instructions
- Prep nails and apply base coat; cure under LED light.
- Apply two coats of butter yellow polish as your background color; cure.
- Brush a thin layer of clear blooming gel over the nail (do not cure yet!).
- Drop small ribbons of smoky amber gel onto the wet blooming gel.
- Drag your fine brush gently through the amber drops to create flowing organic swirls.
- Watch the amber color bloom and spread softly for 10–15 seconds.
- Cure immediately for 60 seconds to freeze the design in place.
- Repeat the process on chosen accent nails or all ten fingers.
- Apply a top coat to smooth out any surface texture and cure.
- Finish with cuticle oil for a healthy glow.
Beginner Tips
If you do not own blooming gel, swirl wet amber gel into wet base coat directly on the nail for a similar soft effect.
Common Mistakes to Avoid
Waiting too long before curing allows the swirl lines to bleed together completely, losing definition.
Styling or Decorating Ideas
Looks stunning styled alongside amber glass bottles, mustard yellow sofa pillows, and tortoiseshell accessories.
Best Colors and Materials
Butter yellow, amber jelly polish, blooming gel, glossy top coat.
Estimated Details
- Estimated Cost: $14 – $22
- Estimated Time: 40 minutes
- Difficulty Level: Intermediate
- Where It Looks Best: Medium to long almond nails.
Pinterest-Worthy Tip
Rest your fingers on a marble countertop next to an amber glass candle for a warm, luxurious contrast.
Conclusion
Butter Yellow & Smoky Amber Swirls offer a creative, artistic gradient that keeps late summer bright yet deeply warm.
5. Rich Plum & Berry Jelly Glass Nails
Introduction
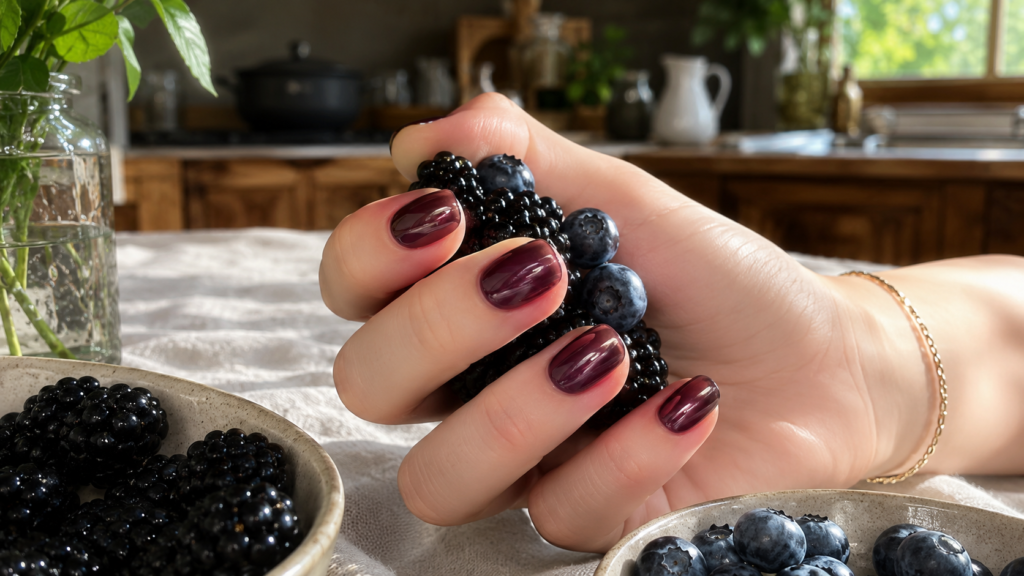
Jelly nails stay wildly popular year-round, but late summer calls for translucent berry and deep plum tones. Rich Plum & Berry Jelly Glass Nails give a glossy, gemstone-like finish reminiscent of fresh late-summer harvest fruit.
Why You’ll Love This Idea
Translucent jelly polishes provide a light, glassy look that feels fresh for hot days, while the deep plum tone hints at cozy fall style.
Materials Needed
- Deep plum or wild berry gel polish
- Clear gel base coat or mixing gel
- Glass-finish high-shine gel top coat
- Nail palette for mixing
Step-by-Step Instructions
- Shape nails into clean, rounded silhouettes.
- Apply base coat and cure.
- On a clean palette, mix 1 drop of rich plum gel polish with 3 drops of clear top coat to build a translucent tint.
- Apply the sheer tinted mixture evenly across the nail plate.
- Cure under LED light for 60 seconds.
- Apply a second sheer layer to build rich depth while keeping full transparency.
- Cure again.
- Apply a thick layer of high-shine glass top coat to create a plump 3D gel appearance.
- Cure completely for 60–90 seconds.
- Wipe away any tacky residue with alcohol wipes.
Beginner Tips
Always mix clear top coat with pure cream polish if you do not have premade jelly polish bottles.
Common Mistakes to Avoid
Applying coats too thick ruins the stained-glass transparency; keep each coat sheer and thin.
Styling or Decorating Ideas
Complements dark floral print dresses, berry lip tints, and cozy plum velvet accent pillows.
Best Colors and Materials
Plum jelly, deep blackberry tint, crystal clear gel top coat.
Estimated Details
- Estimated Cost: $8 – $14
- Estimated Time: 25 minutes
- Difficulty Level: Easy
- Where It Looks Best: Short square or medium natural oval nails.
Pinterest-Worthy Tip
Photograph your hand holding fresh blackberries or plums over a white linen napkin for an enticing culinary aesthetic.
Conclusion
Rich Plum & Berry Jelly Glass Nails combine glassy summer texture with dark cozy shade depth, creating a sophisticated finish.
6. Smoky Blue-Gray Micro French
Introduction
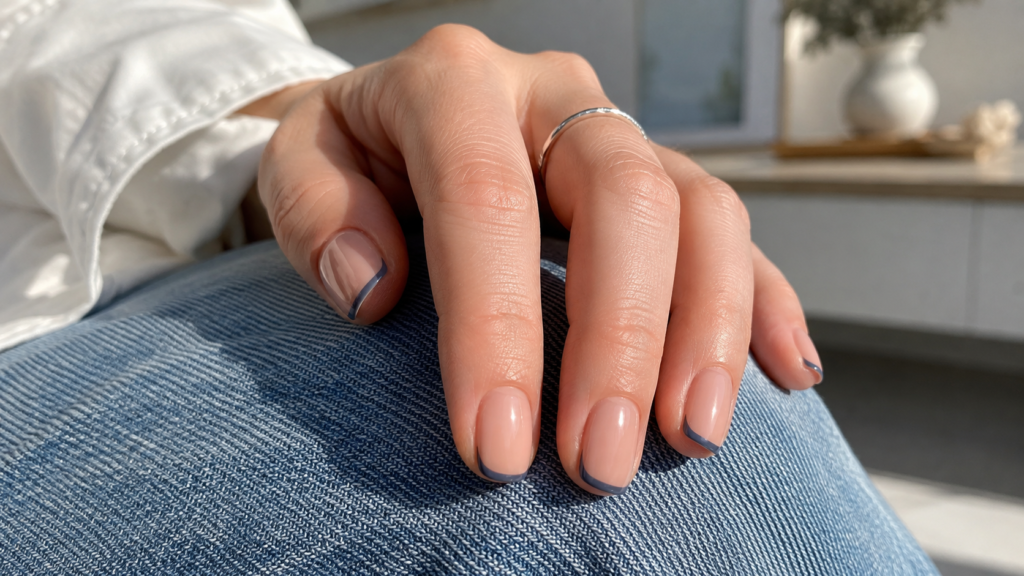
If you loved summer’s sky-blue nails, it is time to try Smoky Blue-Gray. Paired with a delicate micro French line, this design offers a clean, slate-like finish that mirrors moody late-summer skies.
Why You’ll Love This Idea
Micro French tips are sleek, modern, and minimal. Adding a dusty blue-gray color gives a cool, refreshing aesthetic that coordinates effortlessly with early fall denim.
Materials Needed
- Sheer pale pink or nude base
- Smoky blue-gray polish
- Extra-fine detail liner brush (5mm length)
- Glossy gel top coat
Step-by-Step Instructions
- Trim and file nails into a short, tidy square shape.
- Apply base coat and cure.
- Coat nails with two thin layers of sheer pink polish; cure each layer.
- Load the tip of your fine detail brush with smoky blue-gray polish.
- Trace a ultra-thin hairline stroke along the edge of each nail tip.
- Keep the line consistent from left to right.
- Cure the micro-tips for 60 seconds.
- Seal with a ultra-glossy top coat to build a flat, smooth surface.
- Cure fully and apply cuticle oil.
Beginner Tips
Rest your pinky finger against your opposite hand while painting to steady your brush stroke.
Common Mistakes to Avoid
Making the tip line too wide converts a delicate micro French into a standard French tip; keep it hair-thin!
Styling or Decorating Ideas
Pairs perfectly with cozy oversized denim jackets, slate gray home decor accents, and silver jewelry.
Best Colors and Materials
Smoky blue-gray polish, sheer nude polish, micro-liner brushes.
Estimated Details
- Estimated Cost: $6 – $12
- Estimated Time: 30 minutes
- Difficulty Level: Easy to Intermediate
- Where It Looks Best:Short natural square nails.
Pinterest-Worthy Tip
Pose your hand resting on the lapel of a vintage denim jacket with silver minimalist rings.
Conclusion
Smoky Blue-Gray Micro French nails deliver understated chic style, making them an ideal pick for everyday wear.
7. Golden Hour Honeycomb Accents
Introduction
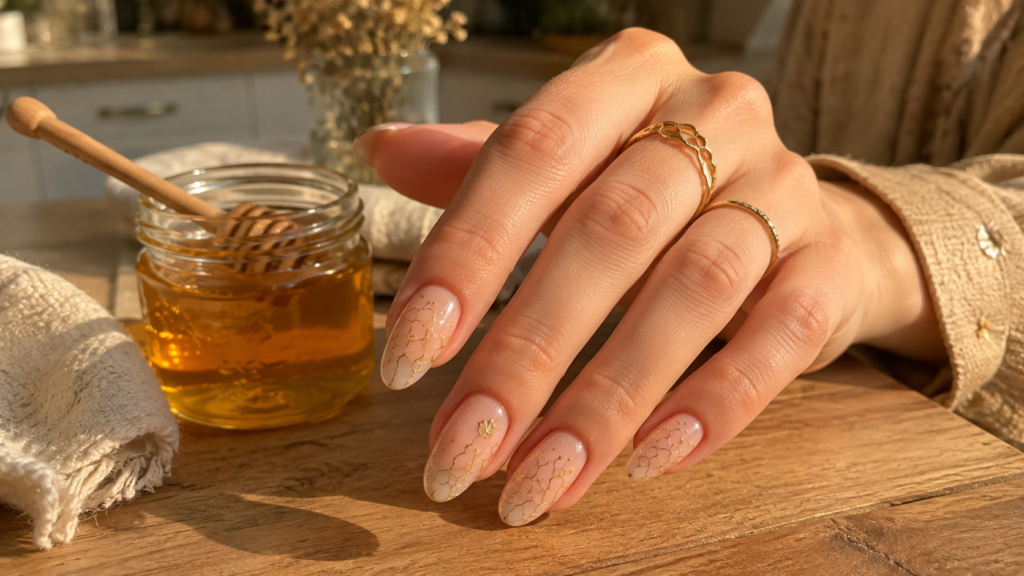
Golden Hour Honeycomb Accents incorporate warm gold chrome lines and subtle geometric honeycomb patterns onto warm nude nails. This design celebrates late-summer fields, honey harvests, and warm golden sunshine.
Why You’ll Love This Idea
It combines modern graphic nail art with rich metallic elegance. It gives your hands a glowing finish that looks custom-crafted by an elite artist.
Materials Needed
- Warm nude base polish
- Gold metallic painting gel or gold chrome powder
- Fine line nail art brush
- Dotting tool
- Top coat
Step-by-Step Instructions
- Shape nails into smooth almond silhouettes.
- Apply base coat and cure.
- Paint all nails with two layers of warm nude polish; cure.
- Using your fine detail brush and gold painting gel, paint small connected hexagon shapes on your accent nails.
- Keep the honeycomb grid clustered near the side wall or tip for an asymmetrical look.
- Use a dotting tool to add tiny gold drops in the centers of selected hexagons.
- Cure the gold gel art for 60 seconds.
- Coat all nails in a high-shine glossy top coat.
- Cure completely under your lamp.
Beginner Tips
Use honeycomb nail foil transfers or nail stamps if hand-drawing geometric hexagons feels too challenging.
Common Mistakes to Avoid
Drawing hexagons too big can overwhelm small nail beds; keep geometric lines tiny and delicate.
Styling or Decorating Ideas
Looks amazing when styled alongside warm honey-toned wooden tables, beeswax candles, and golden knit cardigans.
Best Colors and Materials
Warm nude, gold chrome painting gel, fine precision brushes.
Estimated Details
- Estimated Cost: $10 – $18
- Estimated Time: 45 minutes
- Difficulty Level: Intermediate to Advanced
- Where It Looks Best: Almond or coffin nails.
Pinterest-Worthy Tip
Capture your hand resting next to a crystal glass jar of fresh honey with a wooden honey dipper under warm golden lighting.
Conclusion
Golden Hour Honeycomb Accents offer a unique, golden-toned centerpiece manicure that shines brightly on any Pinterest feed.
8. Muted Rose & Copper Chrome Ombre
Introduction
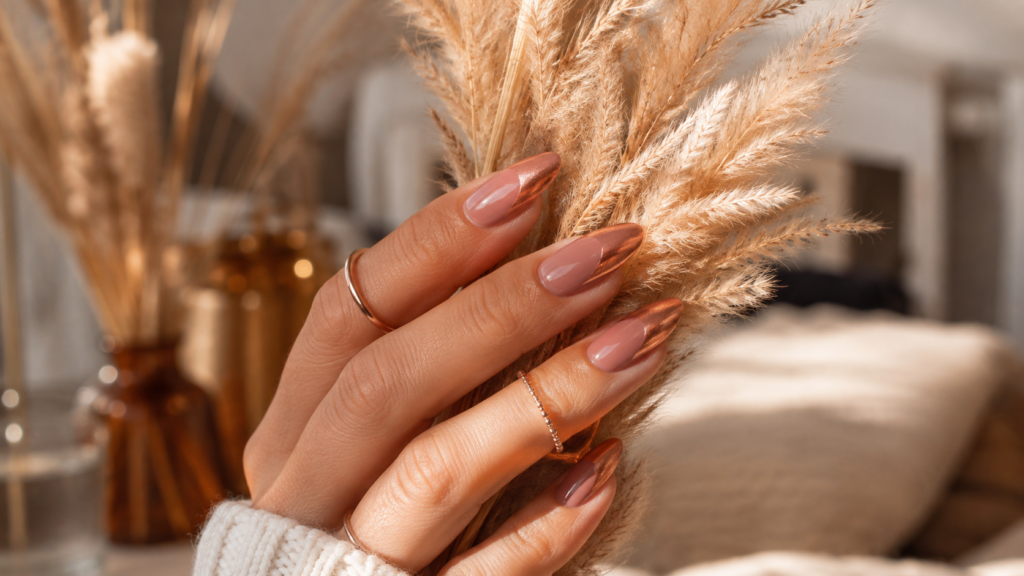
Instead of bright summer pinks, Muted Rose & Copper Chrome Ombre blends dusty rose with a warm metallic copper gradient. It captures the soft glow of late-summer flower petals fading into warm autumn light.
Why You’ll Love This Idea
It lets pink lovers retain their favorite shade family while softening the brightness into a sophisticated, cozy palette.
Materials Needed
- Dusty muted rose polish
- Metallic copper chrome powder or copper gel
- Nail ombre sponge
- No-wipe top coat
Step-by-Step Instructions
- Shape nails into almond or soft oval silhouettes.
- Apply base coat and cure.
- Paint nails with two coats of muted rose polish; cure each coat.
- Apply a no-wipe top coat and cure for 30 seconds.
- Sponge copper chrome powder starting at the free edge, fading down toward the middle of the nail to form a smooth gradient blend.
- Dust away excess loose chrome powder with a soft brush.
- Seal with a durable glossy top coat, capping the tips carefully.
- Cure for 60 seconds under your LED light.
- Hydrate cuticles thoroughly with oil.
Beginner Tips
Dab your chrome sponge onto a paper towel once before applying it to your nail to prevent harsh lines in your gradient.
Common Mistakes to Avoid
Pressing down too hard with the sponge can wipe away your base coat layer; keep your tapping pressure soft and airy.
Styling or Decorating Ideas
Pairs beautifully with rose-gold accessories, dried floral arrangements, and cozy mauve throw blankets.
Best Colors and Materials
Muted rose gel, copper chrome powder, ombre sponges.
Estimated Details
- Estimated Cost: $10 – $16
- Estimated Time: 35 minutes
- Difficulty Level: Intermediate
- Where It Looks Best: Medium-length almond or oval nails.
Pinterest-Worthy Tip
Hold a bouquet of dried pampas grass or muted blush roses in natural window sunlight for a romantic photoshoot.
Conclusion
Muted Rose & Copper Chrome Ombre provides a dreamy, romantic transitional look that smoothly blends summer elegance with autumnal warmth.
Expert Decorating Tips
Taking beautiful photos of your trendy end of summer nails for 2026 helps you build an aesthetic social feed or Pinterest board. Here are styling strategies used by professional creators:
- Seek Golden Hour Lighting: Shoot your nail photos outdoors or near a large window during late afternoon (1–2 hours before sunset). Golden sunlight emphasizes chrome reflections, warm terracotta hues, and shiny top coats.
- Layer Textures in Your Backdrop: Use textured background props like cozy knit blankets, raw linen napkins, marble slabs, or warm oak cutting boards. Texture creates depth without distracting from your manicure.
- Incorporate Seasonal Props: Hold cozy seasonal props such as iced lattes, fresh figs, dried wheat stalks, ceramic mugs, or vintage books.
- Accessorize Thoughtfully: Wear minimal gold or silver stackable rings and delicate bracelets that complement your nail polish undertones without cluttering the frame.
Budget-Saving Tips
Creating beautiful late-summer nails at home does not require spending hundreds of dollars at high-end salons. Use these budget-friendly DIY tricks:
+-----------------------------------------------------------------------+
|                       BUDGET-SAVING DIY NAIL TIPS                     |
+------------------------------------+----------------------------------+
| SALON EXPENSE                      | DIY AT-HOME ALTERNATIVE          |
+------------------------------------+----------------------------------+
| $60+ Professional Chrome Set       | Buy $5 chrome powder packets and |
|                                    | apply with leftover makeup sponges|
+------------------------------------+----------------------------------+
| $15 Specialty Blooming Gel         | Mix equal parts gel top coat with|
|                                    | colored polish on a plastic plate|
+------------------------------------+----------------------------------+
| $20 Precision Nail Brushes         | Cut down cheap synthetic fine-tip|
|                                    | art brushes from craft stores    |
+------------------------------------+----------------------------------+
| $50 Cuticle & Hand Spa Treatments  | Make DIY scrubs using olive oil, |
|                                    | brown sugar, and vitamin E oil   |
+------------------------------------+----------------------------------+
Frequently Asked Questions
1. What are the top trending nail colors for late summer 2026?
The top transitional colors include butter yellow, burnt terracotta, sage green, olive, smoky blue-gray, muted rose, plum jelly, and glazed champagne chrome.
2. How can I make my at-home gel manicure last longer?
Dehydrate your natural nail plate with isopropyl alcohol before applying base coat, avoid applying polish onto cuticles, and cap the free edges of your nails with top coat.
3. Are short nails trending for late summer 2026?
Yes! Short natural square and clean oval nails are extremely popular this season because they offer a practical, low-maintenance aesthetic that looks clean and polished.
4. How do I apply chrome powder without gel polish?
While chrome powder adheres best to non-wipe gel top coats, you can apply it over semi-dry traditional polish when it feels tacky, then seal with a water-based top coat.
5. What nail shapes look best with transitional nail art?
Almond, soft square, and natural oval shapes are the most versatile for late-summer designs, offering plenty of nail plate area for delicate line work and ombre gradients.
6. Can I combine summer and fall shades in one manicure?
Transitional nail fashion encourages combining sun-washed summer tones like butter yellow with warm earth tones like amber or terracotta.
7. How do I create a glass jelly nail effect at home?
Mix a few drops of clear gel top coat with a small dot of pigmented cream polish on a palette to create a translucent stained-glass tint.
8. How do I stop my fine nail art brushes from fraying?
Clean your brushes with alcohol wipes immediately after use, reshape the bristles with a drop of cuticle oil, and store them flat with protective caps.
Final Thoughts
The transition from late summer into early autumn is one of the most exciting times of the year for nail fashion and DIY creative expression. You do not have to choose between bright summer joy and warm fall cozy aesthetic vibes—these trendy end of summer nails for 2026 allow you to enjoy both!
By experimenting with warm terracotta French tips, glazed chrome powders, muted botanical art, and rich fruit jelly colors, you can create salon-quality art right at your kitchen table. Pick your favorite idea from this guide, gather your tools, and pamper yourself with a gorgeous seasonal manicure today!
Pin This Guide to Your Nail Board!
Loved these late-summer nail ideas? Don’t lose them! Click the Pin button below to save this article directly to your Pinterest Beauty or DIY Nail Ideas board so you have instant inspiration for your next pampering session! 📌✨