Introduction
Styling toddler curly hair is a special journey filled with bouncy ringlets, soft coils, and—let’s be honest—a fair share of toddler wriggling! Toddler curls are naturally delicate, beautiful, and full of personality. However, any parent or caregiver knows that keeping those precious curls defined, tangle-free, and styled without tears can feel like a daily workout.
Whether your little one has loose waves, springy ringlets, or tight z-pattern coils, finding hairstyles that are both adorable and quick to execute is the ultimate goal. Toddlers rarely sit still for long, which means styling routines need to be gentle, efficient, and long-lasting. Protective yet easy hairstyles not only keep curls neat throughout playtime, naptime, and park visits, but they also protect sensitive scalps and fragile hair strands from breakage and tangling.
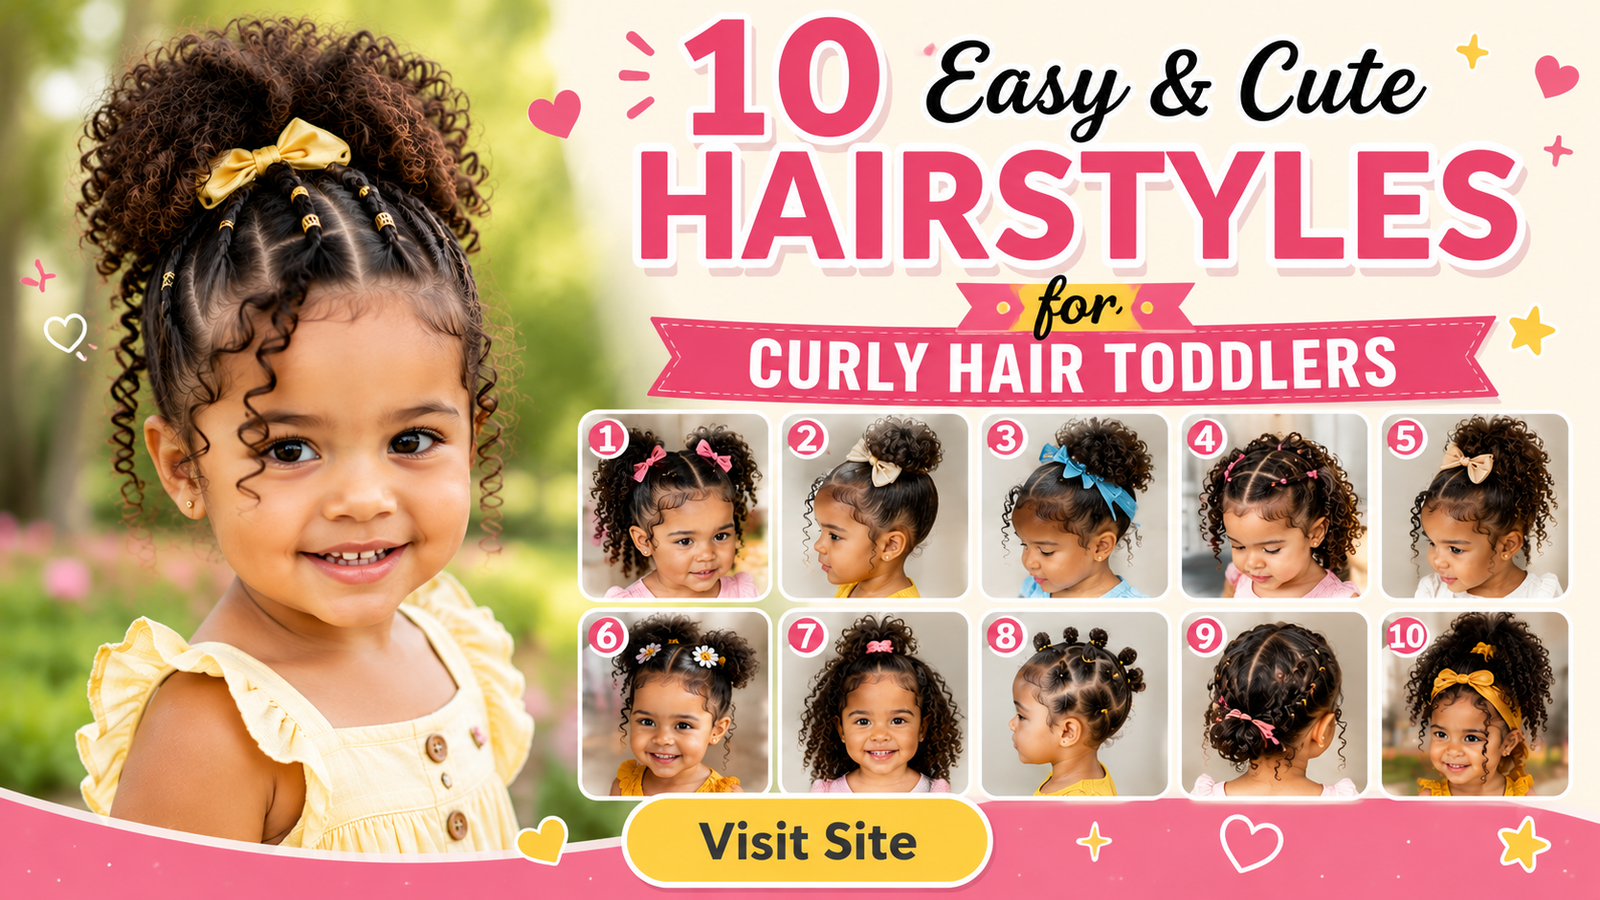
In this ultimate guide, we are sharing 8 gorgeous, easy, and cute hairstyles for curly hair toddlers that will turn hair day from a struggle into a delightful bonding experience. These styles require minimal tools, prioritize hair health and scalp safety, and look completely picture-perfect for everyday wear or special family photos. Get ready to save your favorite ideas directly to your Pinterest boards!
Why This Trend Is Popular
In recent years, the movement toward celebrating natural curls from a young age has taken social media by storm. Parents are moving away from harsh heat tools or tight, painful pulled-back styles and embracing moisture-focused, gentle curly hair care for toddlers.
Pinterest trends show a massive surge in searches for “gentle toddler curly hairstyles,” “quick curly hair ideas for kids,” and “protective hairstyles for toddler girl curls.” Parents love these styles because:
- They save precious time: Quick 5-to-10-minute routines work within a toddler’s short attention span.
- They protect curl health: Moisture-locking techniques prevent breakage and maintain natural coil elasticity.
- They keep hair out of little eyes: Active toddlers need styles that keep curls secure during playtime, running, and eating.
- They boost self-love: Teaching toddlers to cherish their natural curly textures builds early confidence and pride.
Materials and Tools Needed
Having the right tools ready beforehand makes styling toddler curls smooth and stress-free. Always prioritize gentle, non-snagging accessories.
| Tool / Material | Purpose |
| Continuous Mist Spray Bottle | Dampens hair evenly with water or leave-in mix without soaking. |
| Wide-Tooth Comb / Flexi Detangling Brush | Safely detangles curls starting from ends to roots. |
| Kids’ Alcohol-Free Leave-In Conditioner | Adds essential hydration and slip to eliminate tugging. |
| Snag-Free Seamless Elastic Bands | Soft elastics coated in fabric that won’t snap delicate hair. |
| Satin Scrunchies & Soft Fabric Bows | Cute, gentle embellishments that prevent friction breakage. |
| Light Natural Oil (Jojoba or Argan) | Seals in moisture and lubricates elastics for easy removal. |
Safety Tips for Toddler Hair Styling
When styling young children’s hair, comfort and hair health should always come first:
- Avoid Tensions and Tightness: Never pull hair too tightly around the hairline or crown. Tight styles can cause tension headaches and lead to traction alopecia in delicate young scalps.
- Never Detangle Dry Hair: Always detangle curly hair when damp and loaded with leave-in conditioner or detangling spray. Dry brushing causes severe breakage and unnecessary pain.
- Use Safe Removal Techniques: Coat elastics in a drop of hair oil or use a special seam ripper/elastic cutter to remove rubber bands without pulling out hair.
- Choose Non-Choking Accessories: Avoid tiny hair clips or hard beads for children under 3 years old, as they can pose a choking hazard if pulled out.
- Keep Distractions Ready: Have a favorite book, toy, or educational show ready so your toddler stays happily occupied during styling.
8 Detailed Ideas for Styling Toddler Curls
1. The Double Puff (Space Buns)
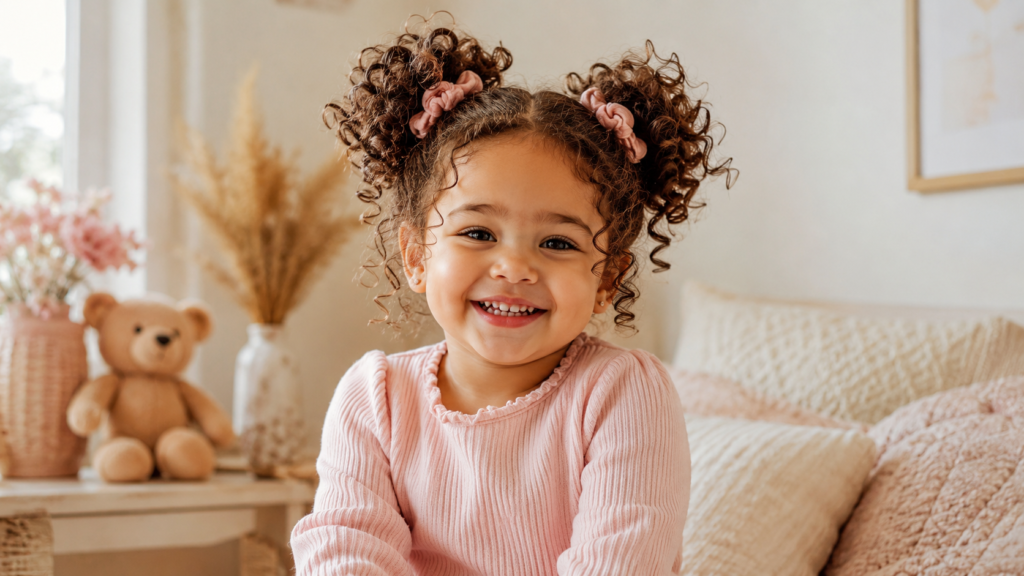
The double puff—often affectionately called toddler space buns—is an absolute classic. It gathers curly volume into two adorable high or mid-height puffs while letting natural texture shine at the top.
Why You’ll Love This Idea
It’s instantly cute, takes under seven minutes, keeps hair off the back of the neck on warmer days, and works amazingly on coils, ringlets, and wavy textures alike.
Materials Needed
- Continuous spray bottle with water
- Hydrating leave-in conditioner
- Soft wide-tooth comb
- 2 seamless fabric elastics
- 2 satin or velvet scrunchies
Step-by-Step Instructions
- Lightly mist your toddler’s hair with water and apply a dime-sized amount of leave-in conditioner.
- Gently detangle using your fingers or a wide-tooth comb from tips to roots.
- Using your fingers, create a clean middle part from the front hairline to the nape of the neck.
- Secure one side loosely with a clip to keep it out of the way.
- Gather the open side into a high ponytail near the crown, ensuring the tension is soft and comfortable.
- Pass a seamless elastic around the base once or twice—do not pull the curls completely flat; let the volume fluff out naturally!
- Repeat the process on the opposite side to create two symmetric puffs.
- Fluff the ends gently with your fingers to form rounded puff shapes.
- Wrap soft color-coordinated satin scrunchies around the base of each puff for extra flair.
- Lightly smooth baby hairs along the hairline using a touch of kid-friendly curly cream.
Beginner Tips
Don’t worry about making the middle part perfectly laser-straight. Organic, finger-made parts look softer and reduce scalp pulling.
Common Mistakes to Avoid
- Pulling the puffs too tight around the temples.
- Using rough rubber bands that snap or catch curls.
Styling or Decorating Ideas
Add small oversized fabric bows right in front of each puff for a adorable retro look.
Best Colors and Accessories
Pastel pinks, sunshine yellow scrunchies, or mint green ribbon clips.
Estimated Cost
$5 – $10 (using basic hair ties and scrunchies).
Estimated Time
5 to 7 minutes.
Difficulty Level
★☆☆☆☆ (Very Easy)
Where It Looks Best
Daycare days, park playdates, birthday parties, and casual weekend outings.
Pinterest-Worthy Tip
Angle the camera slightly from above to capture the full fluffy shape of both puffs against a cute, bright outfit.
Conclusion
The double puff is a timeless staple every curly toddler parent needs in their quick-style arsenal. It highlights natural curl texture effortless fashion.
2. Half-Up Pineapple Bun with Soft Bow
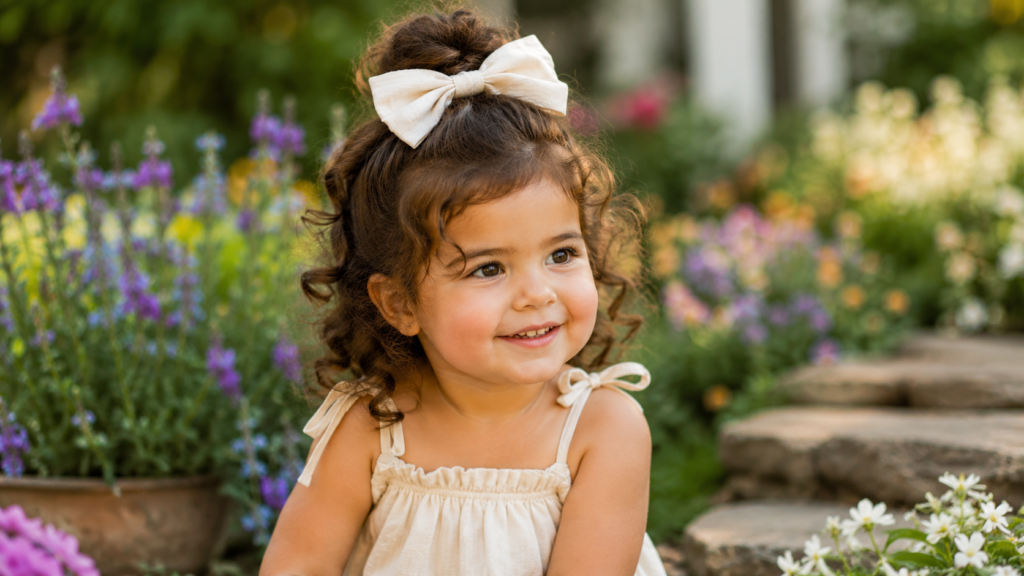
The toddler “pineapple” is a favorite high pony/bun hybrid that gathers curls at the top of the head, letting the curls spill over like a cute palm top.
Why You’ll Love This Idea
This style protects delicate back and side curls while keeping front ringlets out of eyes. It takes less than five minutes and looks effortlessly chic.
Materials Needed
- Leave-in conditioning spray
- Soft detangling brush
- 1 large seamless satin tie or soft elastic
- Oversized fabric bow clip
Step-by-Step Instructions
- Lightly mist the top section of hair with detangling spray.
- Separate the top half of the hair (from above the ears up to the crown).
- Leave the bottom half of curls down to float freely across the shoulders.
- Smooth the top section gently upward using your palm and a wide comb.
- Gather the section loosely at the top-front of the head (near the crown).
- Secure with a satin tie, pulling the curls through just enough to form a fountain-like puff.
- Gently fluff the cascading curls so they fan out evenly over the top.
- Apply a drop of light oil to the free curls at the back to enhance ringlet shine.
- Clip a soft fabric bow directly in front of the pineapple elastic band.
- Adjust any loose front curls to frame the face gently.
Beginner Tips
Gather the top section slightly forward toward the forehead rather than straight up; this gives the signature pineapple bounce!
Common Mistakes to Avoid
- Over-smoothing the hair flat, which ruins the natural volume.
- Forgetting to refresh the cascading curls at the bottom with a mist of water.
Styling or Decorating Ideas
Pair with a linen toddler jumpsuit or floral dress for a sweet bohemian vibe.
Best Colors and Accessories
Linen cream bows, mustard yellow bands, or dusty rose accessories.
Estimated Cost
$3 – $8.
Estimated Time
3 to 5 minutes.
Difficulty Level
★☆☆☆☆ (Super Easy)
Where It Looks Best
Family photo shoots, Sunday brunches, and warm summer afternoon strolls.
Pinterest-Worthy Tip
Capture the style in warm outdoor sunlight to highlight individual curl shine and the soft bow texture.
Conclusion
Quick, easy, and undeniably cute, the half-up pineapple is the ultimate low-effort, high-reward hairstyle for busy mornings.
3. Gentle Front Twist-Backs with Curly Back
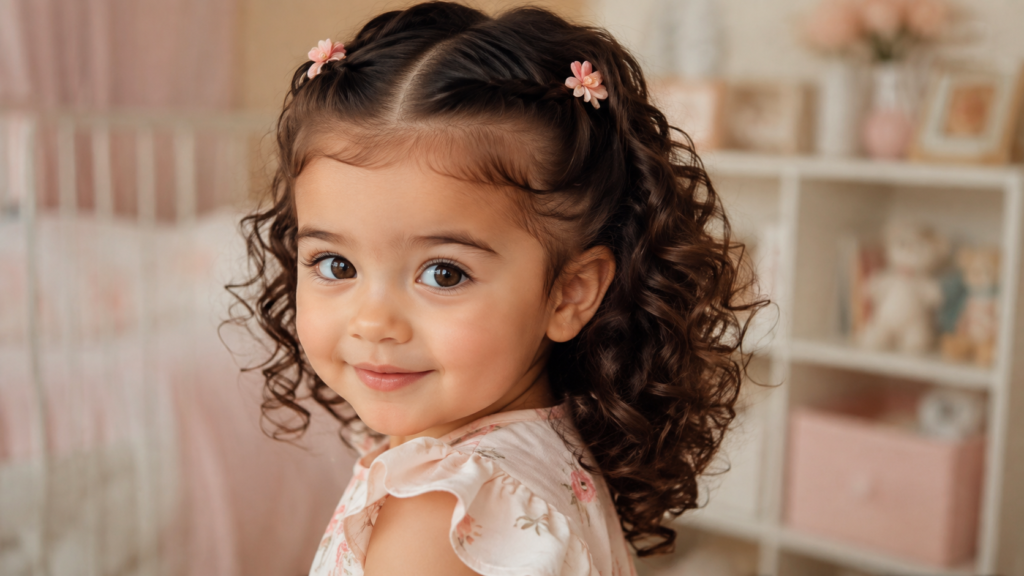
Front twist-backs are ideal for toddlers growing out bangs or who dislike hair falling into their faces during creative play.
Why You’ll Love This Idea
It offers the polished look of a structured style while leaving 80% of your toddler’s natural curls free and bouncy in the back.
Materials Needed
- Water mist bottle
- Curl defining cream
- 2 mini seamless elastic bands
- 2 decorative mini floral snap clips
Step-by-Step Instructions
- Dampen the front hairline section with water and a tiny dab of curl cream.
- Create a clean center or side part extending back about 2 to 3 inches.
- Take a small 1-inch section of hair on one side of the part near the hairline.
- Divide this section into two equal strands.
- Twist the two strands over each other, adding small bits of hair as you move backward along the hairline (flat twist style).
- Continue twisting until you reach just past the ear.
- Secure the twist with a mini seamless elastic.
- Repeat the exact process on the opposite side of the part.
- Fluff the remaining back curls with a touch of leave-in spray to keep them springy.
- Snap a mini decorative floral clip over each elastic band to hide the tie.
Beginner Tips
If flat twisting feels tricky, a simple single roll/twist back towards the ear works just as well and takes half the time!
Common Mistakes to Avoid
- Twisting too tightly near the forehead temples.
- Pulling dry hair without dampening it first.
Styling or Decorating Ideas
Use small sunflower or daisy clips at the ends of the twists for a charming spring look.
Best Colors and Accessories
Pastel daisy clips, soft white pearl snaps, or vibrant silicone mini ties.
Estimated Cost
$4 – $7.
Estimated Time
6 to 8 minutes.
Difficulty Level
★★☆☆☆ (Easy-Intermediate)
Where It Looks Best
Preschool sessions, playdates, and outdoor garden parties.
Pinterest-Worthy Tip
Photograph your toddler from a 45-degree side angle to showcase both the front twist detail and the cascading curls behind.
Conclusion
Front twist-backs balance practical face-clearing design with full, glorious curl display—a win-win for parents and toddlers alike.
4. Side-Swept Curly Ponytail with Colorful Elastics
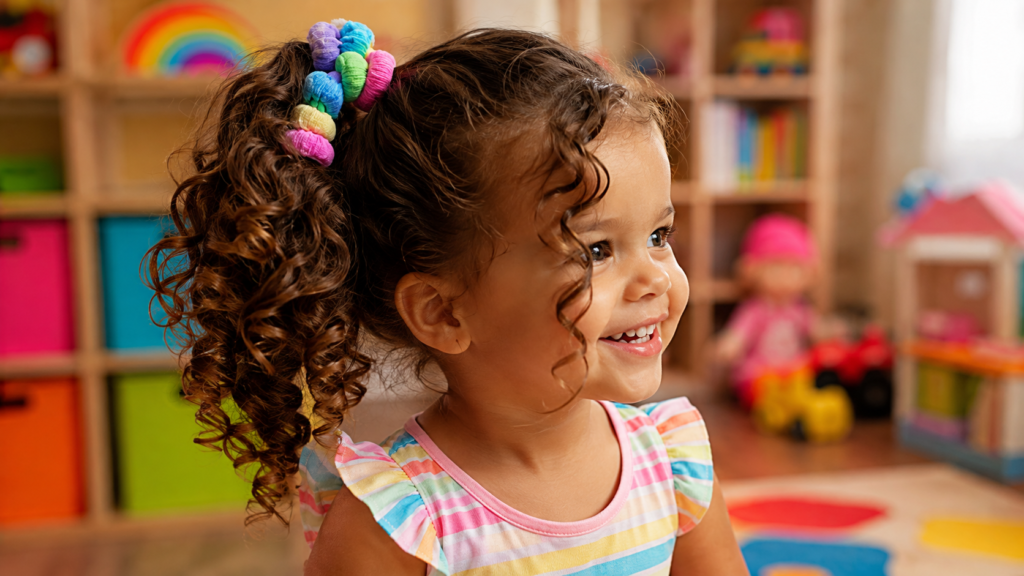
This play on the traditional side ponytail adds structure and playful color bursts by using a series of gentle elastics along the side.
Why You’ll Love This Idea
It turns a basic ponytail into a fun, rainbow-accented style that holds even fine toddler curls in place all day long.
Materials Needed
- Detangling mist
- Wide-tooth comb
- 3 to 4 colorful soft elastics
- Light curl gel or butter
Step-by-Step Instructions
- Mist hair thoroughly and apply a light moisturizing butter.
- Create a deep side part starting above the outer eyebrow arch.
- Sweep all hair gently toward the opposite side of the head.
- On the swept side, collect a small front section of hair and secure with a soft elastic.
- Gather a second section right behind it, including the tail of the first section, and secure with a second elastic.
- Gather all remaining hair along with the sectioned ponytail into a low-to-mid side ponytail behind the ear.
- Fasten with a main soft elastic band.
- Gently pull each small banded section slightly apart (“puffing”) for added volume.
- Apply a small dab of cream to the ponytail ringlets and finger-coil the ends.
- Finish with a bright fabric scrunchie at the base of the main ponytail.
Beginner Tips
Match elastic colors to your toddler’s outfit to make the look feel coordinated and intentionally styled!
Common Mistakes to Avoid
- Over-tightening the bands along the scalp line.
- Rushing through finger-coiling the loose ends.
Styling or Decorating Ideas
Combine primary-colored elastics for a bright, cheerful playground aesthetic.
Best Colors and Accessories
Rainbow pastel sets, neon bright elastics, or matching hair bands.
Estimated Cost
$3 – $6.
Estimated Time
8 to 10 minutes.
Difficulty Level
★★☆☆☆ (Easy)
Where It Looks Best
Playgrounds, gymnastics classes, and active park days.
Pinterest-Worthy Tip
Focus on a close-up profile shot showing the colorful ladder of elastics transitioning into luscious curls.
Conclusion
A creative, durable style that handles energetic playtime without losing its adorable charm!
5. The Gentle “Bubble” Curly Ponytails
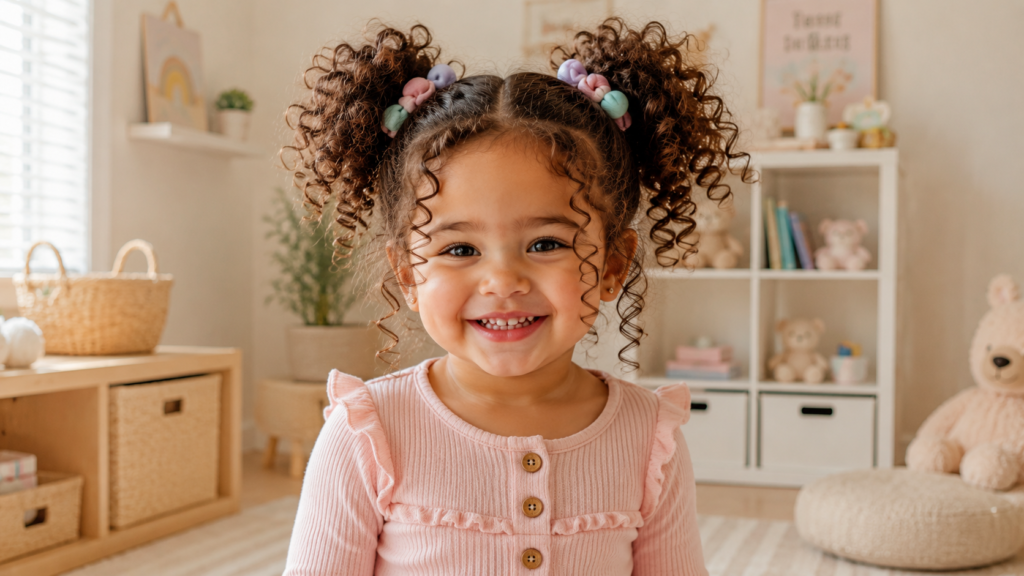
Bubble ponytails are trendy, fun, and extremely effective at controlling long or medium toddler curls without needing complex braiding skills.
Why You’ll Love This Idea
You get the clean, organized look of braids without any of the intricate weaving. It’s fast, cute, and stays tidy through naptime!
Materials Needed
- Hydrating curl spray
- Soft detangling brush
- 6 to 8 mini seamless fabric ties
Step-by-Step Instructions
- Spray hair with water and a leave-in conditioner mist.
- Part hair down the center into two equal left and right sections.
- Secure the left section into a high pigtail near the top crown.
- Move down 1.5 to 2 inches along the pigtail length and add a second elastic band.
- Gently tug outward on the hair between the two elastics to create a rounded “bubble” shape.
- Add a third elastic further down if hair length permits, fluffing it into another bubble.
- Leave the natural curly ends free at the bottom like a little pom-pom.
- Repeat the exact steps on the right pigtail section.
- Ensure bubbles on both sides align symmetrically.
- Mist the free ends with water and bounce them up with your palm.
Beginner Tips
Don’t pull the “bubbles” out too forcefully; gentle tugging creates the perfect rounded shape without loosening the elastic ties.
Common Mistakes to Avoid
- Placing elastics too close together, which flattens the bubble effect.
- Using rough elastics that tug on fine curl shafts.
Styling or Decorating Ideas
Place mini clip bows over each bubble node for an extra charming accent.
Best Colors and Accessories
Ombre shades, soft pastel elastics, or polka-dot bows.
Estimated Cost
$5 – $8.
Estimated Time
7 to 10 minutes.
Difficulty Level
★★☆☆☆ (Easy)
Where It Looks Best
Daycare photos, birthday celebrations, and family outings.
Pinterest-Worthy Tip
Take the photo from slightly behind your toddler to showcase both twin bubble columns clearly.
Conclusion
Bubble ponytails deliver high Pinterest visual impact with very minimal effort and zero braid experience needed!
6. Banded Curly Crown (Rubber Band Method for Kids)
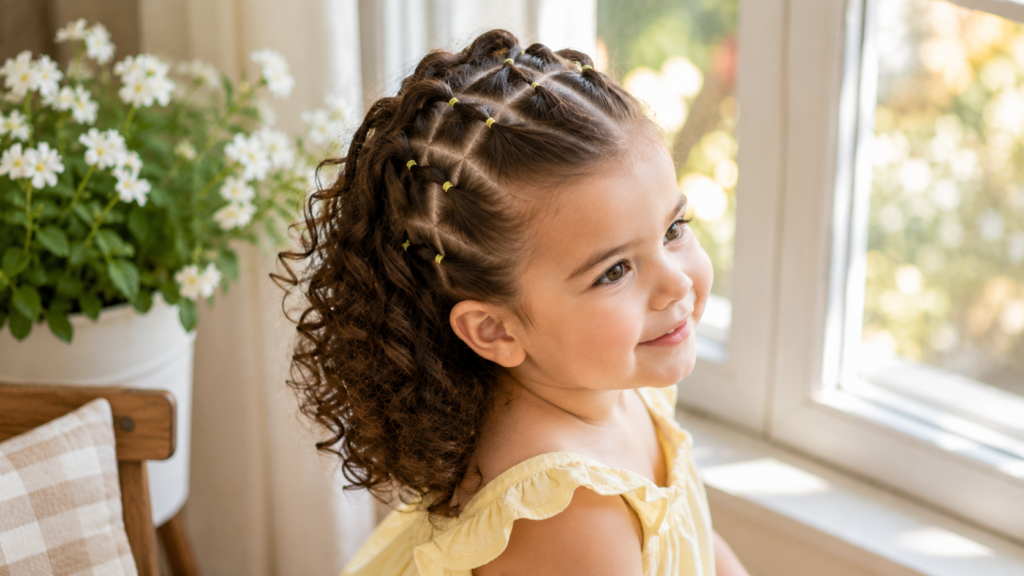
This style creates a headband-like crown of soft, crisscrossed elastic ties across the top of the head, leaving the remaining curls free at the back.
Why You’ll Love This Idea
It secures unruly front baby hairs effortlessly while delivering a regal, neat crown look that lasts up to 3 days with minimal morning touch-ups.
Materials Needed
- Detangling cream & continuous mister
- Tail comb for sectioning (or finger parting)
- 4 to 6 snag-free soft mini elastics
- Light sealing oil
Step-by-Step Instructions
- Dampen the front quadrant of hair (from ear to ear across the top).
- Apply a thin layer of moisturizing curl cream to the front section.
- Divide the front section into 4 small, equal box squares along the hairline.
- Secure each small box into a neat mini ponytail using a soft elastic.
- (Optional) Cross the tail of the 1st box into the 2nd box before securing for a lattice effect.
- Smooth down any flyaways using a touch of kid-friendly edge gel or cream.
- Refresh the unbanded back curls with damp hands and a dollop of leave-in spray.
- Finger-coil individual back ringlets that need extra definition.
- Apply a drop of jojoba oil over the front bands to add shine and seal moisture.
- Allow the style to set naturally.
Beginner Tips
Keep box sections relatively large (1 inch minimum) so there is enough hair volume in each elastic, preventing scalp tension.
Common Mistakes to Avoid
- Making grid sections too small or pulling elastics too tight against the scalp.
- Removing elastics dry—always lubricate elastics with oil before taking them out!
Styling or Decorating Ideas
Crisscross the small ponytails to create a diamond pattern across the crown.
Best Colors and Accessories
Clear elastics for a subtle look or bright contrast colors for a playful pop.
Estimated Cost
$4 – $8.
Estimated Time
10 to 12 minutes.
Difficulty Level
★★★☆☆ (Intermediate)
Where It Looks Best
Special events, holiday gatherings, and long weekend trips.
Pinterest-Worthy Tip
Style against a simple backdrop so the intricate geometry of the crisscross crown pops on screen.
Conclusion
A long-lasting, protective front-crown style that keeps curls gorgeous and tangle-free for multiple days.
7. Two Soft Flat Twists into Curly Pigtails
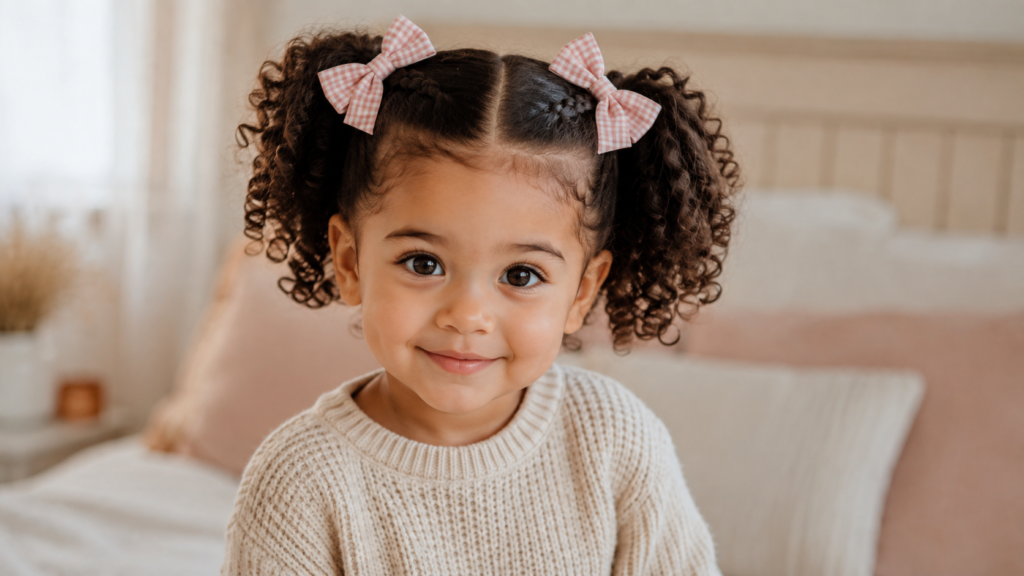
Combining the neatness of flat twists with the playfulness of low pigtails, this style offers a super gentle alternative to tight cornrows.
Why You’ll Love This Idea
Flat twists are much faster and gentler to install than classic cornrows, making them perfect for tender-headed toddlers who won’t sit still long.
Materials Needed
- Leave-in moisturizer & water mister
- Wide-tooth comb
- 2 soft scrunchies or fabric ties
- 2 ribbon bow clips
Step-by-Step Instructions
- Mist hair until evenly damp and thoroughly detangle with leave-in conditioner.
- Create a clean middle part extending from the forehead down to the nape of the neck.
- Secure one half with a soft clamp or tie while working on the other.
- On the active side, take a small triangular section right at the front hairline.
- Divide into two strands and begin flat-twisting along the scalp toward the base of the neck.
- Add small amounts of hair from the scalp to both strands as you roll backward.
- Once you reach the nape of the neck, secure the twist with a soft elastic.
- Leave the tail of the ponytail un-twisted, allowing natural curls to burst out freely.
- Repeat the flat-twist process on the second side.
- Attach ribbon bow clips over each ponytail base to finish the look.
Beginner Tips
If flat twisting slips, hold your thumbs close to the scalp as you roll the strands over each other to keep tension smooth and comfortable.
Common Mistakes to Avoid
- Twisting too tightly near the nape of the neck, which restricts neck movement.
- Skipping leave-in moisturizer before twisting.
Styling or Decorating Ideas
Add satin ribbon ties braided directly into the flat twist for extra holiday charm.
Best Colors and Accessories
Gingham fabric bows, velvet ribbons, or pastel scrunchies.
Estimated Cost
$5 – $10.
Estimated Time
10 to 15 minutes.
Difficulty Level
★★★☆☆ (Intermediate)
Where It Looks Best
Family outings, holiday gatherings, and photo sessions.
Pinterest-Worthy Tip
Style your toddler in a cozy knitted sweater for a sweet, timeless Pinterest picture aesthetic.
Conclusion
Two soft flat twists into curly pigtails offer standard-setting protective styling that blends traditional elegance with playful toddler energy.
8. Natural Wash-and-Go Curly Fro with Satin Headband
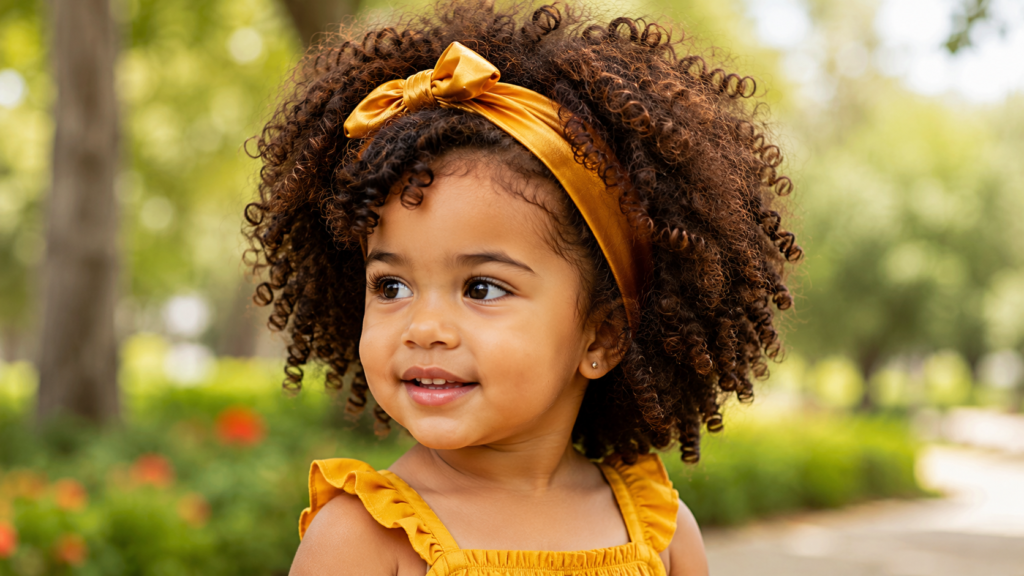
Nothing celebrates natural toddler curls quite like a healthy, full, hydrated natural curl fro accented by a soft, non-slip satin headband!
Why You’ll Love This Idea
It requires zero sectioning, zero elastics, and zero tension! It’s the ultimate curl-positive style that lets your child’s natural curl pattern shine brightest.
Materials Needed
- Warm water mist bottle
- Kid’s curl activating cream or curling jelly
- Light hair oil (Argan or Jojoba)
- Stretchy wide satin headband
Step-by-Step Instructions
- Thoroughly wet hair using your continuous mist bottle until uniformly damp.
- Apply a generous amount of kid-friendly leave-in conditioner throughout the curls.
- Work a dime-sized amount of soft-hold curling jelly through the hair using “raking” finger motions.
- Gently scrunch curls upward toward the scalp to encourage natural coil formation.
- Allow hair to air-dry naturally (or gently air-fluff with your fingers).
- Once 90% dry, apply 2 drops of light oil onto your palms and cup the curls to soften any cast.
- Slip a wide, stretchy satin headband over the child’s head and down to the neck.
- Pull the headband back up to the hairline, gently pushing front curls back slightly.
- Fluff the back and top volume with your fingers for balanced roundness.
- Check that the headband sits comfortably behind the ears without pinching.
Beginner Tips
Look for wide headbands made of satin or stretchy cotton jersey so they stay in place without pulling delicate hair edges.
Common Mistakes to Avoid
- Touching or picking curls while they are still wet, which causes instant frizz.
- Using adult gel with harsh alcohols that dry out sensitive toddler ringlets.
Styling or Decorating Ideas
Choose headbands with attached floral accents or top knot bow details for instant outfit matching.
Best Colors and Accessories
Floral print satin headbands, solid mustard or olive wide bands, or knotted fabric wraps.
Estimated Cost
$4 – $9.
Estimated Time
4 to 6 minutes.
Difficulty Level
★☆☆☆☆ (Super Easy)
Where It Looks Best
Everyday casual wear, park dates, quick morning errands, and family park outings.
Pinterest-Worthy Tip
Capture the wash-and-go fro outdoors against lush green grass or flowers to highlight natural curl volume and vibrant colors.
Conclusion
Embrace raw, gorgeous texture with this zero-stress style that celebrates your toddler’s natural curls in all their glory.
Expert Styling & Care Tips for Toddler Curls
Keeping toddler curls healthy, bouncy, and soft goes beyond just choosing cute hairstyles. Here are essential care rules every toddler parent should know:
Comparison of Care Essentials
| Care Step | Best Practice | Why It Matters |
| Washing | Use sulfate-free moisturizing shampoo weekly. | Prevents stripping natural scalp oils. |
| Conditioning | Always follow with a rich kid-safe conditioner. | Replenishes moisture barrier and untangles easily. |
| Drying | Pat gently with a microfiber towel or cotton T-shirt. | Rough terrycloth towels create severe friction and frizz. |
| Sleeping | Use a satin pillowcase or soft toddler satin bonnet. | Keeps moisture in hair strands overnight and avoids morning tangles. |
| Refreshing | Spritz morning curls with 80% water + 20% leave-in. | Reactivates products without needing a full bath wash. |
Budget-Saving Tips for Parents
You don’t need to spend a fortune on high-end salon products to keep your child’s curls looking stunning:
- DIY Refresh Spray: Mix 1 part of your favorite rinse-out conditioner with 4 parts distilled water in a spray bottle for an instant, penny-cost daily refresher.
- Buy Accessories in Bulk: Purchase seamless fabric elastics and satin scrunchies in multipacks online rather than individual boutique packs.
- Multi-Use Oils: Pure raw oils like organic Jojoba or Sweet Almond oil are multi-purpose—use them for detangling lubrication, scalp massage, and bath moisturizing.
- Repurpose T-Shirts: Old soft 100% cotton adult t-shirts make superior, zero-cost curl-drying towels!
Frequently Asked Questions (FAQs)
1. How often should I wash my toddler’s curly hair?
Washing once or twice a week is usually sufficient for toddlers. Over-washing strips natural oils, causing dry, frizzy curls. If hair gets dirty between washes from outdoor play, rinse with plain water or a light conditioner co-wash.
2. How do I detangle toddler curls without tears?
Never attempt to detangle dry curls! Always wet the hair first with water and a generous amount of leave-in conditioner. Use a wide-tooth comb or flexible detangling brush, starting gently at the ends of the hair and working your way up to the roots.
3. What hair products are safe for curly toddlers?
Look for products labeled as tear-free, sulfate-free, silicone-free, and paraben-free. Natural ingredients like shea butter, aloe vera, coconut oil, and chamomile are gentle on sensitive toddler scalps.
4. How can I protect my toddler’s curls overnight?
Switch your toddler’s standard cotton pillowcase to a smooth satin pillowcase. If your toddler tolerates it, a soft satin hair bonnet works wonderfully to prevent friction tangles while sleeping.
5. Why are my toddler’s curls frizzy on top?
Frizz on top usually results from friction (rubbing against car seats, strollers, or crib mattresses) or lack of moisture. A quick morning spritz of water and leave-in conditioner smoothed over the surface will instant reset the top layer.
6. Are rubber bands safe for toddler hair?
Standard rubber bands cause friction and tear hair shafts. Always choose seamless fabric elastics, silk-coated ties, or soft mini band ties. If using mini clear elastics, soak them in oil before removal so they slip out effortlessly.
7. How do I get my active toddler to sit still during styling?
Keep styling sessions under 10 minutes! Offer a special “styling time only” distraction like a favorite musical video, interactive storybook, or a small handheld toy to keep their hands busy.
8. My toddler has a mix of curl patterns—how do I style it?
Multi-textured curls are completely normal! Focus on moisture consistency throughout. Styles like half-up pineapples, double puffs, or front twist-backs work harmoniously regardless of varying curl patterns across the scalp.
9. When should I cut or trim my toddler’s curls?
A light trim every 4 to 6 months helps remove dry or tangled ends. Always trim curly hair when it is dry and in its natural state, as curly hair shrinks significantly when dry compared to when wet.
10. How can I promote healthy hair growth for my toddler?
Focus on scalp hydration, avoid tight tension styles, maintain a balanced nutrient-rich diet, and keep hair moisturized. Gentle handling during detangling preserves hair length by reducing breakage.
Final Thoughts
Styling your toddler’s curly hair is more than just a morning routine—it’s an opportunity to teach your little one to love and embrace their natural beauty. By choosing easy, protective, and gentle hairstyles like double puffs, twist-backs, and pineapple buns, you protect delicate ringlets while keeping hair styling fun, fast, and completely tear-free.
Remember that perfection is never the goal when styling toddlers! A few loose ringlets or soft wisps only add to the natural charm. Focus on moisture, keep tension soft, and enjoy these sweet everyday moments with your toddler.
Save This Pin! 📌
Love these easy toddler curly hair ideas?
Don’t lose these quick guides! Click the red “Save” button on your screen to pin this article directly to your Pinterest board for Toddler Hairstyles, Curly Hair Care, or Kids Fashion Inspiration. Revisit these 8 step-by-step guides whenever you need quick morning hair inspiration!