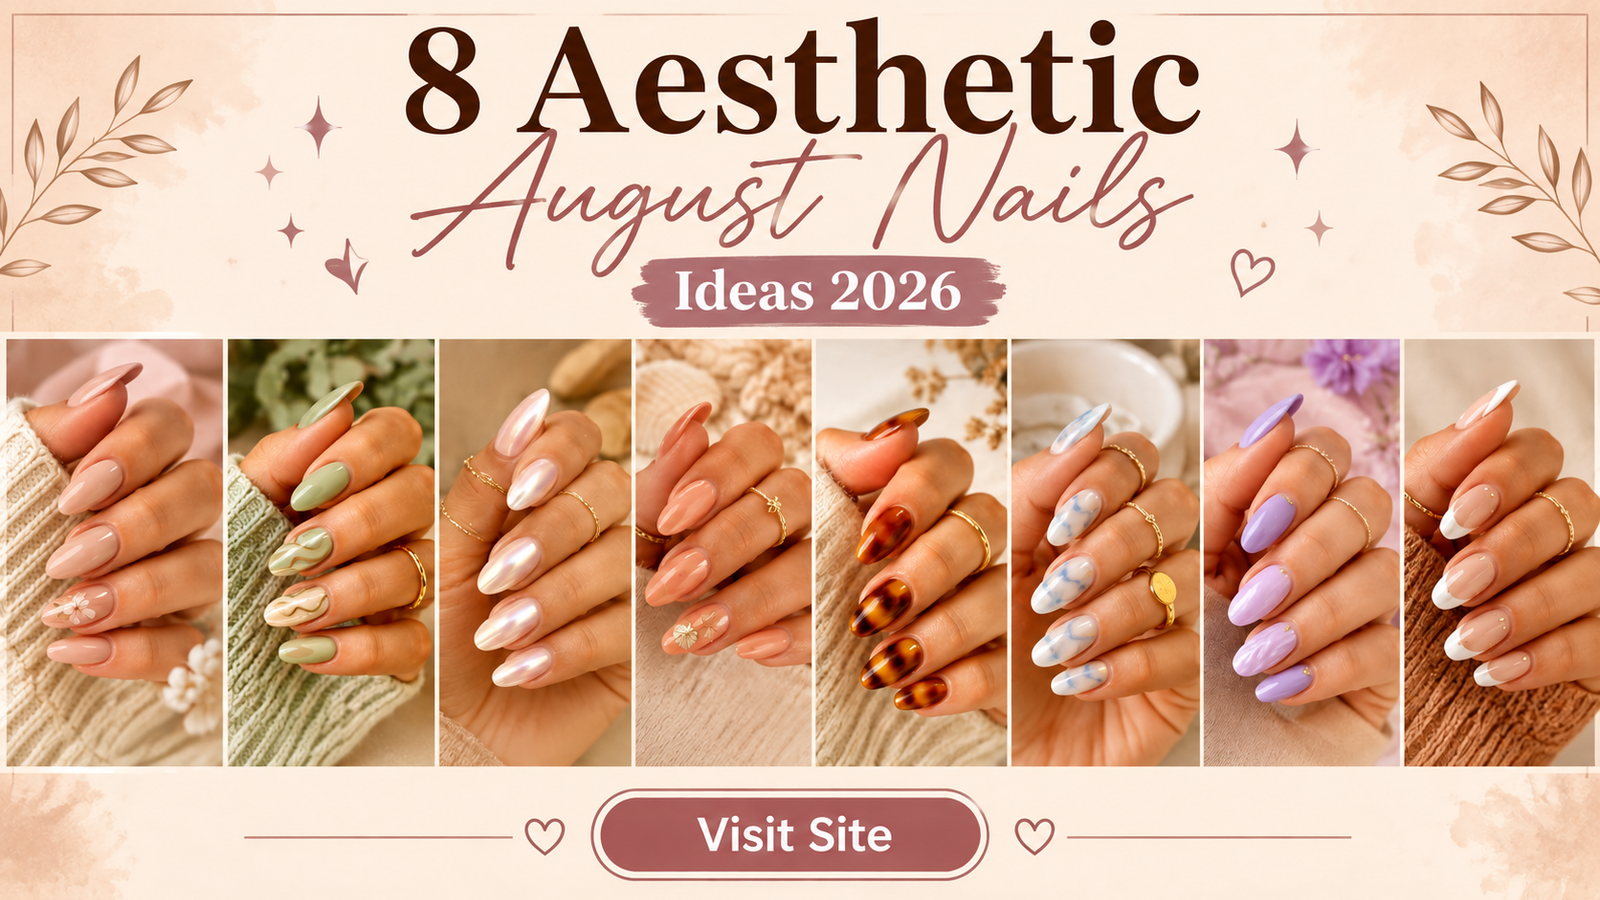
Introduction: Upgrading Your Nails for August 2026
August brings a very special mood to our beauty routines. It is the month where the hot days of high summer start to gently touch the crisp, cozy feel of early fall. You might not be ready for deep pumpkin spices or dark burgundy polishes just yet, but bright neon pinks can start to feel a bit out of place.
That is where aesthetic August nails ideas 2026 come into play. This late summer season is all about finding that gorgeous middle ground. Think warm buttery yellows, soft muted chrome finishes, rich matcha greens, earthy sunset terracottas, and golden hour shimmer. Whether you are sipping an iced coffee on a patio, heading on a late summer beach trip, or prepping your mood for back-to-school vibes, your nails are the ultimate accessory to set the tone.
In this ultimate guide, we are sharing eight stunning, Pinterest-approved nail trends that capture the exact essence of late summer transition. Each idea comes complete with everything you need to recreate the look at home: simple supplies, foolproof step-by-step instructions, beginner tips, cost estimates, and Pinterest styling advice.
Put on your favorite summer playlist, gather your nail care kit, and let’s find your next favorite manicure!
Why Late Summer Nail Trends Are Taking Over Pinterest
Late summer manicures are currently going viral on Pinterest for several great reasons:
- The Seasonal Transition: People love the shift from vibrant neon colors to rich, warm earth tones. August nails let you bridge the gap naturally.
- Warm “Golden Hour” Aesthetics: Late August sunlight is soft and golden. Nail designs with metallic flecks, pearl sheens, and glazed finishes catch this light beautifully in photos.
- Versatility: These designs work amazingly well on short natural nails, long acrylics, almond shapes, or square cuts.
- Easy DIY Appeal: You don’t need a professional salon setup to pull off these looks. Many top late summer trends feature minimalist swirls, soft gradients, and simple accents that anyone can do at home.
Essential Materials and Tools Needed
Before diving into the design tutorials, build your ultimate home nail station with these basic tools:
| Tool/Material | Why You Need It |
| Nail Prep Kit | Fine-grit file, 240-grit buffer, wooden cuticle pusher, and alcohol wipes. |
| Base & Top Coat | Strengthening base coat and a high-shine (or matte) top coat. |
| Detailing Brushes | Ultra-fine nail art brushes (5mm to 9mm) for line work and swirls. |
| Dotting Tools | Great for making clean dots, flowers, and geometric accents. |
| Chrome / Shimmer Powder | Micro-fine pearl or gold powder for glazed finishes. |
| Cuticle Oil | Hydrating oil (jojoba or vitamin E) to keep your manicures looking fresh. |
Essential Nail Safety and Prep Tips
To ensure your DIY manicure lasts for up to two weeks without damaging your natural nails, keep these quick tips in mind:
- Never Cut Live Cuticle Tissue: Gently push cuticles back after soaking or applying a cuticle remover. Only trim loose hangnails.
- Dehydrate the Nail Plate: Wipe each nail with 90% isopropyl alcohol or acetone before applying your base coat to remove natural oils.
- Apply Thin Layers: Multi-thin coats cure faster, resist chipping better, and look cleaner than one thick layer of polish.
- Cap the Free Edge: Always run your polish brush along the top edge of your nail to seal the color and prevent premature peeling.
8 Aesthetic August Nails Ideas for Late Summer 2026
1. Honey Butter Glazed Almond Nails
Warm, Sweet, and Effortlessly Radiant
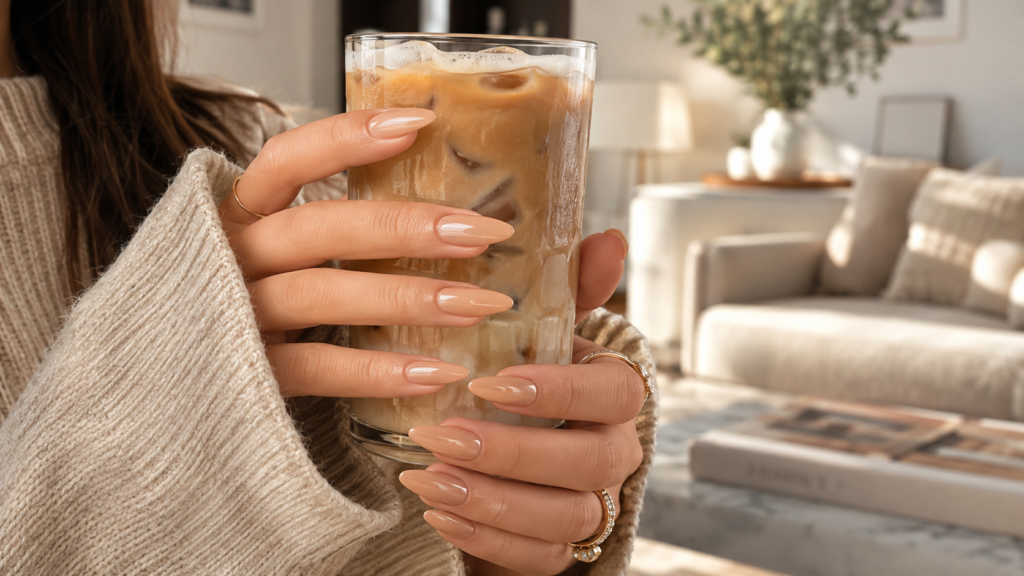
Honey Butter Glazed Almond Nails capture the exact color of late August afternoon sunlight. This style blends a soft, creamy butter yellow base with a pearlescent white or soft gold chrome powder finish. It creates an luminous, warm glow that looks incredible against sun-kissed skin.
+-------------------------------------------------------+
|  STEP 1: Shape nails into a smooth almond profile.    |
|  STEP 2: Apply 1 layer of sheer nude-pink base.       |
|  STEP 3: Layer 2 thin coats of pale butter yellow.    |
|  STEP 4: Buff pearlescent chrome powder overall.       |
|  STEP 5: Seal with a ultra-glossy gel top coat.        |
+-------------------------------------------------------+
Why You’ll Love This Idea
It is chic, soft, and minimalist, yet feels elevated compared to a plain yellow manicure. It brightens your hands instantly without clashing with your late summer wardrobe.
Materials Needed
- Almond nail tips (or natural almond-shaped nails)
- Neutral sheer base polish
- Pale butter-yellow polish
- Pearlescent white chrome powder with silicone applicator
- No-wipe top coat
Step-by-Step Instructions
- File and shape your nails into an almond shape.
- Clean the nail surface with an alcohol wipe to remove debris.
- Apply a thin layer of base coat and let it dry completely.
- Apply two thin coats of butter-yellow polish, allowing 2 minutes of dry time between coats.
- Apply a no-wipe top coat and let it dry until it is slightly tacky (or UV cure for 30 seconds).
- Rub the pearlescent chrome powder across the nail surface using a sponge applicator until shiny.
- Dust off any excess powder with a fluffy brush.
- Seal everything with a final layer of high-shine top coat, capping the tips.
- Wipe away stray powder on surrounding skin using a clean brush dipped in acetone.
- Finish with a drop of cuticle oil.
Beginner Tips
If you don’t have chrome powder, you can achieve a similar soft shimmer by mixing a drop of sheer gold shimmer polish directly into your top coat!
Common Mistakes to Avoid
- Applying chrome powder on wet polish: This creates clumped, muddy patches. Ensure your top coat is correctly set first.
- Skipping the top coat edge: Failing to cap the free edge will cause the chrome shimmer to wash off over 24 hours.
Styling & Decorating Ideas
Pair this style with dainty gold rings, linen button-down shirts, or cream knit dresses for an effortless warm-weather look.
Best Colors and Materials
- Colors: Soft butter yellow, warm vanilla cream, pearl shimmer.
- Materials: Chrome powder, high-shine gel or polish.
Quick Spec Sheet
- Estimated Cost: $10 – $18
- Estimated Time: 30–40 Minutes
- Difficulty Level: Easy to Intermediate
- Where It Looks Best: Almond or oval nails, mid-length.
Pinterest-Worthy Tip
Take photos holding an iced oat milk latte or a glass of lemonade in natural sunlight to let the glazed sheen pop.
Idea Conclusion
This design is the ultimate transition look for mid-to-late August—sweet, simple, and shining with warmth.
2. Sunset Terracotta & Sheer Gold Swirls
Earthy Warmth Meets Dreamy Line Art
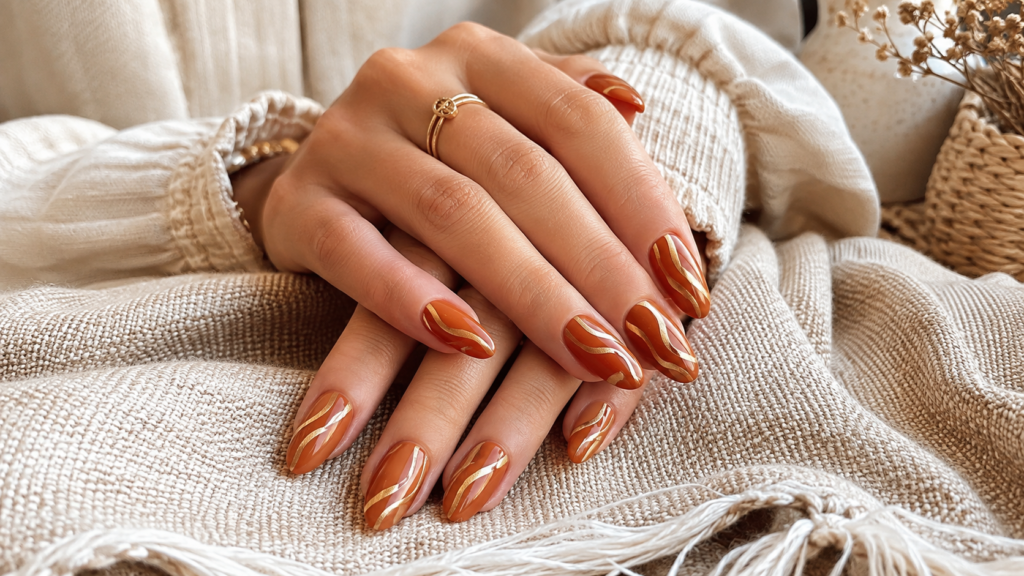
As August progresses, sunset shades take center stage. Terracotta—a rich mix of burnt orange, warm clay, and soft brown—gives a cozy preview of fall while remaining totally grounded in summer. Combined with sheer nude bases and metallic gold swirls, this look feels modern and artistic.
Why You’ll Love This Idea
Every nail can have a unique pattern! Dynamic swirl art hides small mistakes easily, making it one of the most forgiving styles for DIY beginners.
Materials Needed
- Nude or sheer pink base polish
- Terracotta/burnt orange polish
- Metallic gold gel line polish or chrome painter gel
- Fine nail art detail brush (7mm)
- Glossy top coat
Step-by-Step Instructions
- Prep nails by pushing back cuticles and gently buffing the shine away.
- Apply a transparent, protective base coat.
- Paint two thin coats of your sheer nude base color.
- Dip your fine detail brush into the terracotta polish.
- Paint organic, flowing wave patterns across two-thirds of each nail.
- Fill in the wavy shapes with color and let dry completely.
- Clean your fine brush and dip it into metallic gold polish.
- Trace delicate accent lines along the edge of the terracotta shapes.
- Add tiny gold dots in empty spaces for extra interest.
- Seal the artwork with a thick layer of top coat.
[Sheer Nude Base] ---> [Terracotta Waves] ---> [Gold Accent Lines] ---> [Glossy Top Coat]
Beginner Tips
Rest your elbows on a steady table while holding the fine detail brush to keep your hand stable while painting curved lines.
Common Mistakes to Avoid
- Making lines too thick: Keep brush strokes light. Thin, variable lines look much more modern than heavy strokes.
Styling & Decorating Ideas
Looks amazing with earthy wardrobe tones like olive green, linen taupe, terracotta rust, and woven straw bags.
Best Colors and Materials
- Colors: Terracotta clay, nude-beige, liquid foil gold.
- Materials: Fine detail striping brush, metallic paint polish.
Quick Spec Sheet
- Estimated Cost: $12 – $22
- Estimated Time: 45 Minutes
- Difficulty Level: Intermediate
- Where It Looks Best: Square, squoval, or almond shapes of any length.
Pinterest-Worthy Tip
Rest your hand on a textured woven placemat alongside dried pampas grass to highlight the warm, earthy aesthetic.
Idea Conclusion
Sunset Terracotta Swirls are sophisticated, cozy, and bring artistic modern flair to your late-summer nail rotation.
3. Matcha Latte Green Micro-French Tips
Clean Girl Aesthetic with a Refreshing Pop of Green
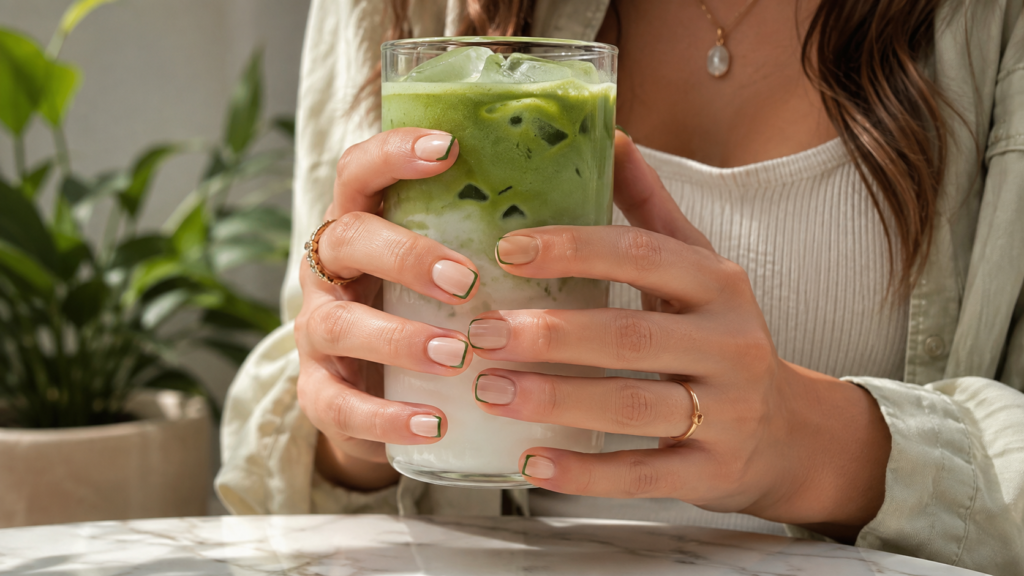
Green remains a huge trend for 2026, but August calls for a specific shade: creamy, soothing Matcha Green. Replacing thick traditional white tips with ultra-thin “micro” matcha tips offers a clean, understated aesthetic that suits offices, school, and weekends alike.
| Feature | Classic French Manicure | Matcha Micro-French |
| Tip Width | Thick (3mm – 6mm) | Micro-thin (1mm – 2mm) |
| Tip Color | Bright Stark White | Soft Creamy Matcha Green |
| Base Color | Opaque Pink | Sheer Milky Nude |
| Overall Vibe | Traditional & Formal | Modern & Minimalist |
Why You’ll Love This Idea
Micro tips make short nails look longer and feel neat. It adds a subtle pop of color without feeling overwhelming.
Materials Needed
- Milky nude base coat
- Sage/matcha green polish
- Ultra-fine 5mm striping brush or French tip silicone stamper
- Top coat
Step-by-Step Instructions
- Shape nails into short square or rounded edges.
- Apply a clean layer of base coat.
- Paint two light coats of milky nude polish for a clean background.
- Place a drop of matcha green polish onto a palette or piece of foil.
- Coat your fine striping brush lightly with the green polish.
- Gently paint a thin line following the natural curved tip of your nail.
- Alternatively, press your nail tip gently into a green-coated silicone stamper.
- Inspect all tips to keep the width thin and consistent across all fingers.
- Let the green tips dry completely.
- Apply a glossy, protective top coat over the entire nail.
Beginner Tips
Using a clear silicone nail stamper is the fastest shortcut for micro tips: apply polish to the pad and press the top edge of your finger into it at a 45-degree angle!
Common Mistakes to Avoid
- Drawing the line too deep: Keep the tip line right at the very edge of the nail to preserve the delicate “micro” look.
Styling & Decorating Ideas
Complements minimalist gold jewelry, fresh cotton button-downs, matcha green accessories, and sleek clean-girl makeup styles.
Best Colors and Materials
- Colors: Creamy matcha, sage green, milky translucent nude.
- Materials: Silicone nail stamper or 5mm detail brush.
Quick Spec Sheet
- Estimated Cost: $8 – $15
- Estimated Time: 25–35 Minutes
- Difficulty Level: Easy
- Where It Looks Best: Short to medium natural oval or square nails.
Pinterest-Worthy Tip
Pose your hand holding a fresh iced matcha latte with a glass straw for a clean, cohesive Pinterest aesthetic.
Idea Conclusion
Matcha Micro-French tips deliver effortless style that looks professionally done in under thirty minutes.
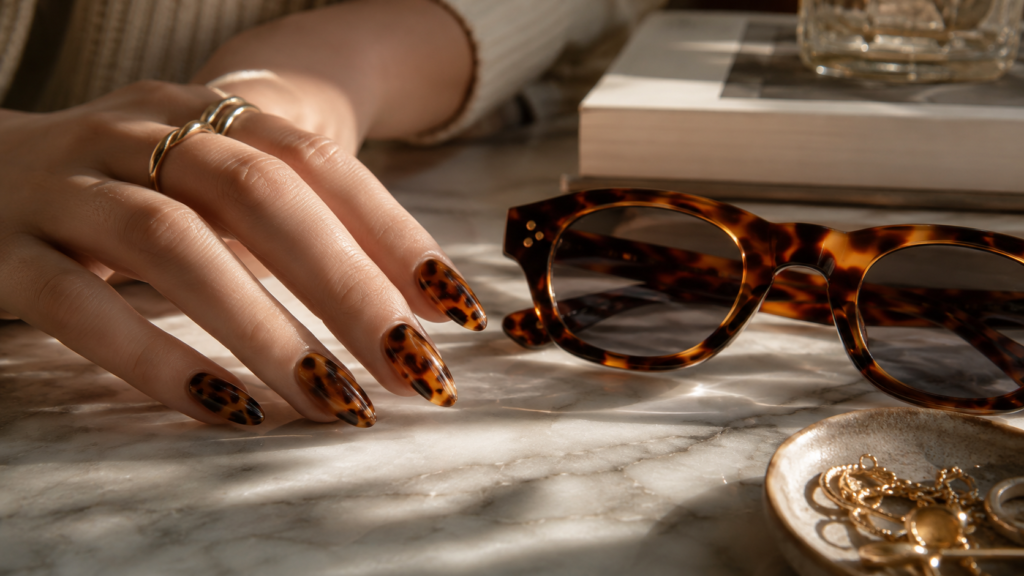
4. Golden Hour Amber Tortoiseshell Accents
Rich, Warm Translucency with Luxurious Depth
Tortoiseshell patterns scream luxury and classic style. In late August, rich amber and brown translucent glass polishes capture the feeling of warm golden hour shadows. Balancing full tortoiseshell accent nails with warm nude tones keeps the look light enough for late summer.
Layering Depth Guide:
1. Jelly Amber Base Layer (Cured/Dried)
2. Soft Floating Black & Dark Brown Blurs
3. Second Sheer Jelly Amber Coat (Creates 3D Depth)
4. Crisp Gold Foil Accents
5. Clear Protective Top Coat
Why You’ll Love This Idea
The translucent “jelly” layers create a deep 3D optical illusion that looks expensive, complex, and high-end.
Materials Needed
- Translucent yellow/amber jelly polish
- Deep chocolate brown polish
- Black polish
- Small sponge or blooming gel
- Gold foil flakes
- Top coat
Step-by-Step Instructions
- Apply base coat to all nails.
- For accent nails, paint one coat of transparent amber jelly polish.
- While the base layer is wet, dab tiny irregular spots of brown polish across the nail.
- Add smaller black dots inside the center of some brown spots.
- Use a dry detail brush to gently feather the edges of the dark spots into the amber base.
- Dry or UV-cure this patterned layer.
- Apply a second thin coat of amber jelly polish over the design to create realistic depth.
- Press a few tiny flecks of gold foil onto the wet top layer.
- Finish with a generous layer of high-shine top coat to smooth out any foil texture.
- Clean surrounding skin with acetone.
Beginner Tips
If you don’t own jelly polish, mix 1 drop of brown-orange polish into 3 drops of clear top coat on a palette to make your own custom translucent shade!
Common Mistakes to Avoid
- Making spots uniform: Tortoiseshell patterns should be irregular and organic. Avoid making perfect polka dots or symmetrical shapes.
Styling & Decorating Ideas
Looks beautiful paired with tortoise-shell sunglasses, warm leather sandals, cream trench coats, and gold hoops.
Best Colors and Materials
- Colors: Amber jelly, warm caramel, espresso brown, gold foil.
- Materials: Foil flakes, translucent nail polishes.
Quick Spec Sheet
- Estimated Cost: $14 – $25
- Estimated Time: 50 Minutes
- Difficulty Level: Advanced
- Where It Looks Best: Medium to long coffin or almond nails.
Pinterest-Worthy Tip
Photograph your manicure outdoors during actual golden hour (about an hour before sunset) to catch the glowing amber depth.
Idea Conclusion
Amber Tortoiseshell is an elegant choice that bridges late summer vibes directly with early autumn luxury.
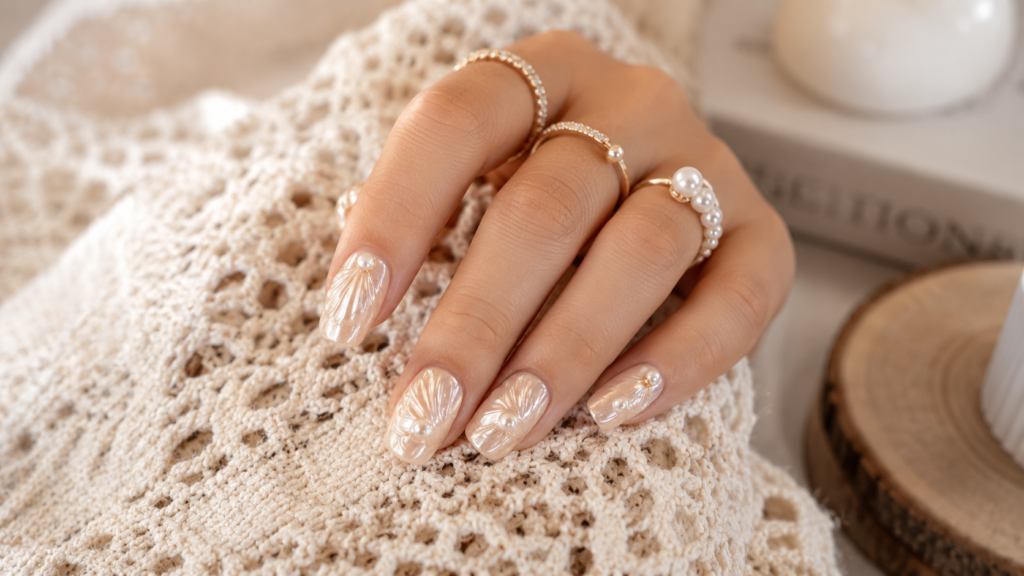
5. Muted Pearlescent Seashell Texture
Subtle Coastal Romance for the End of Summer
If you aren’t ready to let go of beach memories, Pearlescent Seashell Nails are the answer. Instead of bright turquoise or neon ocean art, this look relies on soft off-white chrome sheen and gentle 3D ridges that mirror the surface of sea shells.
   / / / / /   <-- 3D Textured Ridges (Clear Builder Gel)
  ( ( ( ( (    <-- Chrome Pearl Powder Base
  ===========  <-- Milky White Base Polish
Why You’ll Love This Idea
It captures summer coastal nostalgia while shifting toward soft, romantic neutral tones suitable for early fall.
Materials Needed
- Milky off-white polish
- Chrome pearl powder
- Clear builder gel or 3D gel line art gel
- Fine line detail brush
- Matte or glossy top coat
Step-by-Step Instructions
- Prep and shape nails into soft almond or oval edges.
- Apply base coat and cure/dry.
- Apply two coats of milky off-white polish as your foundation.
- Apply a no-wipe top coat, cure/dry, and buff chrome pearl powder across the nails.
- Wipe away loose dust.
- Dip a fine detail brush into clear 3D builder gel.
- Paint thin vertical lines radiating from the base of the nail toward the tip to imitate shell ridges.
- Make the lines slightly thicker at the base and thinner toward the top edge.
- UV-cure or set the builder gel immediately to lock the 3D texture in place.
- Seal with a top coat to secure the 3D shell pattern.
Beginner Tips
Keep the 3D ridges subtle! Thin lines create an elegant, touchable texture without feeling bulky or getting caught on clothes.
Common Mistakes to Avoid
- Using thick paint: Regular polish won’t hold 3D structure—you need a thick builder gel or hard gel to form lasting ridges.
Styling & Decorating Ideas
Pairs beautifully with pearl jewelry, cream crochet tops, silk skirts, and neutral summer linens.
Best Colors and Materials
- Colors: Pearl white, soft ivory, iridescent iridescent pink/blue sheen.
- Materials: 3D builder gel, pearl chrome dust.
Quick Spec Sheet
- Estimated Cost: $15 – $28
- Estimated Time: 50–60 Minutes
- Difficulty Level: Intermediate to Advanced
- Where It Looks Best: Almond shape nails.
Pinterest-Worthy Tip
Pose with your hand lightly touching a neutral linen shirt or holding a smooth sea shell against a soft neutral background.
Idea Conclusion
This design brings beachy romance into August with subtle texture and timeless pearlescent sparkle.
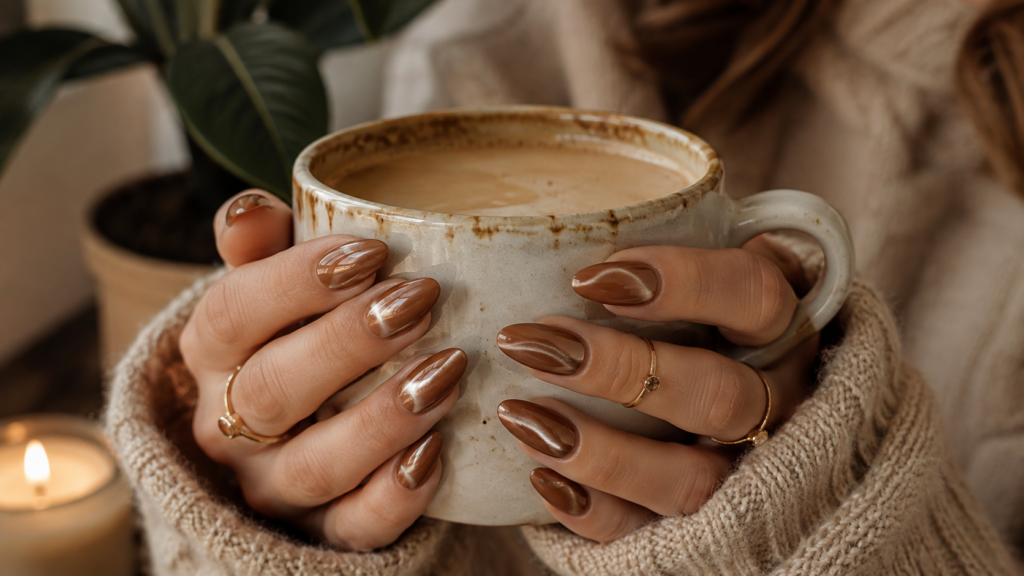
6. Latte Velvet Cat-Eye Nails
Soft Warm Magnetism for Late Summer Nights
Cat-eye polish uses tiny magnetic shimmer particles to create a soft, velvety light shift. In late August, swapping icy silver tones for warm champagne, nude, or soft bronze “latte” shades creates an ethereal, cozy look.
       [ Magnet Held Over Wet Gel ]
                   |
                   v
    /===============================\  <-- Shifts light softly
   |  . . . . : : : : : : . . . .    | <-- Velvet Shimmer Line
    \===============================/
Why You’ll Love This Idea
The dynamic shine shifts under light constantly, making your nails look alive and velvety without needing any hand-painted art.
Materials Needed
- Nude-brown or dark warm base polish
- Champagne/warm brown magnetic cat-eye gel polish
- Magnet wand
- High-shine top coat
Step-by-Step Instructions
- Apply a base coat and cure/dry.
- Apply a coat of warm chocolate or nude brown polish as a dark backing layer.
- Paint one coat of champagne magnetic cat-eye polish over one nail (do one finger at a time!).
- Immediately hold the magnet wand 1/4 inch above the nail at a diagonal angle for 10–15 seconds.
- Watch the magnetic shimmer gather into a soft, velvety light line.
- Cure or set the nail immediately before the shimmer particles diffuse.
- Repeat the magnetic technique on all remaining nails.
- Apply a thick layer of top coat over all fingers.
- Clean up edges with an angled brush dipped in acetone.
- Nourish cuticles with fresh oil.
Beginner Tips
Always hold the magnet close to the nail without touching the wet polish! If you make a mistake, simply brush over the polish again to reset the magnetic shimmer particles.
Common Mistakes to Avoid
- Magnetizing all fingers at once: Magnetic polish sets quickly—you must magnetize and lock each nail individually.
Styling & Decorating Ideas
Looks stunning paired with cozy knit cardigans, coffee mugs, gold watches, and neutral fall accessories.
Best Colors and Materials
- Colors: Champagne gold, warm nude, soft caramel, cocoa brown.
- Materials: Magnetic gel polish, strong magnet wand.
Quick Spec Sheet
- Estimated Cost: $12 – $20
- Estimated Time: 35–45 Minutes
- Difficulty Level: Intermediate
- Where It Looks Best: Short square or medium coffin nails.
Pinterest-Worthy Tip
Record a short video or take photos under warm indoor lighting to capture the soft velvet light transition as your fingers move.
Idea Conclusion
Velvet Cat-Eye nails offer mesmerizing depth, soft elegance, and warmth that feels completely high-end.
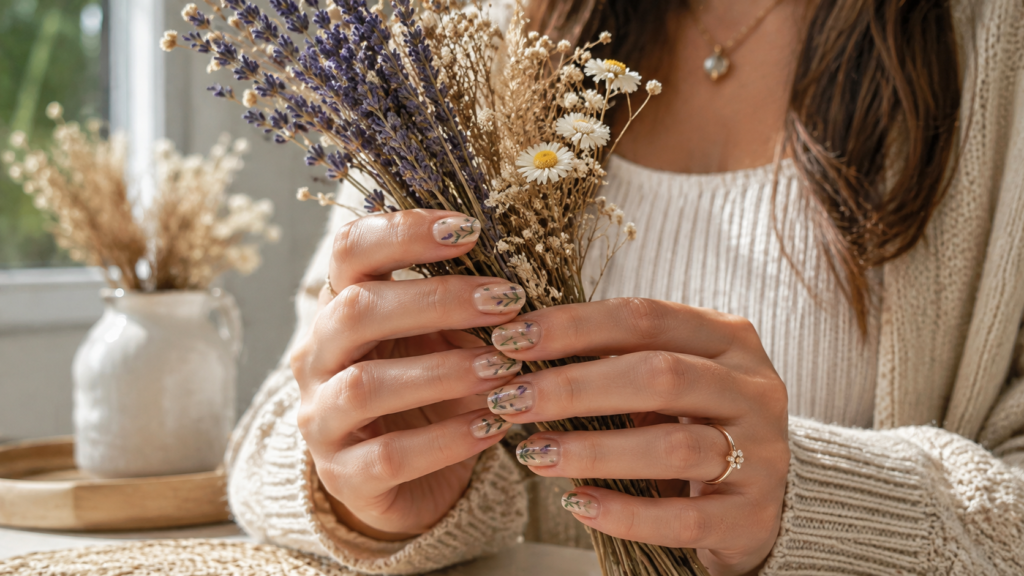
7. August Wildflower & Sage Cottagecore Nails
Soft Botanical Pressed Flowers for Late Summer Days
As late summer gardens reach full bloom, botanical manicures shine on Pinterest. This look features delicate pressed mini-flowers or hand-painted botanical stems set against soft sage green and nude bases, bringing cottagecore vibes to your fingertips.
+----------------------------------------------------+
|  Base: Milky White / Soft Nude                     |
|  Accents: Dried Botanical Mini Flowers & Leaves    |
|  Edges: Soft Sage Green Side Frames                |
+----------------------------------------------------+
Why You’ll Love This Idea
It brings natural beauty right to your hands! It feels peaceful, feminine, and perfect for outdoor events, weddings, or garden picnics.
Materials Needed
- Nude or sheer white base polish
- Sage green polish
- Real mini nail-art dried flowers or botanical floral stickers
- Tweezers
- Clear builder gel or top coat
Step-by-Step Instructions
- Prepare nails with standard prep and base coat.
- Paint two nails with solid sage green polish for balance.
- Paint the remaining accent nails with a sheer nude-white polish.
- Using tweezers, carefully select tiny dried flower petals or botanical stickers.
- Place flowers onto the slightly tacky nude nails in a balanced, cascading pattern.
- Gently press the petals flat using a silicone tool or clean fingertip.
- Apply a layer of builder gel over the dried flowers to smooth out any bumpy edges.
- Cure or let dry completely.
- Finish all nails with a top coat.
- Hydrate hands with a scented floral lotion.
Beginner Tips
Nail stickers offer the same botanical look with zero bulk if real dried flowers feel too tricky to press flat!
Common Mistakes to Avoid
- Leaving flower edges sticking up: Ensure all dried floral pieces are sealed underneath top coat to avoid snagging on clothing.
Styling & Decorating Ideas
Coordinates with floral sundresses, linen totes, woven hats, and outdoor garden party outfits.
Best Colors and Materials
- Colors: Sage green, dusty pink, butter yellow petals, clear nude.
- Materials: Micro dried flowers, nail tweezers, top coat.
Quick Spec Sheet
- Estimated Cost: $10 – $18
- Estimated Time: 40–50 Minutes
- Difficulty Level: Easy to Intermediate
- Where It Looks Best: Almond or oval natural nails.
Pinterest-Worthy Tip
Take photos holding a small bouquet of dried wildflowers or freshly picked garden blossoms in natural outdoor sunlight.
Idea Conclusion
Cottagecore Botanical nails offer a graceful tribute to late summer gardens that feels sweet, personal, and artistic.
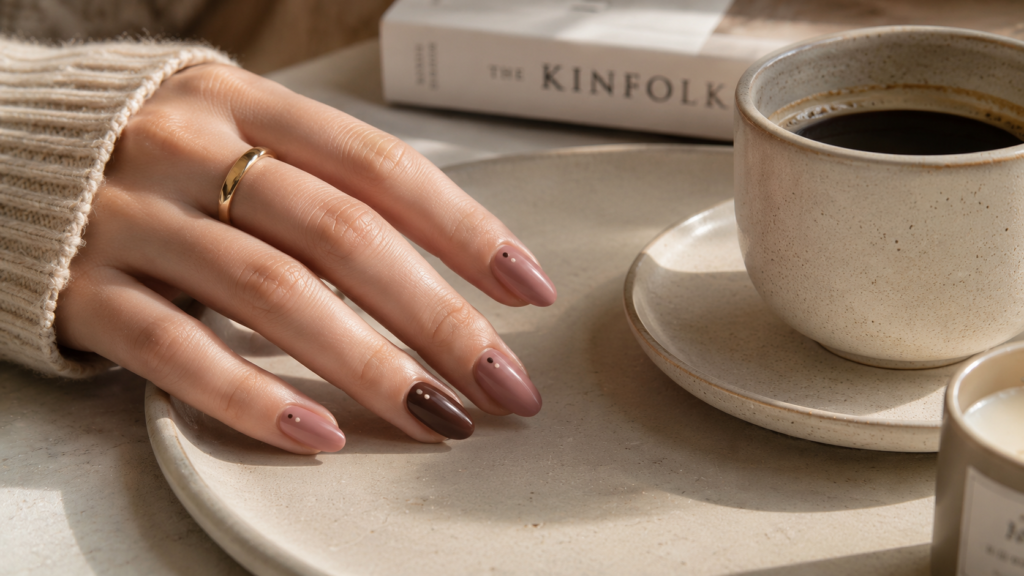
8. Dusty Rose & Espresso Micro Dot Accents
Minimalist Modern Art with Cozy Transitional Tones
For lovers of modern design and clean geometry, this minimalist idea uses two complementary August colors: soft dusty rose and rich espresso brown. With simple, clean dots placed strategically at the base of nude nails, it creates a subtle fashion-forward look.
 [ Nail Tip ]   ---->   |                 |
                        |                 |
                        |   ( ) Dusty Rose Dot
 [ Base ]       ---->   |    * Espresso Dot
Why You’ll Love This Idea
It is one of the easiest nail designs to pull off at home. You can finish both hands in under 20 minutes, yet it looks like high-end editorial nail art.
Materials Needed
- Clean nude or pink-beige base polish
- Dusty rose polish
- Espresso dark brown polish
- Dotting tool (or the rounded end of a bobby pin)
- Glossy or matte top coat
Step-by-Step Instructions
- Shape nails into neat short squares or rounded tips.
- Apply a clean base coat layer.
- Paint two thin coats of nude base polish.
- Pour a small drop of dusty rose and espresso polish onto a piece of wax paper.
- Dip the tip of a dotting tool into the espresso polish.
- Place a clean dot centered right above the cuticle bed on each nail.
- Clean the tool, dip into dusty rose, and place a slightly smaller dot directly above or next to the dark dot.
- Keep dot sizes uniform across all fingers for a neat look.
- Let dots dry for 3 minutes so they don’t smear when sealed.
- Apply a top coat (matte top coat looks incredible on this design!).
Beginner Tips
No dotting tool? The rounded tip of a bobby pin, toothpick, or sewing pin works as a dotting tool!
Common Mistakes to Avoid
- Dragging the top coat brush: Pressing down too hard when applying top coat can smear the wet dots. Float the top coat brush gently over the surface.
Styling & Decorating Ideas
Looks amazing with tailored blazers, simple gold band rings, crisp white tees, and minimalist leather bags.
Best Colors and Materials
- Colors: Soft dusty rose, deep cocoa/espresso, sheer nude.
- Materials: Dual-ended dotting tool, matte or glossy finish top coat.
Quick Spec Sheet
- Estimated Cost: $6 – $12
- Estimated Time: 20 Minutes
- Difficulty Level: Very Easy (Beginner Friendly)
- Where It Looks Best: Short natural nails.
Pinterest-Worthy Tip
A matte top coat finish gives this geometric design a soft, modern ceramic texture that stands out in close-up photos.
Idea Conclusion
Simple, quick, and sophisticated, this minimalist dot design proves that less is often much more.
Expert Decorating and Nail Care Tips
Keeping your late summer DIY manicure looking salon-fresh requires consistency. Here are expert habits to incorporate into your routine:
Weekly Nail Health Checklist:
[ ] Daily Cuticle Oil (Morning & Night)
[ ] Apply Fresh Top Coat Every 3-4 Days
[ ] Wear Gloves While Washing Dishes
[ ] Hydrate Hands with Rich Hand Cream
- Re-Apply Top Coat Every 3 Days: Protect your nail art from daily wear and chipping by adding a fresh thin layer of top coat twice a week.
- Use Cuticle Oil Twice Daily: Keep skin around your nails soft and free from hangnails by massaging jojoba-based cuticle oil every morning and night.
- Protect Hands with Gloves: Household cleaning supplies and hot dishwater weaken polish bonds quickly. Always pop on rubber gloves when washing dishes or cleaning.
Smart Budget-Saving Tips for DIY Nail Artists
You don’t need to spend $80+ at a salon every two weeks to maintain gorgeous nails. Save money with these smart DIY strategies:
| Salon Cost | DIY Alternative | Total Savings |
| Gel Manicure ($50-$70) | UV Gel Starter Kit ($25 one-time) | Save $500+/year |
| Nail Art Add-ons ($15-$30) | Nail Stickers & Fine Brushes ($8) | Save $200+/year |
| Chrome / Metallic Finish ($15) | Chrome Powder Pen ($6) | Save $100+/year |
- Invest in a Quality Multi-Use Kit: A single starter kit with a small UV lamp, base/top coats, and striping brushes pays for itself after just one manicure!
- Repurpose Household Items: Bobby pins make dotting tools, plastic wrap creates marble effects, and makeup sponges create flawless gradients.
- Mix Custom Shades: Instead of buying dozens of bottle colors, mix a drop of dark polish into white or nude to create endless custom pastels and transition tones.
Frequently Asked Questions (FAQs)
1. What are the official trending nail colors for August 2026?
The key August 2026 shades feature warm, transitional tones: butter yellow, matcha green, terracotta clay, amber/caramel jelly tones, champagne glitter, and soft dusty rose.
2. How do I make my DIY manicure last through late summer swimming and heat?
Always prep your nail plate by removing shine and dehydrating with alcohol. Apply thin polish coats, cap the edges of your nails with top coat, and avoid hot baths or saltwater swimming for 6 hours after painting.
3. Can I create these August designs on short natural nails?
Yes! Ideas like Matcha Micro-French tips, Micro Dots, and Butter Glazed looks were designed specifically to flatter short natural nails.
4. What is the difference between chrome powder and magnetic cat-eye polish?
Chrome powder is buffed over a dried/cured top coat to create a mirror-like sheen. Cat-eye polish contains metallic particles inside the liquid polish that are arranged using a magnet wand before drying.
5. How can I safely remove gel polish at home without damaging my nails?
Gently buff away the top shiny layer with a nail file. Soak cotton pads in pure acetone, place them over nails, wrap tightly in aluminum foil for 12–15 minutes, and gently push away the softened gel with a wooden stick.
6. Are tortoiseshell nails difficult for complete beginners?
While they look complex, tortoiseshell designs are forgiving because the spots are meant to be irregular! Using jelly polishes lets you blur colors effortlessly.
7. What nail shape is most popular for late summer 2026?
Soft almond and natural squoval (square with rounded corners) are currently the top requested shapes across Pinterest and Instagram.
8. How do I prevent my light yellow or nude polishes from streaking?
Apply a ridge-filling base coat first. Then apply 2 to 3 ultra-thin layers of polish, letting each layer dry completely, rather than applying two thick coats.
Final Thoughts on Late Summer Nail Trends
August is a beautiful time to slow down, enjoy warm sunny afternoons, and refresh your style routine. Shifting your nail color palette toward warm, earthy, and glowing tones bridges summer warmth with early fall coziness.
Whether you opt for simple Honey Butter Glazed Almonds, delicate Matcha Micro-French Tips, or artistic Terracotta Swirls, these eight ideas offer something for every skill level, nail length, and aesthetic preference.
Which design are you going to try first? Gather your polishes, give your hands some well-deserved TLC, and show off your late-summer style!
Loved these ideas? Save them for later!
📌 PIN THIS POST: Click the Pinterest share button on this page to pin this guide directly to your Nail Inspo, Summer Beauty, or DIY Aesthetic boards so you can find these step-by-step tutorials whenever you need fresh inspiration!