Introduction
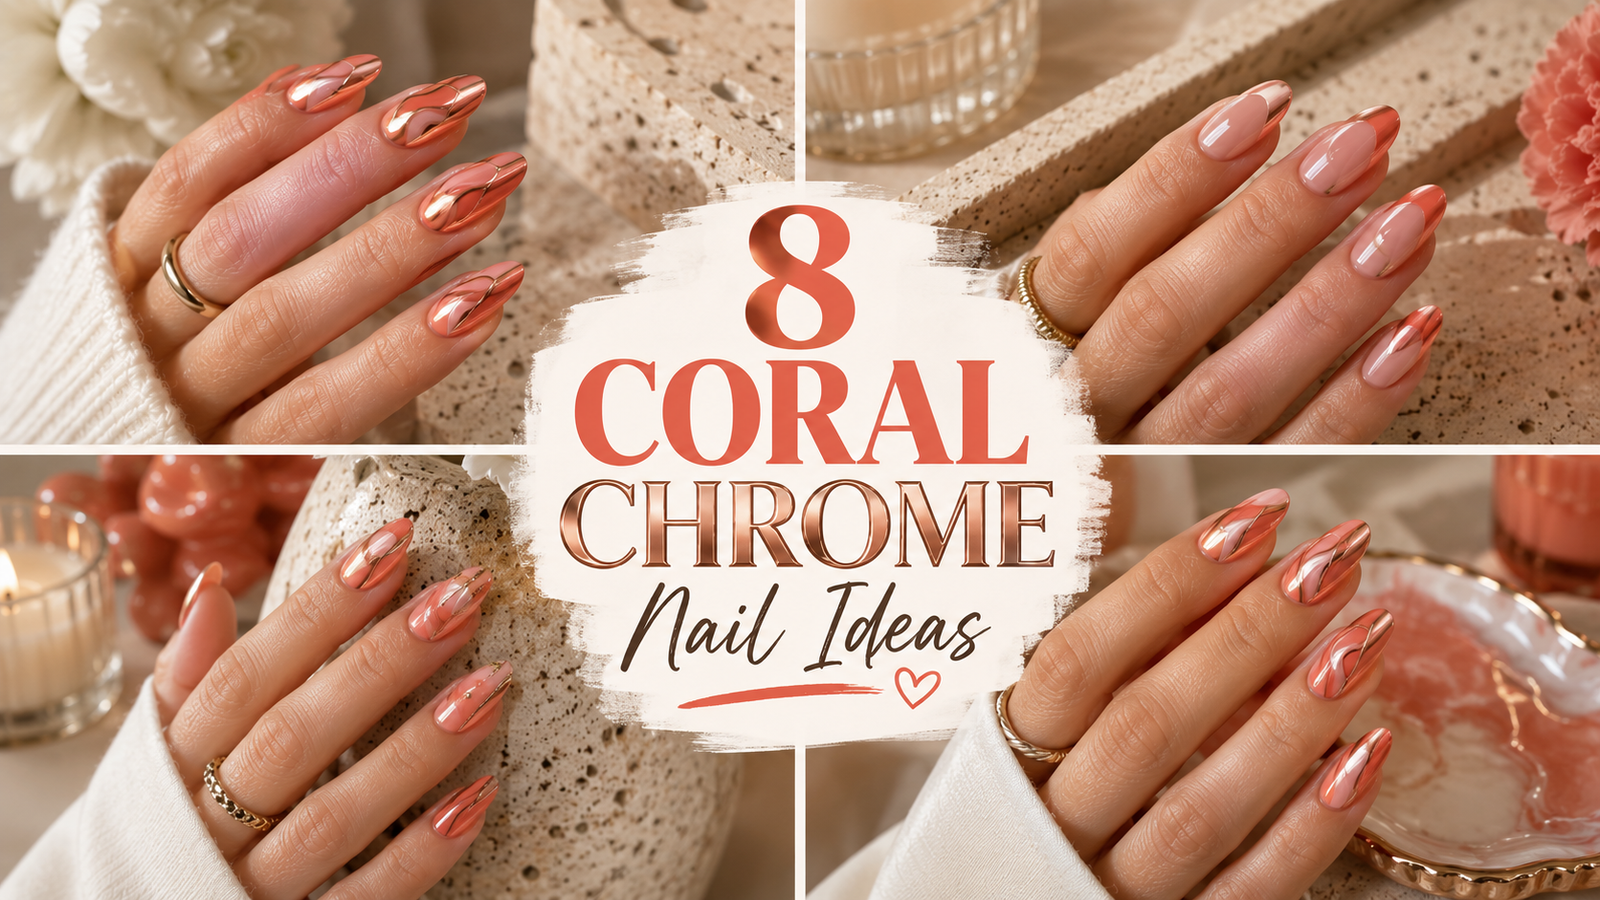
Hey there, beautiful friends! Welcome back to the blog. If you are anything like me, you are absolutely obsessed with finding the perfect summer aesthetic. When the weather gets warm, the days get longer, and the sunsets turn into beautiful shades of pink and orange, it is time to update our style to match! Today, we are diving deep into one of the most gorgeous beauty trends of the year: coral chrome nail ideas.
Summer is all about feeling fresh, vibrant, and a little bit glamorous. Whether you are lounging by the pool, attending a beautiful garden wedding, or just sipping iced coffee in your beautifully decorated backyard, your nails are the ultimate accessory. Over the last year, we have seen the “glazed donut” nail trend take the internet by storm. But for this summer? We are giving that pearly finish a massive, colorful upgrade. Coral is the ultimate summer shade—it is a perfect mix of bright pink and warm orange that flatters literally every single skin tone. When you add a magical, mirror-like chrome powder over the top, you get a chic summer look that is absolutely blinding in the sunlight!
In this massive guide, I am going to share my top 8 coral chrome nail ideas for a chic summer look. As always, I am keeping my DIY and home-loving Pinterest friends in mind! We will treat this just like a fun home project. I will walk you through exactly what you need, how to set up your space, and how to achieve salon-quality results right from your own living room. Grab your favorite drink, get comfortable, and let’s get ready to create some Pinterest-worthy magic!
Why This Trend Is Popular
You might be wondering, why are coral chrome nail ideas completely taking over Pinterest and TikTok right now?
First of all, coral is the unofficial color of summer. It reminds us of tropical vacations, fruity drinks, and beautiful sunsets. It is bright enough to be fun, but soft enough to remain elegant and chic.
Secondly, the chrome finish adds a layer of modern luxury. Traditional glossy nails are great, but a chrome powder gives your nails a mesmerizing, color-shifting glow that looks like expensive silk or a shiny seashell.
Finally, this trend is wildly popular because it is actually incredibly easy to DIY at home. You do not need to spend $80 at the salon to get this look. With a few affordable supplies, you can create a chic summer look while relaxing in your own home. It fits perfectly into the modern DIY lifestyle that we all love so much!
Materials and Tools Needed
To create the perfect coral chrome nail ideas at home, you will need to set up a little DIY nail station. Here is a handy table of the exact tools and materials you should gather before we start.
| Item Name | Purpose | Importance |
|---|---|---|
| Gel Base Coat | Protects your natural nail and grips the color. | Essential |
| Coral Gel Polish | The star of the show! Choose your favorite shade. | Essential |
| No-Wipe Gel Top Coat | The chrome powder only sticks to a no-wipe top coat! | Essential |
| Pearl/White Chrome Powder | Gives that shiny, glazed donut summer look. | Essential |
| Sponge Applicator | Used to rub the chrome powder onto the nail. | Essential |
| UV/LED Nail Lamp | Required to cure (harden) the gel polish. | Essential |
| Nail Buffer & File | For shaping and prepping the nail surface. | Essential |
| Rubbing Alcohol | To clean the nail and remove oils before painting. | Essential |
| Cuticle Oil | To hydrate your skin after the manicure is done. | Highly Recommended |
Safety Tips
Before we jump into our 8 coral chrome nail ideas, let’s talk about safety. Just like any DIY home project, safety comes first!
- Avoid Skin Contact: Gel polish should never touch your skin or cuticles. If it does, carefully wipe it off with a wooden stick before putting your hand under the UV lamp. Curing gel on your skin can cause severe allergies over time.
- Work in a Ventilated Space: While gel polish doesn’t smell as strong as acrylics, it is always best to work in a well-ventilated room. Open a window and let that fresh summer breeze in!
- Protect Your Hands: If you use UV lamps often, consider wearing fingerless UV protection gloves to keep the skin on your hands safe and youthful.
- Do Not Over-Buff: When prepping your nails, use a light hand. Over-buffing can make your natural nails thin, weak, and painful.
1. The Classic Glazed Coral Chrome
Short Introduction
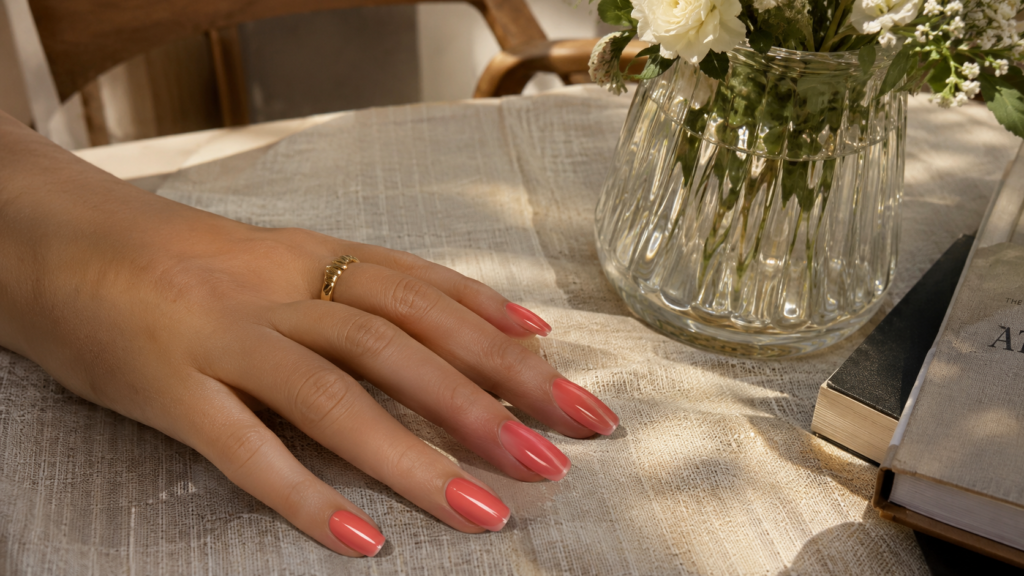
Let’s start with the absolute essential: The Classic Glazed Coral Chrome. This is the foundation of all coral chrome nail ideas. It is sleek, elegant, and perfectly captures that glossy, “wet look” aesthetic that is dominating Pinterest boards this season.
Why You’ll Love This Idea
You will love this idea because it is universally flattering and perfectly balances simplicity with glamour. It is not too loud, making it perfect for both the office and the beach. It gives off a healthy, wealthy, and chic summer look!
Materials Needed
- Nail dehydrator/alcohol
- Gel base coat
- Peachy-coral gel polish
- No-wipe gel top coat
- White pearl chrome powder
- Sponge eyeshadow applicator
- Fluffy dusting brush
- UV/LED lamp
Step-by-Step Instructions
- Prep Your Canvas: Start by pushing back your cuticles gently. Use a nail file to shape your nails into a soft almond or square shape. Wipe each nail with a lint-free wipe soaked in rubbing alcohol to remove any natural oils.
- Apply Base Coat: Apply a very thin, even layer of gel base coat. Make sure to cap the free edge (the very tip of your nail). Cure under your UV/LED lamp for 60 seconds.
- First Color Layer: Apply your first thin coat of peachy-coral gel polish. It is okay if it looks a little streaky on the first coat. Cure for 60 seconds.
- Second Color Layer: Apply the second coat of coral polish to get full coverage and a rich color. Cure again for 60 seconds.
- The Magic Top Coat: Apply a layer of your no-wipe top coat. This step is crucial! Cure it for exactly 30-60 seconds (depending on your lamp’s strength). It needs to be warm but fully dry to the touch.
- Apply the Chrome: Dip your sponge applicator lightly into the white pearl chrome powder. Gently rub the powder onto the warm nail in circular motions. Watch the magic happen as it turns into a shiny mirror!
- Dust Off Excess: Take your fluffy brush and dust off any extra loose powder from your fingers and the edges of your nails.
- Final Seal: Apply a final layer of no-wipe top coat to seal in the chrome powder. Make sure to cap the edges well so the chrome doesn’t chip. Cure for 60 seconds.
- Hydrate: Finish by massaging a rich cuticle oil into your skin.
Beginner Tips
If your chrome powder looks glittery instead of smooth, it means your top coat was under-cured or over-cured. Try curing for exactly 30 seconds next time before rubbing the powder on!
Common Mistakes to Avoid
Never apply chrome powder directly onto the color layer. It will just look like chunky glitter. You absolutely must use a cured no-wipe top coat in between the color and the powder.
Styling or Decorating Ideas
This classic look pairs beautifully with dainty gold rings and woven summer bags. If you are taking photos for your own blog or Pinterest, style your hand holding a crystal glass of iced peach tea against a linen tablecloth.
Best Colors and Materials
A medium “true coral” (equal parts pink and orange) works best here. Stick to a white pearl chrome rather than a silver chrome to keep it looking soft and glazed.
Project Details
- Estimated Cost: $15–$25 (assuming you own a lamp)
- Estimated Time: 45 minutes
- Difficulty Level: Beginner
- Where It Looks Best: Everyday summer wear, office settings, Sunday brunch.
- Pinterest-Worthy Tip: Take your photo in direct golden-hour sunlight to make the chrome reflection pop!
Conclusion for the Idea
The Classic Glazed Coral Chrome is a timeless summer staple that you will want to wear on repeat. It is the perfect entry point into the wonderful world of chrome nail art!
2. Coral Chrome French Tips
Short Introduction
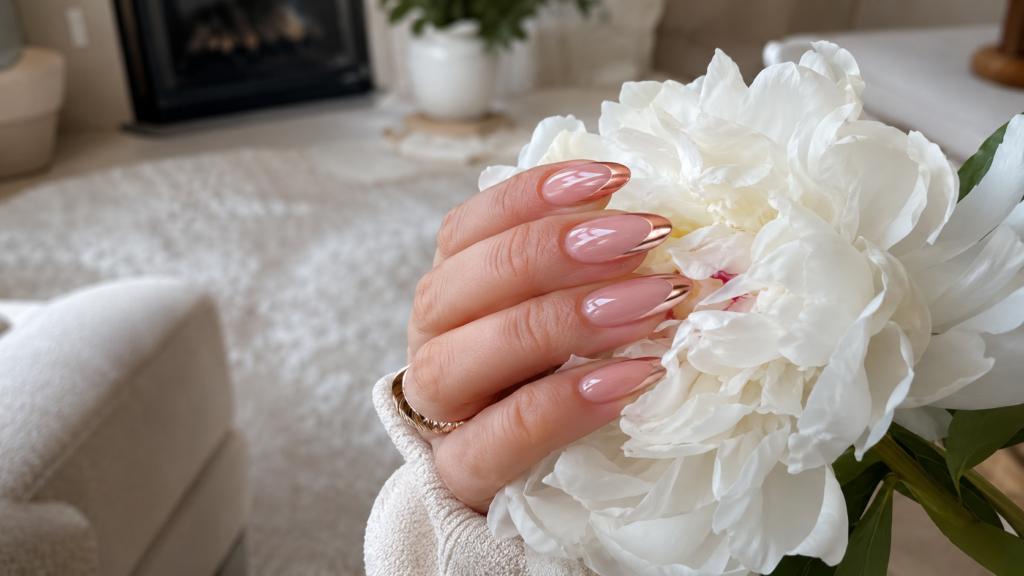
If you love a classic French manicure but want to modernize it, the Coral Chrome French Tip is your best friend. This look uses a neutral base with a stunning, glowing coral chrome painted only on the tips.
Why You’ll Love This Idea
This is one of the most sophisticated coral chrome nail ideas on our list. It gives a nod to traditional elegance while injecting a fun, colorful, chic summer look. It grows out beautifully, meaning your manicure will look great for weeks!
Materials Needed
- Sheer pink or milky white gel base color
- Coral gel polish
- Fine nail art liner brush
- No-wipe top coat
- Pearl chrome powder
- UV/LED lamp
Step-by-Step Instructions
- Prep the Nails: File, buff, and cleanse the nails with alcohol.
- Neutral Base: Apply a gel base coat and cure. Then, apply 1-2 coats of a sheer, milky pink gel polish. Cure fully.
- Matte or Wipe: Wipe the sticky layer off the milky pink base with alcohol (or apply a matte top coat and cure). This stops the chrome from sticking where you don’t want it!
- Paint the Tips: Using a fine liner brush and your coral gel polish, carefully paint your French tips. Cure for 60 seconds.
- Top Coat the Tips: Carefully paint the no-wipe top coat only over the coral tips. Cure for 30-60 seconds.
- Apply Chrome: Rub the pearl chrome powder only onto the tips where you placed the no-wipe top coat.
- Dust and Clean: Dust off the excess powder. If any powder stuck to the neutral base, gently wipe it away with a tiny bit of alcohol on a brush.
- Final Gloss: Apply a glossy no-wipe top coat over the entire nail to seal the design together. Cure for 60 seconds.
Beginner Tips
Rest your elbow on a solid table when painting the French tips. This stabilizes your hand and prevents shaky lines!
Common Mistakes to Avoid
Skipping the step where you wipe the sticky layer off the base color. If the base color is sticky, the chrome powder will go everywhere and ruin the clean French tip look.
Styling or Decorating Ideas
This design is incredibly elegant. Style it with a flowy white summer dress and pearl jewelry. For home decor lovers, photograph this look holding a fresh-cut white peony from your garden!
Best Colors and Materials
A sheer milky white base makes the bright coral tip stand out spectacularly.
Project Details
- Estimated Cost: $20
- Estimated Time: 1 hour
- Difficulty Level: Intermediate
- Where It Looks Best: Summer weddings, bridal showers, elegant dinners.
- Pinterest-Worthy Tip: A deep, curved “smile line” on your French tip makes your nail beds look longer and more graceful.
Conclusion for the Idea
Coral Chrome French Tips offer the ultimate chic summer look for anyone who loves minimalist, elevated beauty. It is a stunning twist on a classic favorite!
3. Ombre Sunset Coral Chrome
Short Introduction
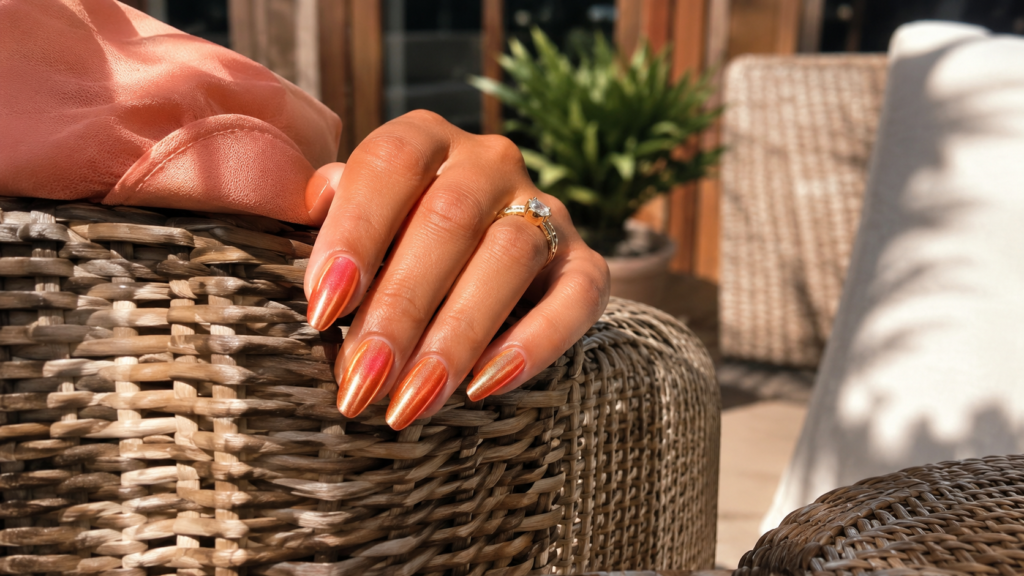
Capture the breathtaking beauty of a summer sunset right on your fingertips! The Ombre Sunset Coral Chrome blends a soft pink into a vibrant coral, topped with a gorgeous chrome finish.
Why You’ll Love This Idea
Summer is all about vibrant sunsets by the beach. This idea transitions seamlessly from day to night. If you love colorful, gradient nail art, this is definitely the chic summer look for you.
Materials Needed
- Gel base coat
- Soft pink gel polish
- Bright coral gel polish
- Makeup sponge or ombre brush
- No-wipe top coat
- Aurora or Pearl chrome powder
- Latex tape (optional, for easy cleanup)
Step-by-Step Instructions
- Nail Prep: Shape the nails and clean them with rubbing alcohol.
- Base Layer: Apply the base coat and cure. Paint the entire nail with a thin layer of the soft pink polish. Cure for 60 seconds.
- Prepare the Sponge: Paint a stripe of soft pink and a stripe of bright coral slightly overlapping on a small makeup sponge.
- Sponge the Ombre: Dab the sponge gently onto the nail, moving it slightly up and down to blend the colors in the middle. Cure for 60 seconds.
- Repeat: Repeat the sponging process 2-3 times until the ombre gradient is opaque and vibrant. Cure after each layer.
- Smooth it Out: Apply a thin layer of no-wipe top coat. This will magically smooth out any bubbly texture left by the sponge! Cure for 30-40 seconds.
- Chrome Application: Rub your chrome powder generously over the entire ombre design using an eyeshadow applicator.
- Seal it Up: Dust off the edges, apply your final no-wipe top coat, and cure for 60 seconds. Wash your hands to remove any powder from your skin.
Beginner Tips
If you struggle with the sponge method, you can use a small fluffy eyeshadow brush to gently tap and blend the two wet gel colors together on the nail before curing.
Common Mistakes to Avoid
Don’t press too hard with the sponge, or you will lift the wet polish right back off the nail! Use very light, tapping motions.
Styling or Decorating Ideas
Since this is a vibrant look, pair it with fun, colorful summer outfits—think tropical prints or bright sundresses. For a Pinterest-perfect shot, pose your hand near a beautifully styled outdoor patio space.
Best Colors and Materials
Use a soft baby pink at the cuticle and a hot coral at the tip. An “Aurora” chrome powder (which shifts pink/gold) looks incredible here!
Project Details
- Estimated Cost: $25
- Estimated Time: 1 hour 15 minutes
- Difficulty Level: Intermediate to Advanced
- Where It Looks Best: Tropical vacations, beach trips, summer festivals.
- Pinterest-Worthy Tip: Apply liquid latex tape around your cuticles before sponging. You can peel it off afterward for zero cleanup!
Conclusion for the Idea
The Ombre Sunset Coral Chrome is a true showstopper. It brings the magic of a warm summer evening directly to your hands and is guaranteed to get you compliments!
4. Coral Chrome with 3D Water Droplets
Short Introduction
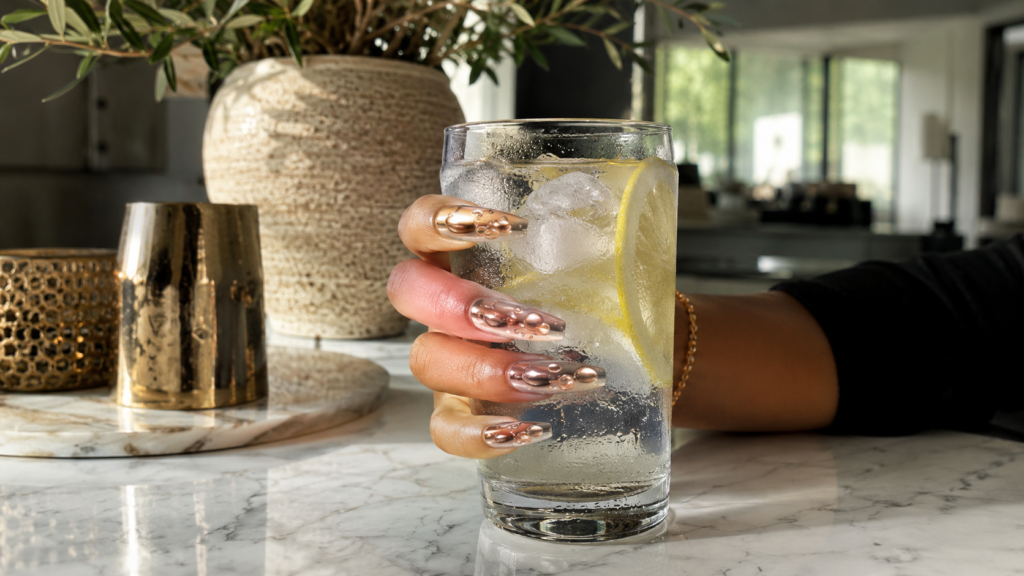
Want to add a cool, refreshing element to your warm coral nails? The 3D Water Droplet trend is massive right now, making your nails look like they just emerged from a crystal-clear swimming pool.
Why You’ll Love This Idea
This is one of those coral chrome nail ideas that looks incredibly complex but is actually so easy to do. It adds a wonderful tactile texture to your nails that feels unique and creates the ultimate chic summer look!
Materials Needed
- Gel base coat
- Coral gel polish
- No-wipe top coat
- Pearl chrome powder
- Thick, clear builder gel or rhinestone glue gel
- Dotting tool
- UV/LED lamp
Step-by-Step Instructions
- Create the Chrome Base: Follow steps 1 through 8 from the “Classic Glazed Coral Chrome” tutorial above to create your finished, shiny chrome nails. Ensure the final top coat is fully cured.
- Prepare the 3D Gel: Take a small amount of thick clear builder gel (or thick top coat) and place it on a palette.
- Place the Droplets: Using a medium-sized dotting tool, pick up a bead of the clear gel. Gently place random dots on the surface of your finished chrome nail.
- Shape the Drops: Swirl the dotting tool slightly so the droplets look organic and uneven, just like real water drops on a glass.
- Flash Cure Quickly: Gel will flatten out over time, so you need to “flash cure” each nail for 10 seconds immediately after placing the drops to freeze them in their 3D shape.
- Final Cure: Once all fingers have droplets, cure the entire hand in the lamp for a full 60-90 seconds.
- Wipe (If Needed): If your thick gel leaves a sticky residue, wipe the droplets with rubbing alcohol. If you used a no-wipe thick gel, you are totally done!
Beginner Tips
Do one nail at a time! If you try to do all five fingers at once, the gel droplets on the first finger will lose their shape and melt flat before you get them into the lamp.
Common Mistakes to Avoid
Do not put a top coat over the 3D droplets! Doing so will make them look like weird bumps instead of crisp, clear water drops sitting on top of the mirror surface.
Styling or Decorating Ideas
This aquatic look is begging to be photographed near water. Style it holding a chic, modern water glass with lemon slices on a beautiful marble kitchen counter.
Best Colors and Materials
A bright, vibrant coral base works best here so the clear droplets have a punchy background to contrast against.
Project Details
- Estimated Cost: $25
- Estimated Time: 1 hour
- Difficulty Level: Intermediate
- Where It Looks Best: Pool parties, yacht trips, lounging by the lake.
- Pinterest-Worthy Tip: Mix different sizes of droplets—some tiny, some large—to make it look completely natural and realistic.
Conclusion for the Idea
Adding 3D water droplets turns a standard manicure into an artistic statement. It is a refreshing, innovative take on coral chrome nail ideas!
5. Neon Coral Chrome for Beach Days
Short Introduction
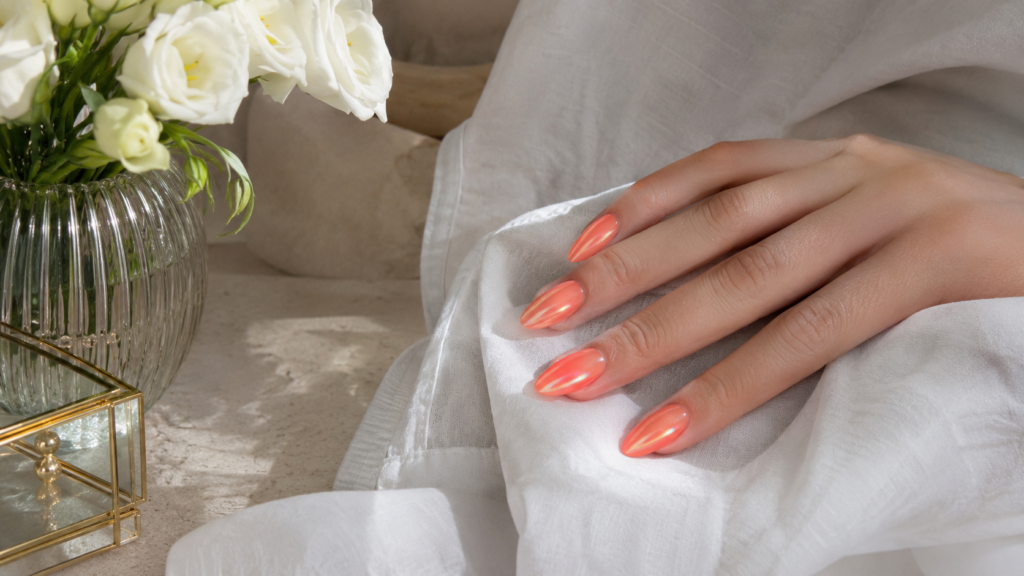
Sometimes, you just need a color that screams summer from a mile away. The Neon Coral Chrome is loud, proud, and unapologetically bright.
Why You’ll Love This Idea
If you are planning a beach vacation and want your tan to pop, neon coral is the secret weapon. It creates a stunning contrast against sun-kissed skin. Adding chrome to a neon base elevates it from a basic bright polish to a chic summer look.
Materials Needed
- Gel base coat
- White gel polish (crucial for neon!)
- Neon coral gel polish
- No-wipe top coat
- Gold or pearl chrome powder
- UV/LED lamp
Step-by-Step Instructions
- Prep: Clean and file the nails. Apply the base coat and cure for 60 seconds.
- The White Base: Neon polishes are often sheer. To make the neon color explode, paint one thin layer of pure white gel polish first. Cure for 60 seconds.
- Neon Application: Paint your neon coral gel polish over the white base. You will immediately notice how incredibly bright it is! Cure for 60 seconds.
- Second Coat: Apply a second coat of neon coral for maximum opacity. Cure again.
- Prep for Chrome: Apply your no-wipe top coat evenly. Cure for 30-45 seconds (until warm but dry).
- Rub the Chrome: Use a sponge applicator to burnish the chrome powder into the warm top coat until it reflects light.
- Clean the Edges: Gently file the very edge of the nail to remove any overhanging chrome powder to prevent early chipping.
- Final Top Coat: Apply a generous layer of no-wipe top coat, sealing the edges well. Cure for 60 seconds.
Beginner Tips
Neon polishes can sometimes cure with a slightly sticky, thick layer. Keep your layers very thin to ensure the UV light penetrates all the way through the polish!
Common Mistakes to Avoid
Skipping the white base coat! Without the white base, neon coral can look patchy, dull, or slightly translucent on the nail.
Styling or Decorating Ideas
This vibrant look needs minimalist styling so it doesn’t look chaotic. Think crisp white linen shirts and simple gold hoop earrings.
Best Colors and Materials
A neon coral with a slight orange undertone looks phenomenal with a subtle gold chrome powder rubbed over it!
Project Details
- Estimated Cost: $20
- Estimated Time: 50 minutes
- Difficulty Level: Beginner
- Where It Looks Best: The beach, summer concerts, tropical island getaways.
- Pinterest-Worthy Tip: Take a photo of these nails against bright blue water or a white sandy beach for the ultimate complementary color contrast.
Conclusion for the Idea
Neon Coral Chrome is for the bold and the beautiful. It is an electrifying twist on coral chrome nail ideas that guarantees all eyes will be on your fabulous hands.
6. Floral Accent Coral Chrome
Short Introduction
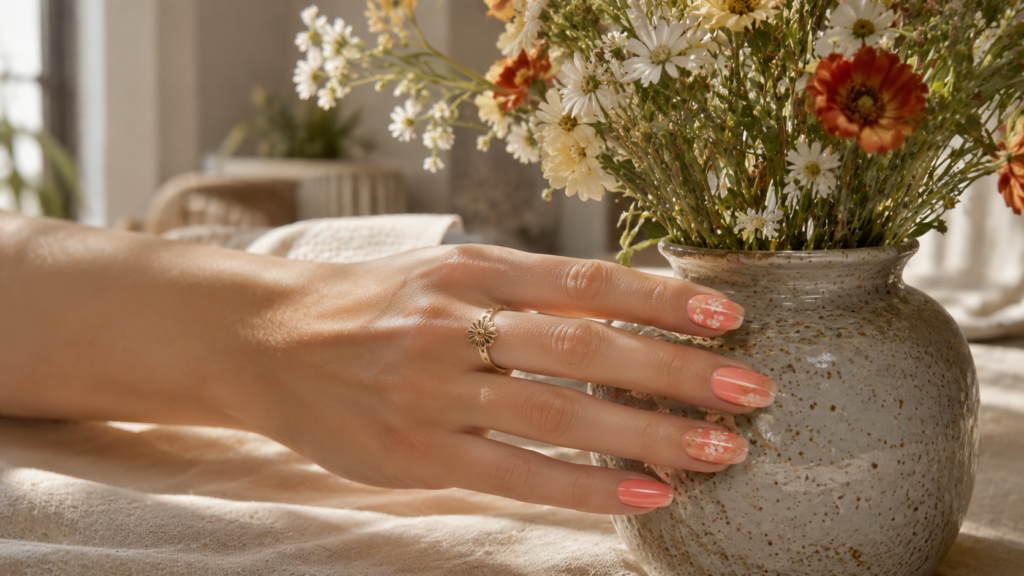
Nothing says “summer lifestyle” quite like blooming flowers. By pairing a solid coral chrome with delicate, hand-painted daisy accents, you get a chic summer look that is incredibly feminine and sweet.
Why You’ll Love This Idea
This design perfectly balances the sleek, modern aesthetic of chrome with the soft, cottage-core charm of floral nail art. It is a fantastic way to break up the intense shine of a full set of chrome nails.
Materials Needed
- Gel base coat
- Coral gel polish
- White gel polish
- Yellow gel polish
- No-wipe top coat
- Pearl chrome powder
- Small dotting tool
- UV/LED lamp
Step-by-Step Instructions
- Prep & Base: Prep the nails as usual, apply base coat, and cure.
- Paint the Solid Nails: Paint all your nails except your ring finger (the accent nail) with the coral gel polish. Cure.
- Accent Nail Base: Paint the ring finger with a sheer nude or milky white base. Cure.
- Chrome the Solid Nails: Apply a no-wipe top coat to the coral nails, cure, rub in the chrome powder, and apply a final top coat. Cure completely.
- Create the Flowers: On your ring finger, use a small dotting tool dipped in white gel polish to create five dots in a circle to make a daisy. Repeat to create 2-3 flowers. Cure for 30 seconds.
- Add the Centers: Clean the dotting tool, dip it in yellow gel polish, and place one dot in the center of each white daisy. Cure for 60 seconds.
- Seal the Accent: Apply a glossy top coat over the floral accent nail to protect the design. Cure for 60 seconds.
- Hydrate: Finish with a generous drop of cuticle oil on each finger.
Beginner Tips
When making flowers with a dotting tool, let the tool do the work! Just place the dot gently and lift straight up. Don’t press the metal tool into the nail.
Common Mistakes to Avoid
Don’t accidentally get chrome powder on your floral accent nail! Keep the accent nail wiped completely clean with alcohol before you start messing with the loose chrome powder.
Styling or Decorating Ideas
This floral look is begging to be paired with woven wicker baskets and floral summer dresses. In a home decor setting, style your hand next to a ceramic vase filled with fresh wildflowers.
Best Colors and Materials
A soft, dusty coral works beautifully here to complement the white and yellow daisies without overpowering them.
Project Details
- Estimated Cost: $25
- Estimated Time: 1 hour 15 minutes
- Difficulty Level: Intermediate
- Where It Looks Best: Garden parties, picnics in the park, farmers market runs.
- Pinterest-Worthy Tip: Use a matte top coat on the floral accent nail to create a stunning texture contrast against the super-shiny coral chrome nails!
Conclusion for the Idea
The Floral Accent Coral Chrome is romantic, playful, and deeply aesthetic. It is one of the most delightful coral chrome nail ideas for a charming summer lifestyle!
7. Rose Gold & Coral Chrome Swirls
Short Introduction
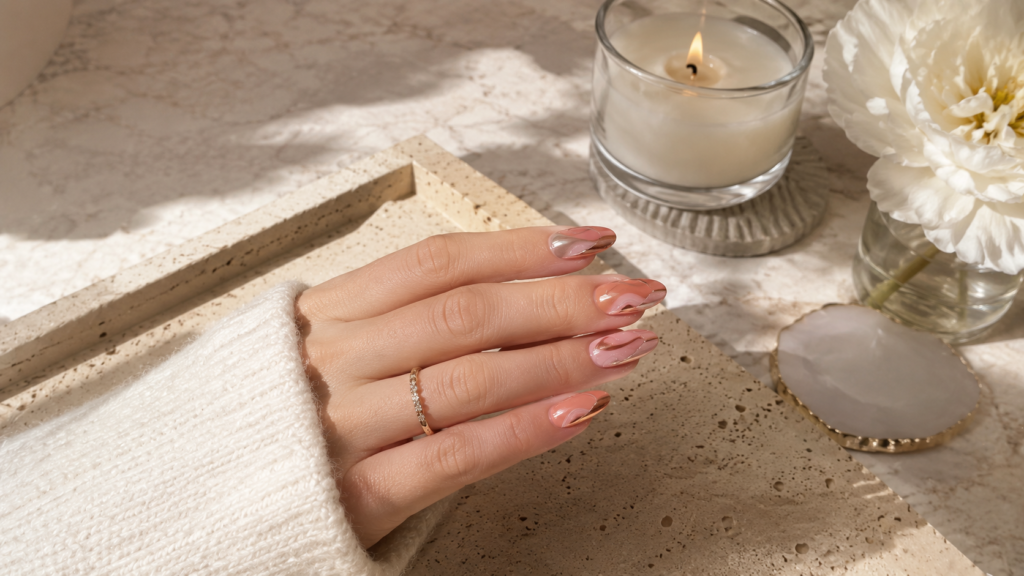
Abstract swirl nails have been a massive trend in the nail art community, and combining them with coral chrome takes the look to a whole new level. This design uses negative space and sweeping lines for a truly modern artistic vibe.
Why You’ll Love This Idea
If you want a chic summer look that feels like modern art, this is it. The negative space makes your nails look longer, and the rose gold and coral combination is incredibly luxurious and rich.
Materials Needed
- Gel base coat
- Sheer nude gel polish
- Coral gel polish
- No-wipe top coat
- Rose gold chrome powder
- Long liner nail art brush
- UV/LED lamp
Step-by-Step Instructions
- The Canvas: Prep nails, apply base coat, and cure. Paint the entire nail with 2 coats of a sheer nude polish (to match your skin tone). Cure fully.
- Matte Top Coat: Apply a matte top coat over the entire nail and cure. (This prevents the chrome from sticking to the negative space).
- Draw the Swirls: Using a long liner brush and coral gel polish, draw thick, sweeping, S-shaped swirls down the side of the nail. Don’t fill the whole nail! Leave plenty of negative space. Cure for 60 seconds.
- Prep Swirls for Chrome: Carefully trace over your coral swirls with a no-wipe top coat using your thin brush. Cure for 30-45 seconds.
- Apply Chrome: Dip a sponge applicator into the rose gold chrome powder and gently rub it only over the coral swirls.
- Clean the Negative Space: Take a soft brush and vigorously dust off the excess powder. If any stuck to the matte nude base, lightly wipe it with alcohol on a cotton swab.
- Final Seal: Carefully apply glossy top coat over the chrome swirls, or apply it over the entire nail depending on if you want the negative space glossy or matte. Cure for 60 seconds.
Beginner Tips
When drawing long swirls, anchor your pinky finger on the table, load your brush with polish, and pull the brush slowly in one continuous motion.
Common Mistakes to Avoid
Making the swirls too thick and blocky. Abstract nail art looks best when the lines taper—thick in the middle and very thin at the ends!
Styling or Decorating Ideas
This design feels very high-fashion and expensive. Pair it with sleek, minimalist gold jewelry and a structured linen blazer. In your home, photograph it resting on a sleek marble or travertine tray.
Best Colors and Materials
A rich, dark coral paired with a true rose gold chrome powder provides an incredibly warm, sunset-inspired aesthetic.
Project Details
- Estimated Cost: $25
- Estimated Time: 1 hour 30 minutes
- Difficulty Level: Advanced
- Where It Looks Best: Art gallery openings, upscale summer dinners, rooftop bars.
- Pinterest-Worthy Tip: Mix the thickness of your swirls on different fingers to make the design flow organically across your whole hand.
Conclusion for the Idea
Rose Gold & Coral Chrome Swirls offer a sophisticated, artistic twist. This idea proves that coral chrome nail ideas can be incredibly chic, modern, and museum-worthy!
8. Matte Base with Coral Chrome Abstract Lines
Short Introduction
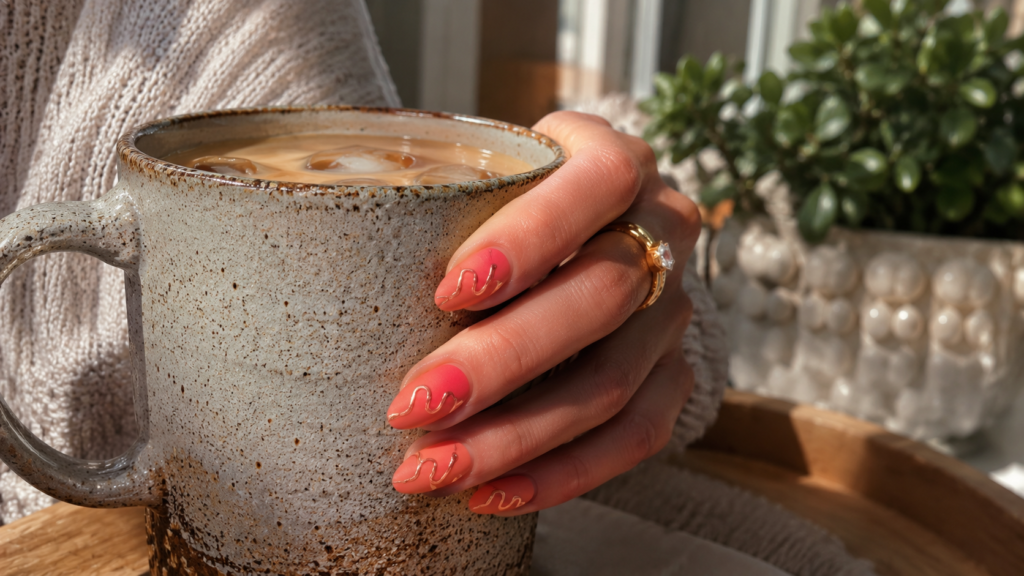
We are finishing off our list with a masterclass in texture! This design contrasts a velvet-matte coral base with ultra-shiny, raised coral chrome abstract lines. The mix of matte and shiny is wildly popular in luxury interior design and translates perfectly to nail art.
Why You’ll Love This Idea
Texture, texture, texture! This chic summer look plays with light in a fascinating way. The matte base looks incredibly soft, while the metallic lines catch the summer sun brilliantly.
Materials Needed
- Gel base coat
- Coral gel polish
- Matte top coat
- Thick clear builder gel (or rhinestone gel)
- No-wipe glossy top coat
- Pearl chrome powder
- Fine liner brush
- UV/LED lamp
Step-by-Step Instructions
- Prep & Color: Apply your base coat and cure. Apply two thin coats of coral gel polish, curing each layer for 60 seconds.
- Go Matte: Apply a high-quality matte top coat over the entire nail. Cure for 60-90 seconds. Wipe with alcohol if necessary. Your nails should look like soft velvet!
- Draw the Lines: Mix a little bit of your no-wipe top coat with the thick clear builder gel on a palette. Using a fine liner brush, draw abstract, overlapping, raised lines over the matte nail.
- Cure the Lines: Cure the clear raised lines for 30-45 seconds so they are ready to accept the chrome powder.
- Apply the Chrome: Gently rub your pearl chrome powder specifically onto the raised clear lines. The powder will stick to the smooth lines but will mostly brush off the matte base.
- Dust Carefully: Use a stiff, fluffy brush to aggressively dust the loose powder off the matte areas of the nail.
- Seal the Lines: Using your ultra-fine liner brush, carefully paint a glossy top coat only over the chrome lines to seal them in. Do not get glossy top coat on the matte base! Cure for 60 seconds.
Beginner Tips
If you accidentally get chrome powder stuck to the matte base, take a tiny piece of scotch tape and gently tap it over the matte areas to lift the stray glitter away!
Common Mistakes to Avoid
Using a thin top coat to draw the 3D lines. Thin top coat will run and flatten out. You need a thick builder gel to keep those lines raised and dimensional!
Styling or Decorating Ideas
Since this look is all about texture, style it with textured summer fabrics like crochet, linen, or ribbed cotton. Photograph your hand holding a beautifully textured ceramic mug of iced coffee.
Best Colors and Materials
A deep, terracotta-leaning coral looks incredibly earthy and beautiful with a matte finish.
Project Details
- Estimated Cost: $30
- Estimated Time: 1 hour 30 minutes
- Difficulty Level: Advanced
- Where It Looks Best: Creative workspaces, coffee dates, stylish summer road trips.
- Pinterest-Worthy Tip: The contrast is what makes this work! Make sure your matte top coat is completely, flawlessly matte before drawing your lines.
Conclusion for the Idea
The Matte Base with Coral Chrome Abstract Lines is the ultimate cool-girl aesthetic. It is a brilliant, tactile way to wrap up our top coral chrome nail ideas for the season!
Expert Decorating Tips: Creating Your DIY Nail Space
As a lifestyle and home decor lover, you know that the space you create in matters just as much as the project itself! If you are planning to test out these coral chrome nail ideas, here are some expert decorating and styling tips to set up a beautiful, inspiring DIY nail station at home:
- Natural Light is King: Always set up your nail station near a large window. Not only does natural daylight help you see the tiny details of your nail art, but it also provides the best lighting for your final Pinterest photos!
- Invest in a Beautiful Mat: Protect your tabletop with a chic, easily washable silicone mat. You can find these in beautiful neutral tones or soft pinks that blend perfectly with modern home decor.
- Organize with Glass and Gold: Ditch the ugly plastic organizers. Store your nail files, dotting tools, and brushes in beautiful glass jars, small ceramic planters, or vintage brass cups.
- Aesthetic Towels: Keep a stack of clean, neutral-colored micro-fiber towels nearby. They look incredibly spa-like folded on your desk and are perfect for resting your hands on while you paint.
- Set the Mood: Turn your DIY nail session into a self-care ritual. Light your favorite summer-scented candle (think coconut, sea salt, or citrus), put on a relaxing playlist, and pour yourself a beautiful drink.
Budget-Saving Tips
Getting a chic summer look doesn’t have to empty your wallet! Here are some of my favorite ways to save money while creating beautiful coral chrome nail ideas:
- Buy a Universal Chrome: Instead of buying ten different colored chrome powders, invest in one high-quality white pearl chrome powder. This one powder will adapt to whatever base color you put under it! Over coral, it turns peachy-pink. Over white, it looks like a glazed donut.
- DIY Dotting Tools: Don’t want to buy professional dotting tools? Use items you already have at home! A bobby pin pulled straight, a toothpick, or the round head of a sewing pin pushed into a pencil eraser work wonderfully for creating flowers and water droplets.
- Makeup Sponges: You do not need to buy expensive, specialized nail art sponges for ombre designs. Grab a cheap pack of wedge makeup sponges from the drugstore—they work exactly the same!
- Eyeshadow Applicators: The best tool for rubbing on chrome powder is a cheap sponge eyeshadow applicator (the kind that comes free in drugstore eyeshadow palettes). You can buy a pack of 100 on Amazon for just a few dollars.
Frequently Asked Questions
To make sure your manicure is an absolute success, I have gathered the most common questions I get asked about coral chrome nail ideas and gel manicures in general!
1. Can I do chrome nails with regular nail polish?
It is very difficult. True chrome powders need the slightly grippy, warm surface of a cured gel no-wipe top coat to create that mirror effect. With regular polish, it usually just looks like loose glitter. If you want the chrome look, investing in a basic gel kit is highly recommended.
2. Why is my chrome powder chipping at the tips?
This happens when the chrome powder is right at the free edge of the nail and the top coat doesn’t fully seal it. Always lightly file the very tip of your nail after applying the powder, then generously wrap your final glossy top coat around the edge to lock it in.
3. Does coral nail polish look good on pale skin?
Absolutely! Coral is universally flattering. If you have very fair, cool-toned skin, look for a coral that leans slightly more pink. If you have warm or olive skin, look for a coral that leans more towards orange or peach.
4. How long does a gel chrome manicure last?
When prepped and applied correctly, a DIY gel manicure should last between 2 to 3 weeks without chipping or peeling.
5. How do I safely remove gel polish at home?
Never peel or pick it off! File the shiny top coat off, then soak cotton balls in 100% pure acetone. Place the cotton on your nails, wrap them tightly in aluminum foil, and wait 15 minutes. The gel will flake off effortlessly.
6. Is the UV/LED nail lamp safe to use?
While nail lamps are generally considered safe for occasional use, it is always a smart idea to protect your skin. Apply a broad-spectrum sunscreen to your hands 20 minutes before your manicure, or buy fingerless UV protection gloves.
7. Why does my chrome look sparkly instead of like a smooth mirror?
This is the most common issue for beginners! It usually means your no-wipe top coat was either cured for too long (it got too dry for the powder to stick) or not long enough (it was too sticky). Try curing for exactly 30 seconds before applying the powder.
8. Can I mix different colored chrome powders?
Yes! Mixing a gold chrome powder with a pearl chrome powder over a coral base will give you a stunning, multi-dimensional sunset effect. Nail art is all about experimenting!
Final Thoughts
There you have it, friends! You are now fully equipped with 8 stunning coral chrome nail ideas for a chic summer look. Whether you choose the elegant simplicity of the Classic Glazed Coral, the fun texture of the 3D Water Droplets, or the artistic flair of the Rose Gold Swirls, you are guaranteed to have the most beautiful hands this season.
Remember, doing your own nails at home is a journey. Do not stress if your first attempt isn’t 100% perfect. The joy of DIY is in the process, the creativity, and the relaxing time you spend treating yourself. Set up your beautiful aesthetic nail station, take your time, and have fun playing with these gorgeous summer colors.
I can’t wait to see what you create! Your nails are a blank canvas just waiting for a little bit of summer magic.
Pin this for later!
⭐ Love these ideas? Hover over any image in this post and click the red “Save” button to add this article to your favorite Pinterest beauty, DIY, or summer style boards! Don’t forget to follow along for more lifestyle, home, and beauty inspiration. ⭐